EMR Edge Node Creation Procedure
- Login to AWS Console.
- Search for EC2 in Find Services in the AWS Console dashboard.
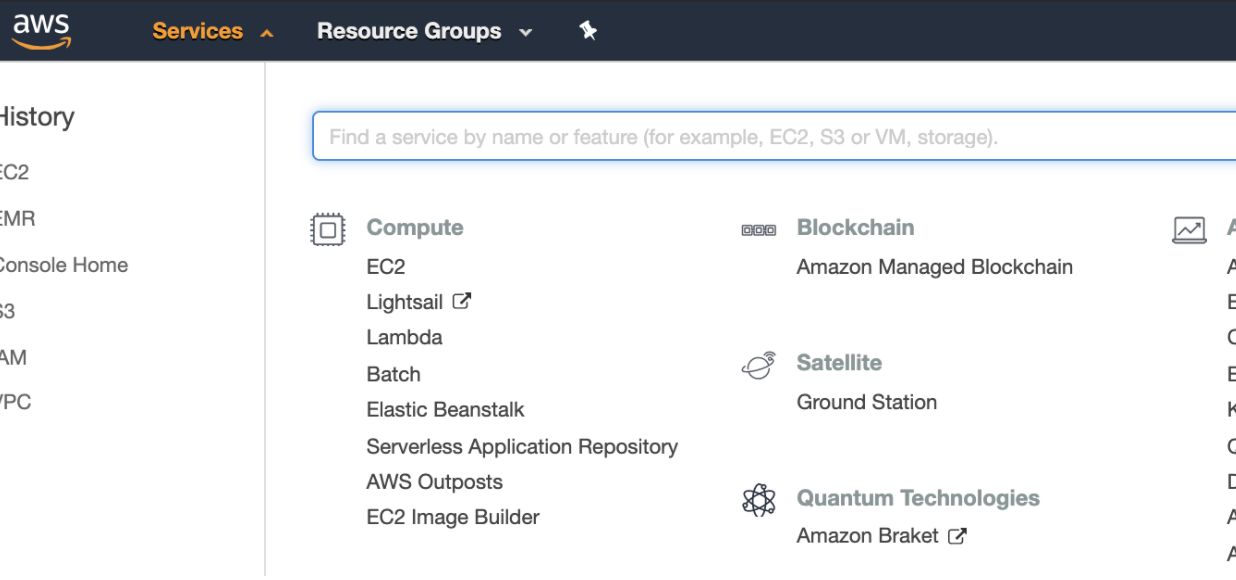
- Select the Images option from the left panel of ec2-dashboard and select AMIs.
- Select Private Images in the drop-down list, search for ami-07e0233eebbcf1a6e, and click the Launch button.
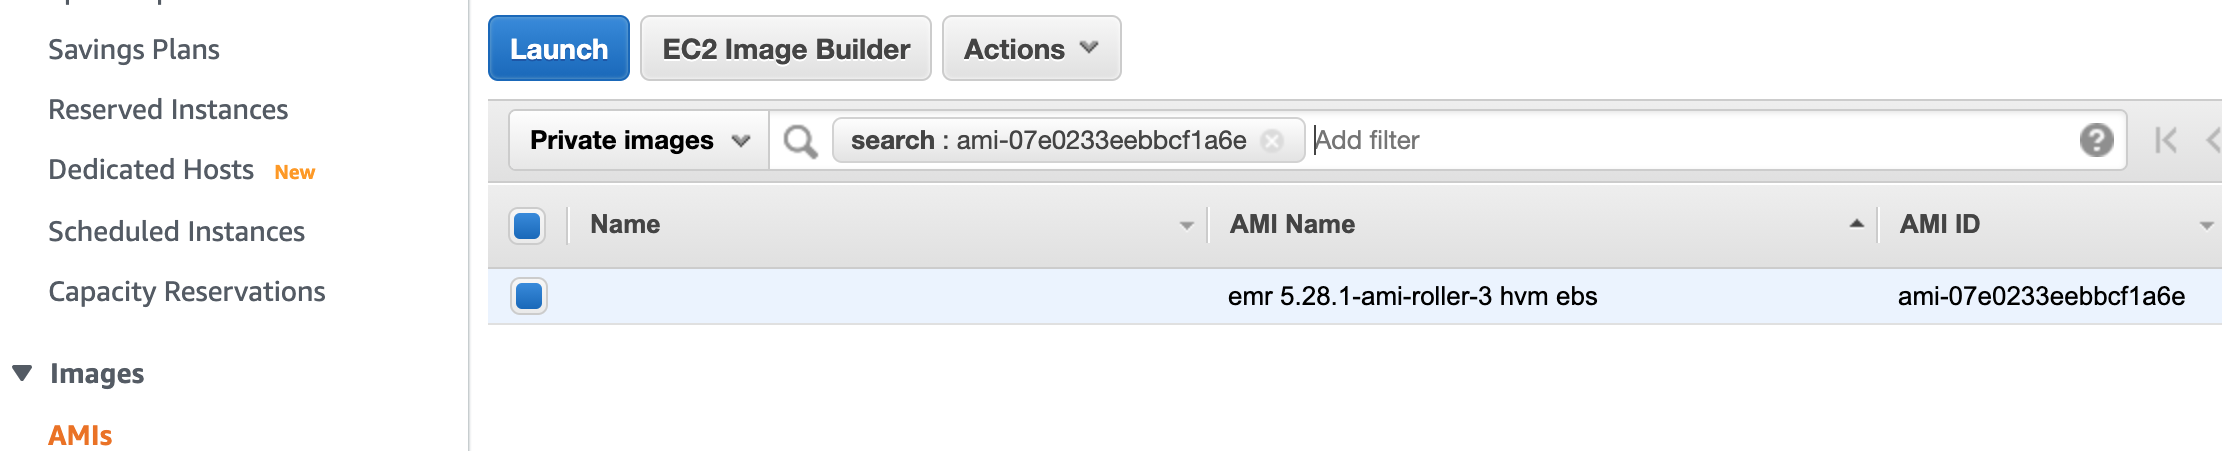
Ensure that the Shared with me checkbox for the Ownership menu is selected.
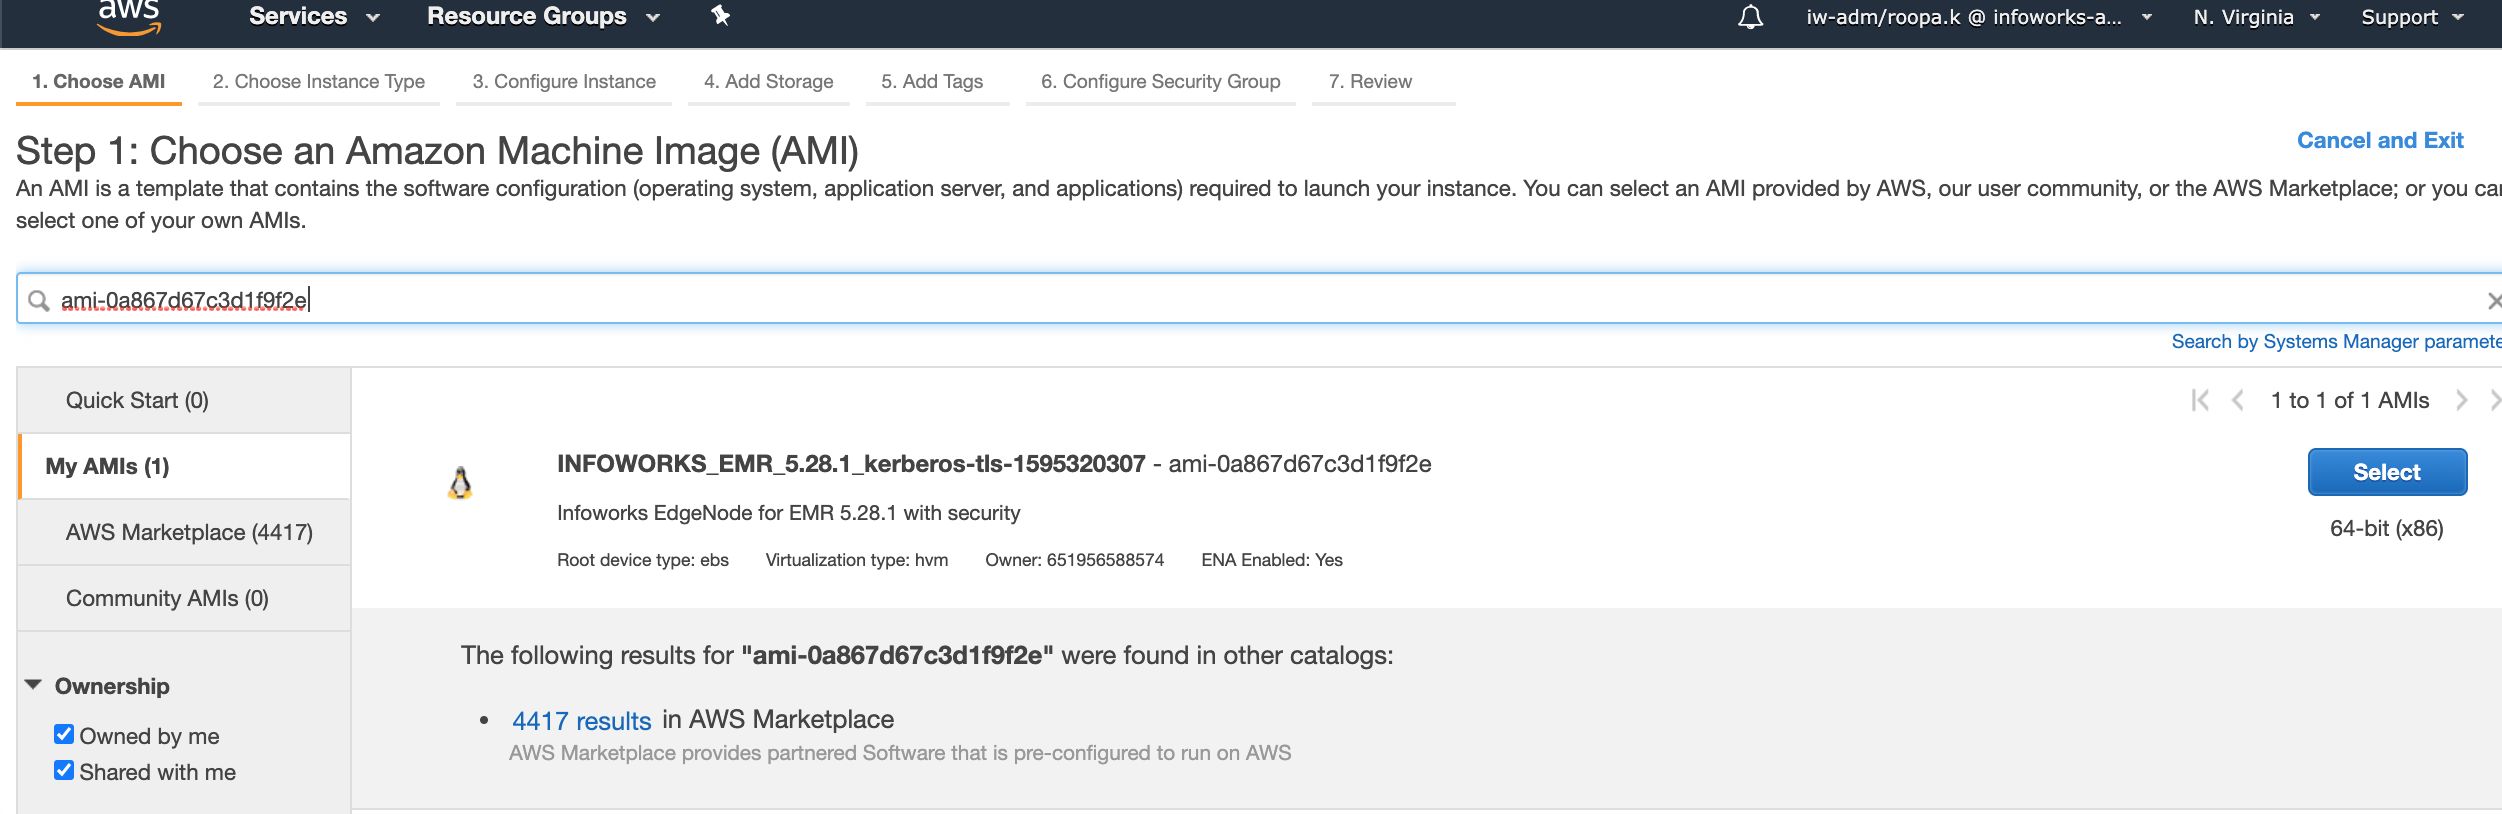
- Choose the Instance configuration, and required configuration details.
- Launch the Instance.
- Login to the Instance
- Install the following packages:
Perform the following steps:
A. Copy the site files and configurations from the Master node. To perform that, use the following commands:
NOTE: Ensure that you copy the files from the same master server, in the cluster.
- sudo scp -i <<key-pair.pem>> -r ec2-user@Masterserver-ip:/etc/hadoop/conf/* /etc/hadoop/conf/
- sudo scp -i <<key-pair.pem>> -r ec2-user@Masterserver-ip:/etc/hive/conf/* /etc/hive/conf/
- sudo scp -i <<key-pair.pem>> -r ec2-user@Masterserver-ip:/etc/hbase/conf/* /etc/hbase/conf/
- sudo scp -i <<key-pair.pem>> -r ec2-user@Masterserver-ip:/etc/spark/conf/* /etc/spark/conf/
- sudo scp -i <<key-pair.pem>> -r ec2-user@Masterserver-ip:/etc/tez/conf/* /etc/tez/conf/
- sudo scp -i <<key-pair.pem>> -r ec2-user@Masterserver-ip:/etc/zookeeper/conf/* /etc/zookeeper/conf/
- sudo scp -i <<key-pair.pem>> -r ec2-user@Masterserver-ip:/usr/share/aws/emr/emrfs/conf/* /usr/share/aws/emr/emrfs/conf/
- sudo scp -i <<key-pair.pem>> -r ec2-user@Masterserver-ip:/etc/krb5.conf /etc/krb5.conf
- sudo scp -i <<key-pair.pem>> hadoop@Masterserver-ip:/var/aws/emr/userData.json /var/aws/emr/userData.json
Now, create Infoworks-user using the following command:
useradd infoworks-user
Now, set the password using the following command:
passwd infoworks-user
Now, run the following command. Ensure that you change the ownership of the userData.json file to Infoworks user.
sudo chown infoworks-user:infoworks-user /var/aws/emr/userData.json
B.Generate Keytabs for infoworks-user and hdfs user:
Step 1: Add Principal by running the following commands:
NOTE: Ensure that you are passing {{REALM}} and {{KPASS}} (Kerberos Password) of your cluster.
- kadmin -p "kadmin/admin@{{REALM}}" -w "{{KPASS}}" -q "addprinc infoworks-user@{{REALM}}"
- kadmin -p "kadmin/admin@{{REALM}}" -w "{{KPASS}}" -q "addprinc hdfs@{{REALM}}"
Step 2: Generate Keytabs by running the following commands:
- kadmin -p "kadmin/admin@{{REALM}}" -w "{{KPASS}}" -q "xst -kt /etc/infoworks-user.keytab infoworks-user@{{REALM}}"
- kadmin -p "kadmin/admin@{{REALM}}" -w "{{KPASS}}" -q "xst -kt /etc/hdfs.keytab hdfs@{{REALM}}"
Step 3: Change ownership of the keytabs by running the following commands:
- sudo chown infoworks-user:infoworks-user /etc/infoworks-user.keytab
- sudo chown hdfs:hdfs /etc/hdfs.keytab
Now, Generate TGT(Kerberos authentication ticket) for HDFS user by running the following commands:
- sudo su - hdfs
- kinit -k -t /etc/hdfs.keytab hdfs@{{REALM}}
C. Create infoworks-user directory on HDFS by running the following commands:
Step 1: Switch to HDFS user by running the following commands:
- hdfs dfs -mkdir /user/infoworks-user
- hdfs dfs -chown infoworks-user:infoworks-user /user/infoworks-user
Step 2: Create /iw directory by running the following commands:
- hdfs dfs -mkdir /iw
- hdfs dfs -chown infoworks-user:infoworks-user /iw
D. Now, change S3 buffer directory in the core-site.xml as:
<property>
<name>fs.s3.buffer.dir</name>
<value>/tmp/s3</value>
<final>true</final>
</property>
Now, change spark logging directory in the /etc/spark/conf/log4j.properties file as below :
spark.yarn.app.container.log.dir=/mnt/var/log/hadoop
E. Now, check the connectivity using the following command:
- beeline -u “jdbc:hive2://your_hive_server_ip:10000/default;principal=hive/_ HOST@{{REALM}}”
Now, run the sample MapReduce job as infoworks-user:
Step 1: Generate KGT for infoworks-user:
kinit -kt /etc/infoworks-user.keytab infoworks-user@{{REALM}}
Step 2: Run sample MapReduce Job:
yarn jar /usr/lib/hadoop-mapreduce/hadoop-mapreduce-examples.jar pi 10 20
F.Copy ssl-client.xml and ssl-server.xml files from master node to edge node using the following command:
scp -i <<keypair.pem>> hadoop@<<masteripaddress>>:/etc/hadoop/conf/ssl-client.xml /etc/hadoop/conf/ssl-client.xmlscp -i <<keypair.pem>> hadoop@<<masteripaddress>>:/etc/hadoop/conf/ssl-server.xml /etc/hadoop/conf/ssl-server.xml
- Now, copy JKS certificates from master node to to edge node using the following command:
scp -i <<keypair.pem>> -r hadoop@<<masteripaddress>>:/usr/share/aws/emr/security/conf /usr/share/aws/emr/security/conf
Infoworks DataFoundry Installation
NOTE: The installation logs are available at: /iw-installer/logs/installer.log
Perform the following:
Download and Extract Installer
- Download the installer tar ball:
wgethttps://infoworks-setup.s3.amazonaws.com/3.1/deploy_3.1.2.tar.gz - Extract the installer:
tar -xf deploy_<version_number>.tar.gz - Navigate to installer directory:
cd iw-installer
Configure Installation
- Run the following command:
./configure_install.sh
Enter the details for each prompt:
- Hadoop distro name and installation path (If not auto-detected)
- Infoworks user
- Infoworks user group
- Infoworks installation path
- Infoworks HDFS home (path of home folder for Infoworks artifacts)
- Hive schema for Infoworks sample data
- IP address for accessing Infoworks UI (when in doubt use the FQDN of the Infoworks host).
- Select the server details you need to provide (1 or 2).
- HiveServer2 thrift server hostname
- Hive user name
- Hive user password
Run Installation
- Install Infoworks:
./install.sh -v <version_number>
NOTE: For machines without certificate setup, --certificate-check parameter can be entered as false as described in the following syntax: ./install.sh -v <version_number> --certificate-check <true/false>. The default value is true. If you set it to false, this performs insecure request calls. This is not a recommended setup.
Post Installation
If the target machine is Kerberos enabled, performed the following post installation steps:
- Go to
<IW_HOME>/conf/conf.properties - Edit the Kerberos security settings as follows (ensure these settings are uncommented):
NOTE: Kerberos tickets are renewed before running all the Infoworks DataFoundry jobs. Infoworks DataFoundry platform supports single Kerberos principal for a Kerberized cluster. Hence, all Infoworks DataFoundry jobs work using the same Kerberos principal, which must have access to all the artifacts in Hive, Spark, and HDFS.
- Copy Keystore passwords from /etc/hadoop/conf/ssl-client.xml to $IW_HOME/conf/dt_spark_defaults.conf file.
Set the password mapping as follows:
ssl.client.keystore.keypassword ⇒ spark.ssl.keyPassword
ssl.client.truststore.password ⇒ spark.ssl.trustStorePassword
ssl.client.keystore.password ⇒ spark.ssl.keyStorePassword
- In the Infoworks DataFoundry landing page, navigate to Admin > Configuration > Add Configuration Entry. Add property modified_time_as_cksum to True, and save it.

- If spark.dynamicAllocation.enabled is true, Replace spark.dynamicAllocation.minExecutors,spark.dynamicAllocation.initialExecutors property values from 50 to 1.
- In the Infoworks DataFoundry landing page, navigate to Admin > Configuration. Change value of CSV_PARSER_LIB property from COMMONS to UNIVOCITY.

Perform sanity check by running the HDFS commands and Hive shell in the edge Node.