The ingestion process includes the following steps:
In this article, Teradata source is used as sample. The other RDBMS sources supported are Redshift, Oracle, MySQL, MariaDB, SQL Server, DB2, Netezza, SAP Hana, Hive, SybaseIq, Apache Ingnite, Vertica, BigQuery.
Creating Source
NOTE: Only an Admin can create a source.
Login to Infoworks DataFoundry.
Click Admin > Sources > New Source.
Enter the source details.
Field | Description |
|---|---|
Source Name | The name of the source that will be displayed in the Infoworks DataFoundry UI. |
Source Type | The type of file or RDBMS to ingest the data form. |
Target Hive Schema | The Hive schema name created by the Hadoop admin. This option is not available for Hive source type. |
Target HDFS Location | The HDFS path on Hadoop cluster, created by the Hadoop admin. This option is not available for MapR DB and Hive source types. |
Make Publicly Available | The option to make the source publicly available for anyone to use. If unchecked, the source will be visible only to the current user and users who have access to the domains where the source has been added. |
Enable ECB Agent | The option to enable the ECB agent. This option is available for Structured Files, JSON Files, XML Files, Teradata, Oracle, and SQL Server source types. |
Driver Name | The JDBC driver name for the database is displayed by default. The driver name can also be edited. This option is available for MapR DB, Teradata, Redshift, Oracle, MySQL, MariaDB, SQL Server, DB2, Netezza, SAP Hana, SybaseIq, Apache Ignite and Vertica source types. |
Source Data Format | The source data format. The options include XML and JSON. This option is available for REST Generic and REST Custom source types. |
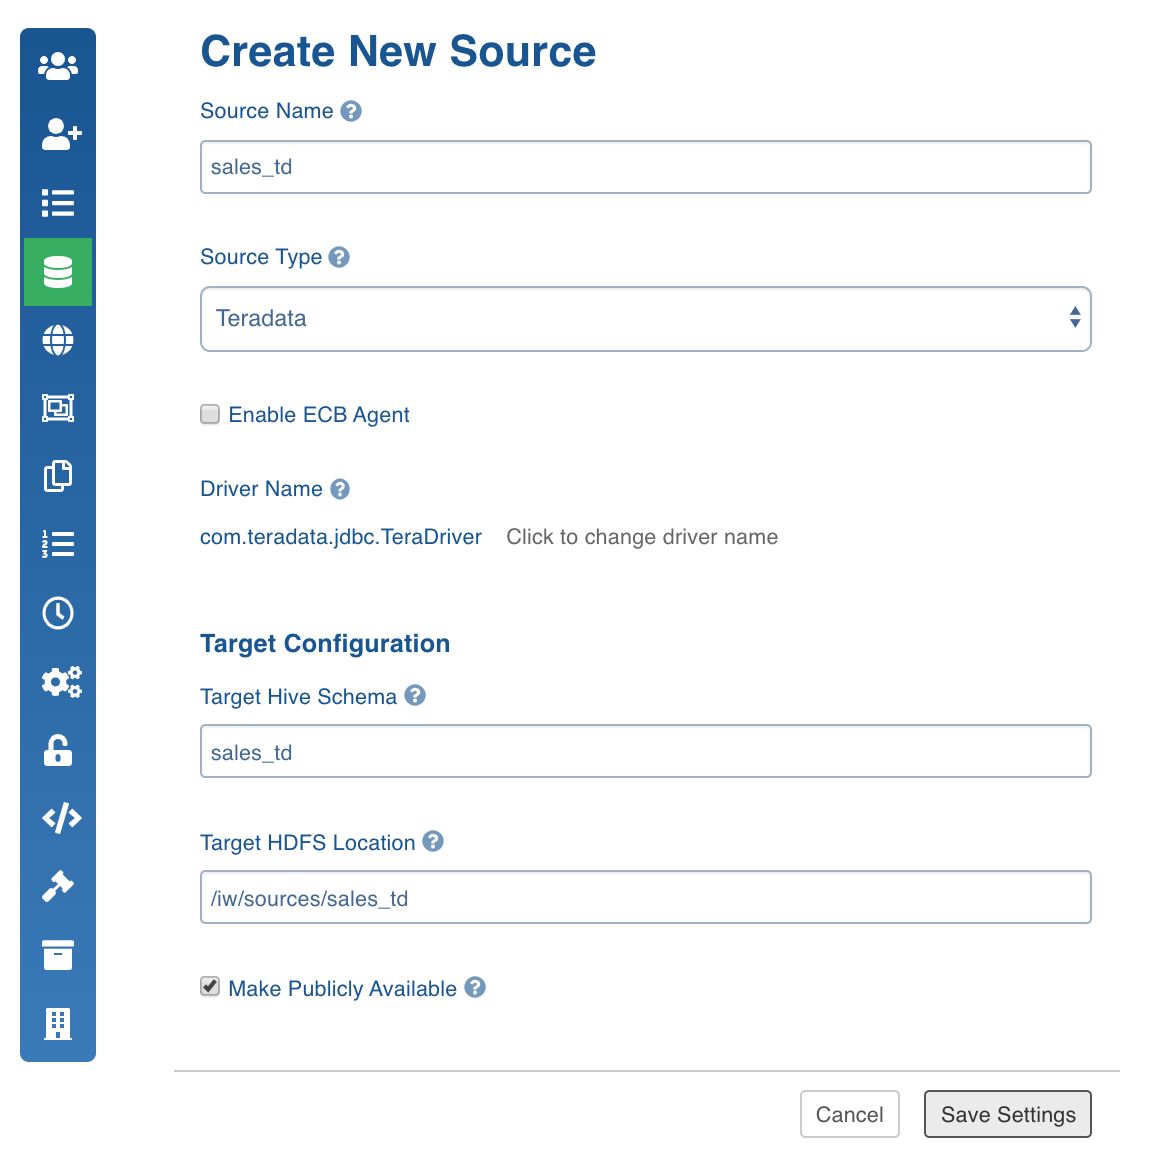
Click Save Settings.
Configuring Source
Click the Sources menu and select the source you created.
In the Source Configuration page, click Click here to enter them to configure the source.
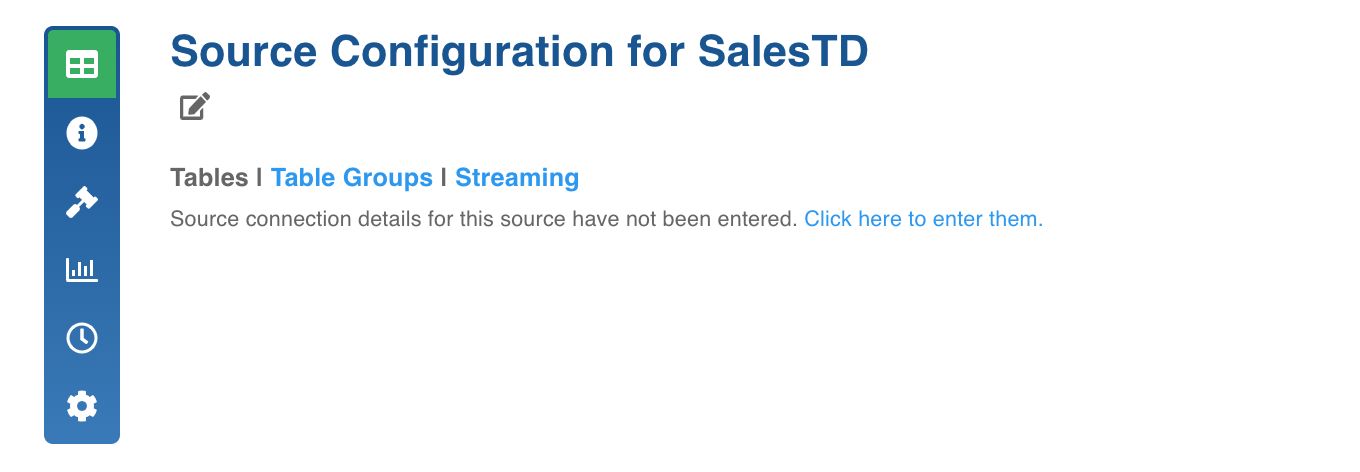
Enter the Source Configuration details. See specific ingestion sections for respective settings.
Click Save Settings. Once the settings are saved, you can test the connection or navigate to the Source Configuration page to crawl the metadata.
Testing Connection
Click the Test Connection button. The test connection job will be run.
Click the Ingestion Logs icon to track the job progress.
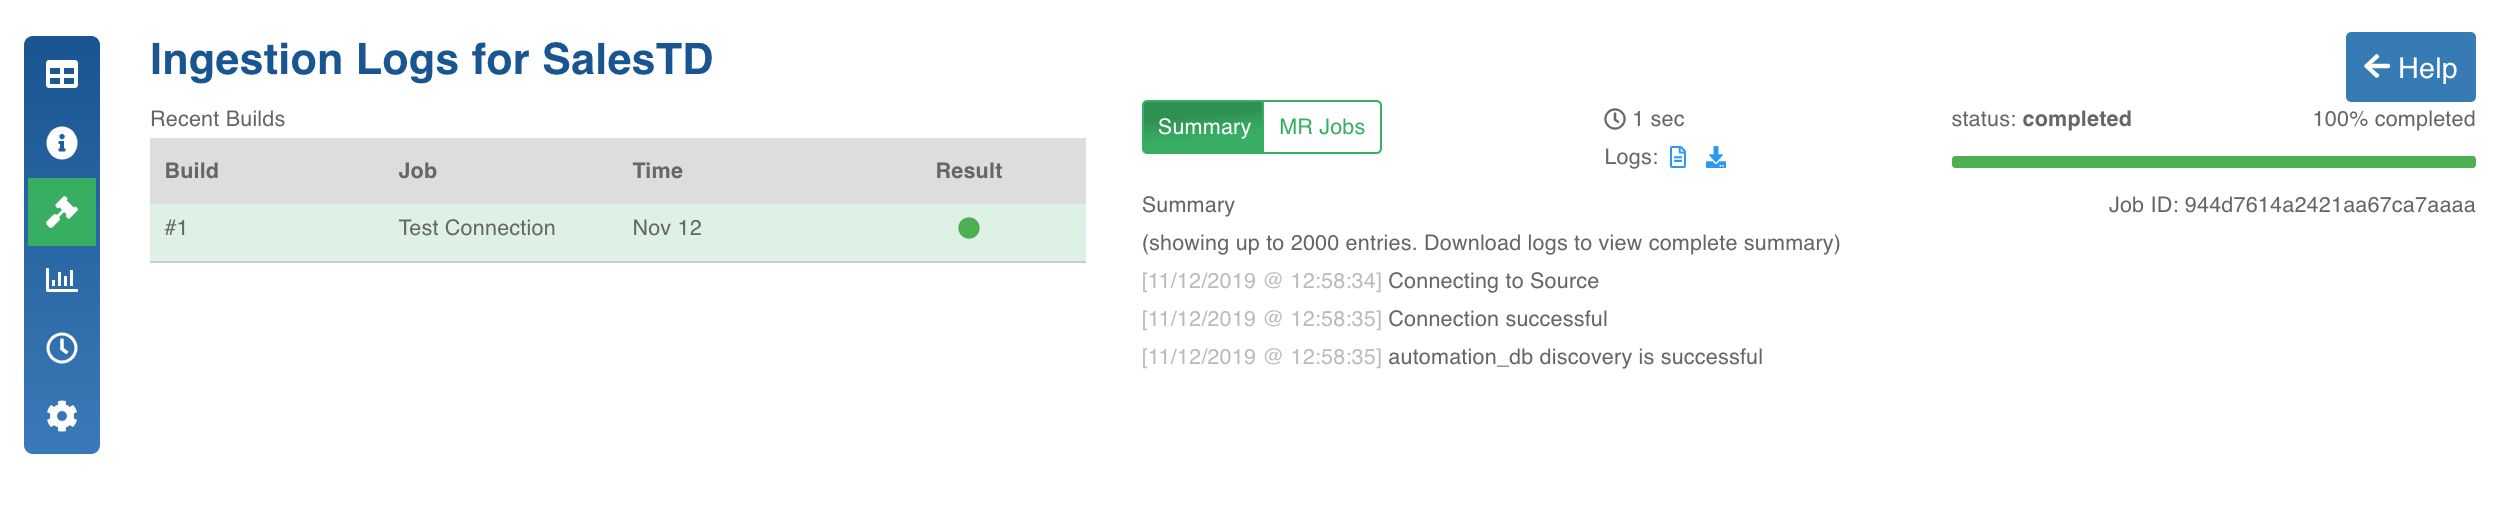
Click the build record to view the Summary and MR Jobs. You can also View and Download the logs from the Logs section.
Crawling Metadata
The metadata crawl process crawls the schema of tables, views from source and stores it on metadata store in the Infoworks DataFoundry platform.
Click the Source Configuration icon.
Click the Crawl Metadata button.
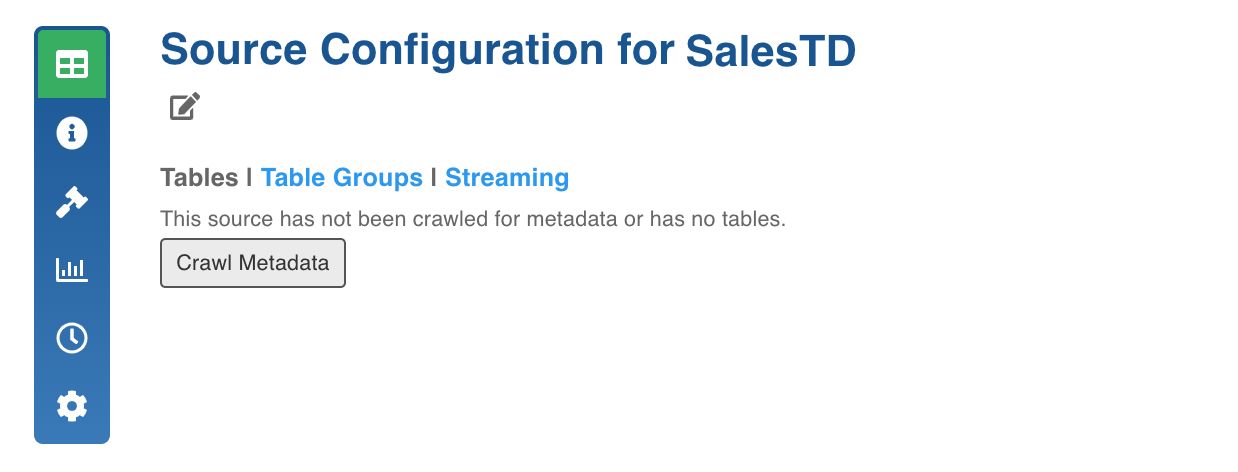
In the pop-up window, click Yes, Crawl Metadata. The metadata crawl will be initiated.
Click the Ingestion Logs icon to track the job progress.
Once fetching metadata is complete, the list of tables will be displayed in the Tables page.
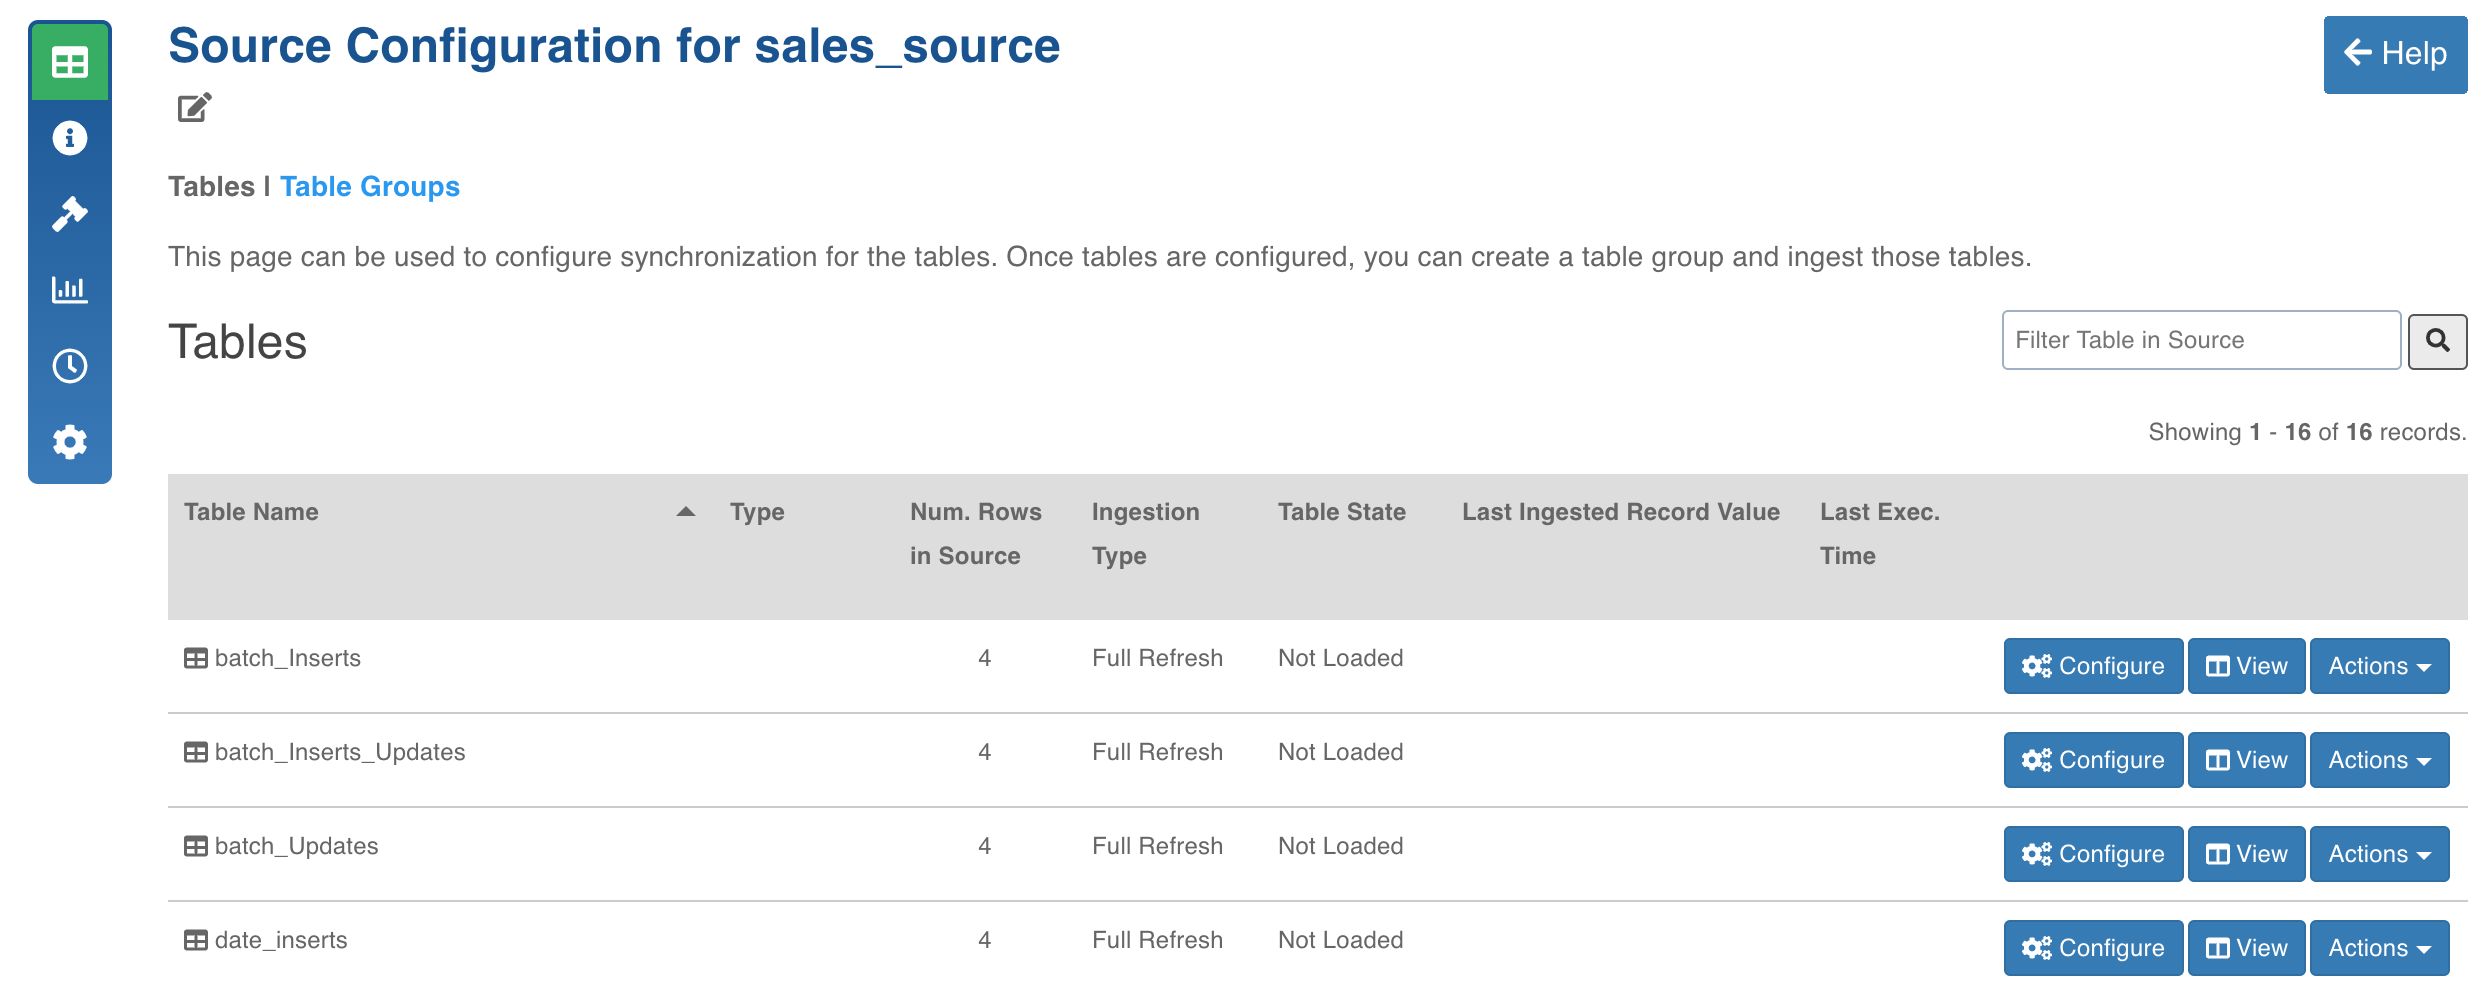
Configuring Source for Ingestion
Click the Configure button for the table to be ingested.
Enter the ingestion configuration details. See specific ingestion sections for the respective settings.
Click Save Settings.

Creating Table Group
Click the Table Groups tab.
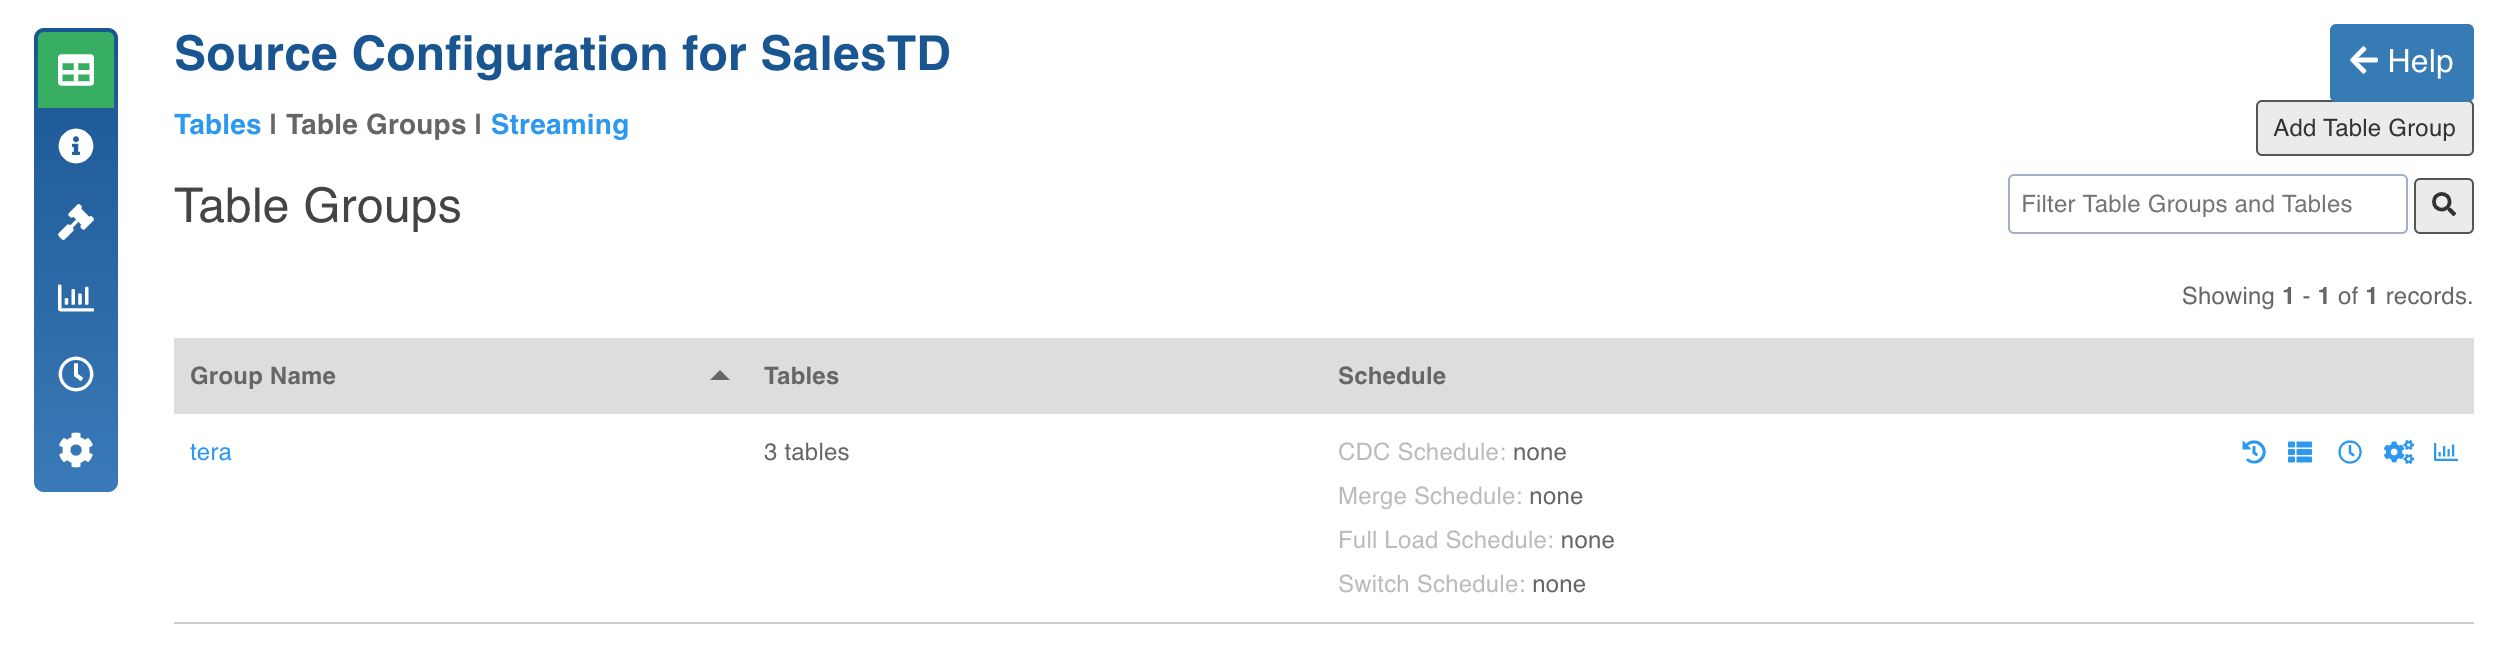
Click the Add Table Group button.
Enter the table group configuration details.
Field | Description |
|---|---|
Table Group Name | The name of the table group. |
Max.Connections to Source | The maximum number of source database connections allocated to the table group. |
Max.Parallel Tables | The maximum number of tables that can be crawled at a given instance. |
Yarn Queue Name (optional) | The name of the yarn queue for ingestion and export jobs. |
Add Tables | The option to add tables to the table group. Select the required tables and click Add Tables. The tables will be added to the table group. |
% Connection Quota | The percentage of Max. connections to source that a table is allocated with. |
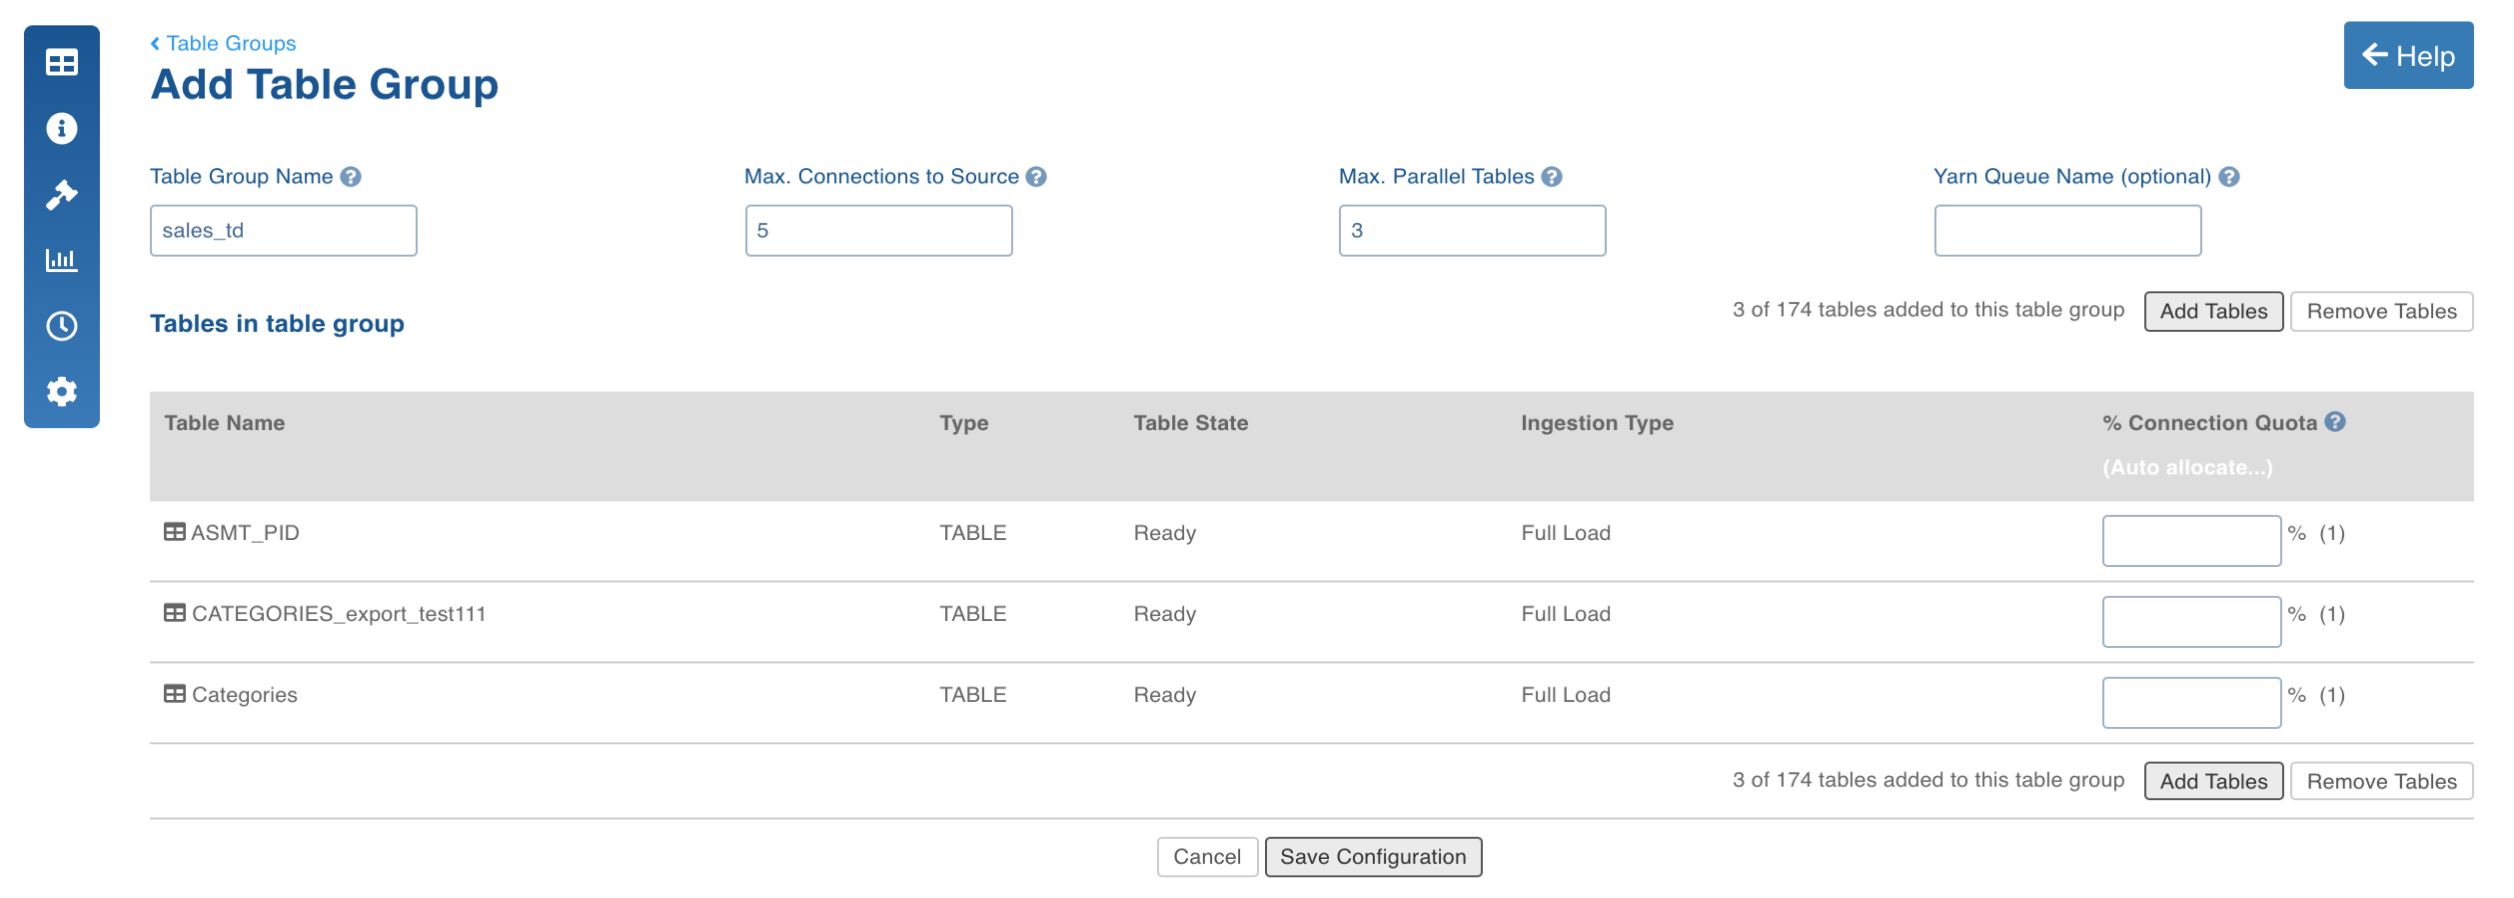
Click Save Configuration. The table group will be created and displayed in the Table Groups page.
Running Ingestion
Click the View Table Group icon for the required table group.
Click Initialize And Ingest Now when performing ingestion on the tables for the first time. To append new data to the crawled source, click Ingest Now.
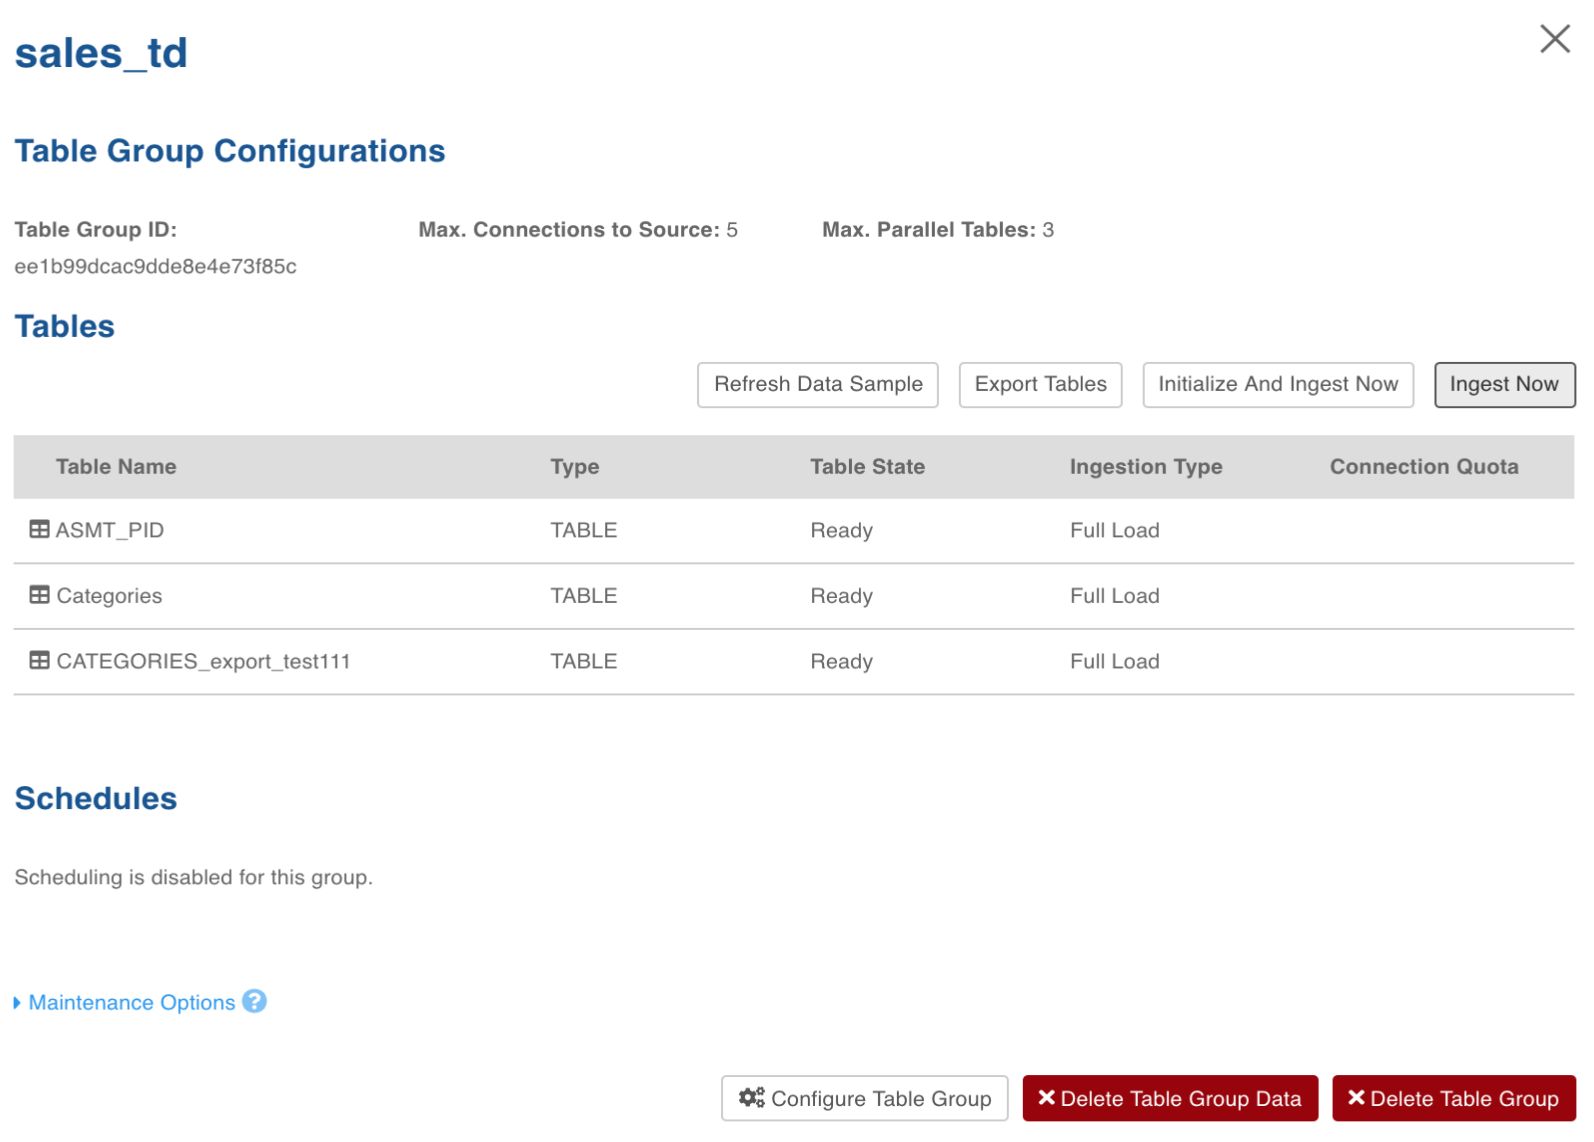
In the pop-up window, click Yes, Initialize And Ingest. The ingestion process will be initiated.
Click the Ingestion Logs icon to track the job progress.
Configurations
fetchsize: This parameter is used to fetch the number of rows at once using JDBC, which improves the performance for large table ingestions. The value is an integer and the default size is 5000. In RDBMS ingestion using JDBC, this configuration can be added at the table level.
Installing External Client Drivers
To install external client drivers like Netezza, SAP HANA, and Teradata, see External Client Drivers.
Schema Synchronization
This section describes how Infoworks DataFoundry handles schema synchronization in ingestion for the following:
Addition of columns
Deletion of columns
Modification of columns
This section also provides specific instructions that you must perform when automatic schema synchronization is not supported.
Addition of Columns
If schema synchronization is enabled for a table, Infoworks DataFoundry ingestion process automatically fetches the new column(s) and merges them with existing data. New column(s) are applied to the existing data on Hadoop for both the current view and historic view tables.
In this process, the new column(s) in the backfilled records will be populated with one of the following:
Default values of the column(s), if a default value is available.
NULL, if backfilling with default values is not required.
Once the schema patch is applied, the regular incremental ingestion process continues to fetch and merge delta. If the configuration of schema synchronization is not enabled, Infoworks DataFoundry process ignores the column and continues with incremental ingestion.
NOTE: For Oracle log-based CDC, the database administrator must ensure to update the dictionary.
Deletion of Columns
Infoworks DataFoundry detects the column deletion and notifies you to reset the table in summary logs.
NOTE: Ensure to truncate reload the table.
Modification of Columns
Infoworks DataFoundry detects the column modification and notifies you to reset the table in summary logs.
NOTE: Ensure to truncate reload the table.