User management includes the following:
- Adding User
- Editing User
- Synchronizing User (for LDAP)
NOTE: Option to add or edit user is not available for LDAP authentication.
Following are the steps to perform the user management functions:
- Login to the Infoworks DF with admin credentials.
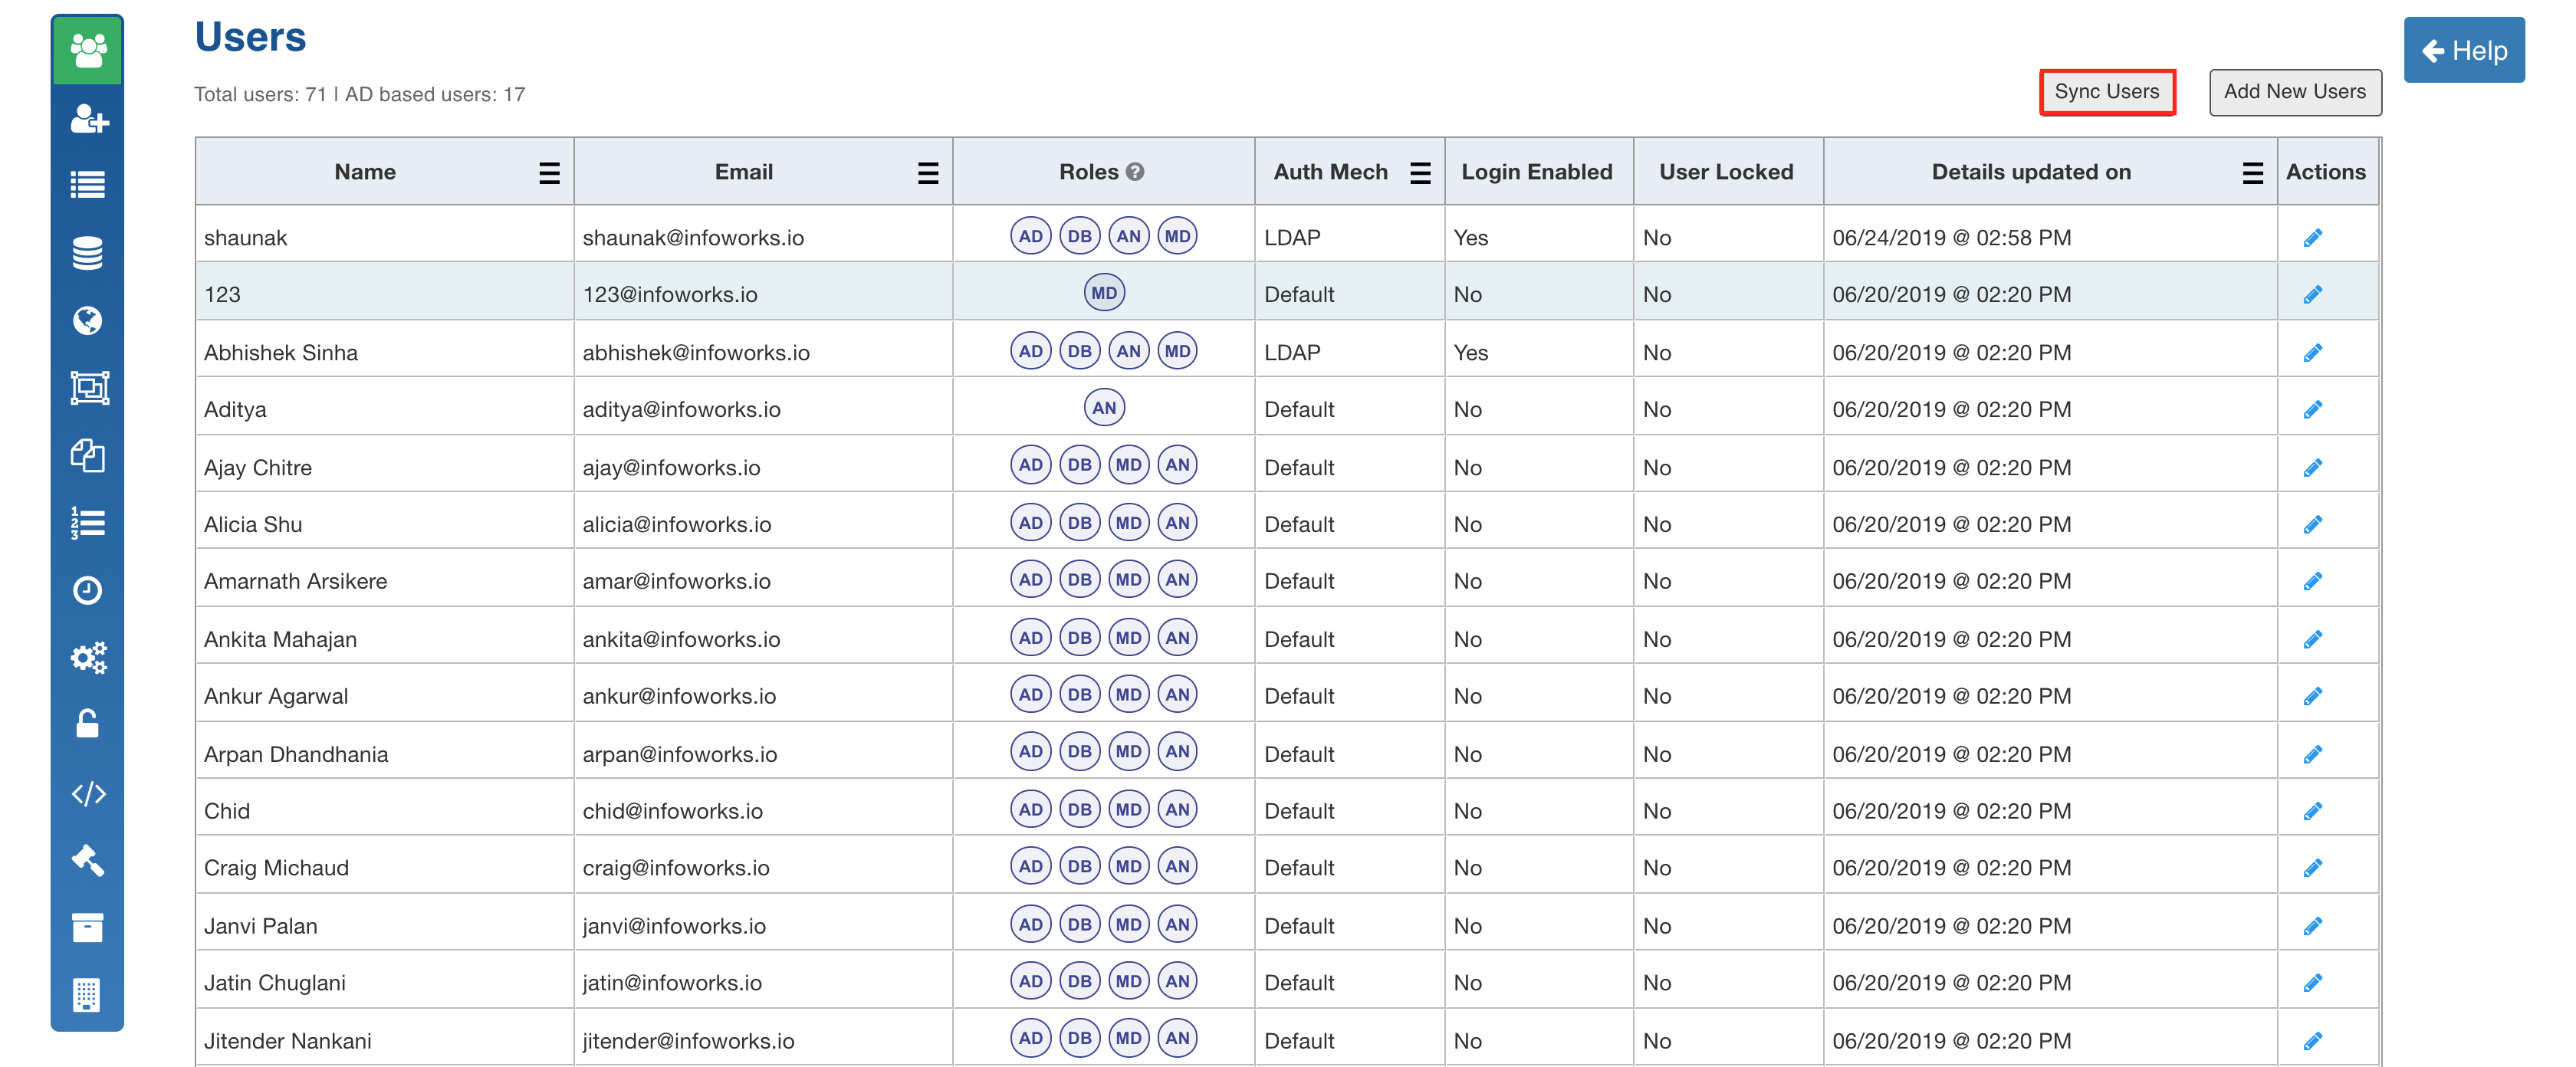
- Click the Admin menu and click the Users icon. The Users page is displayed.
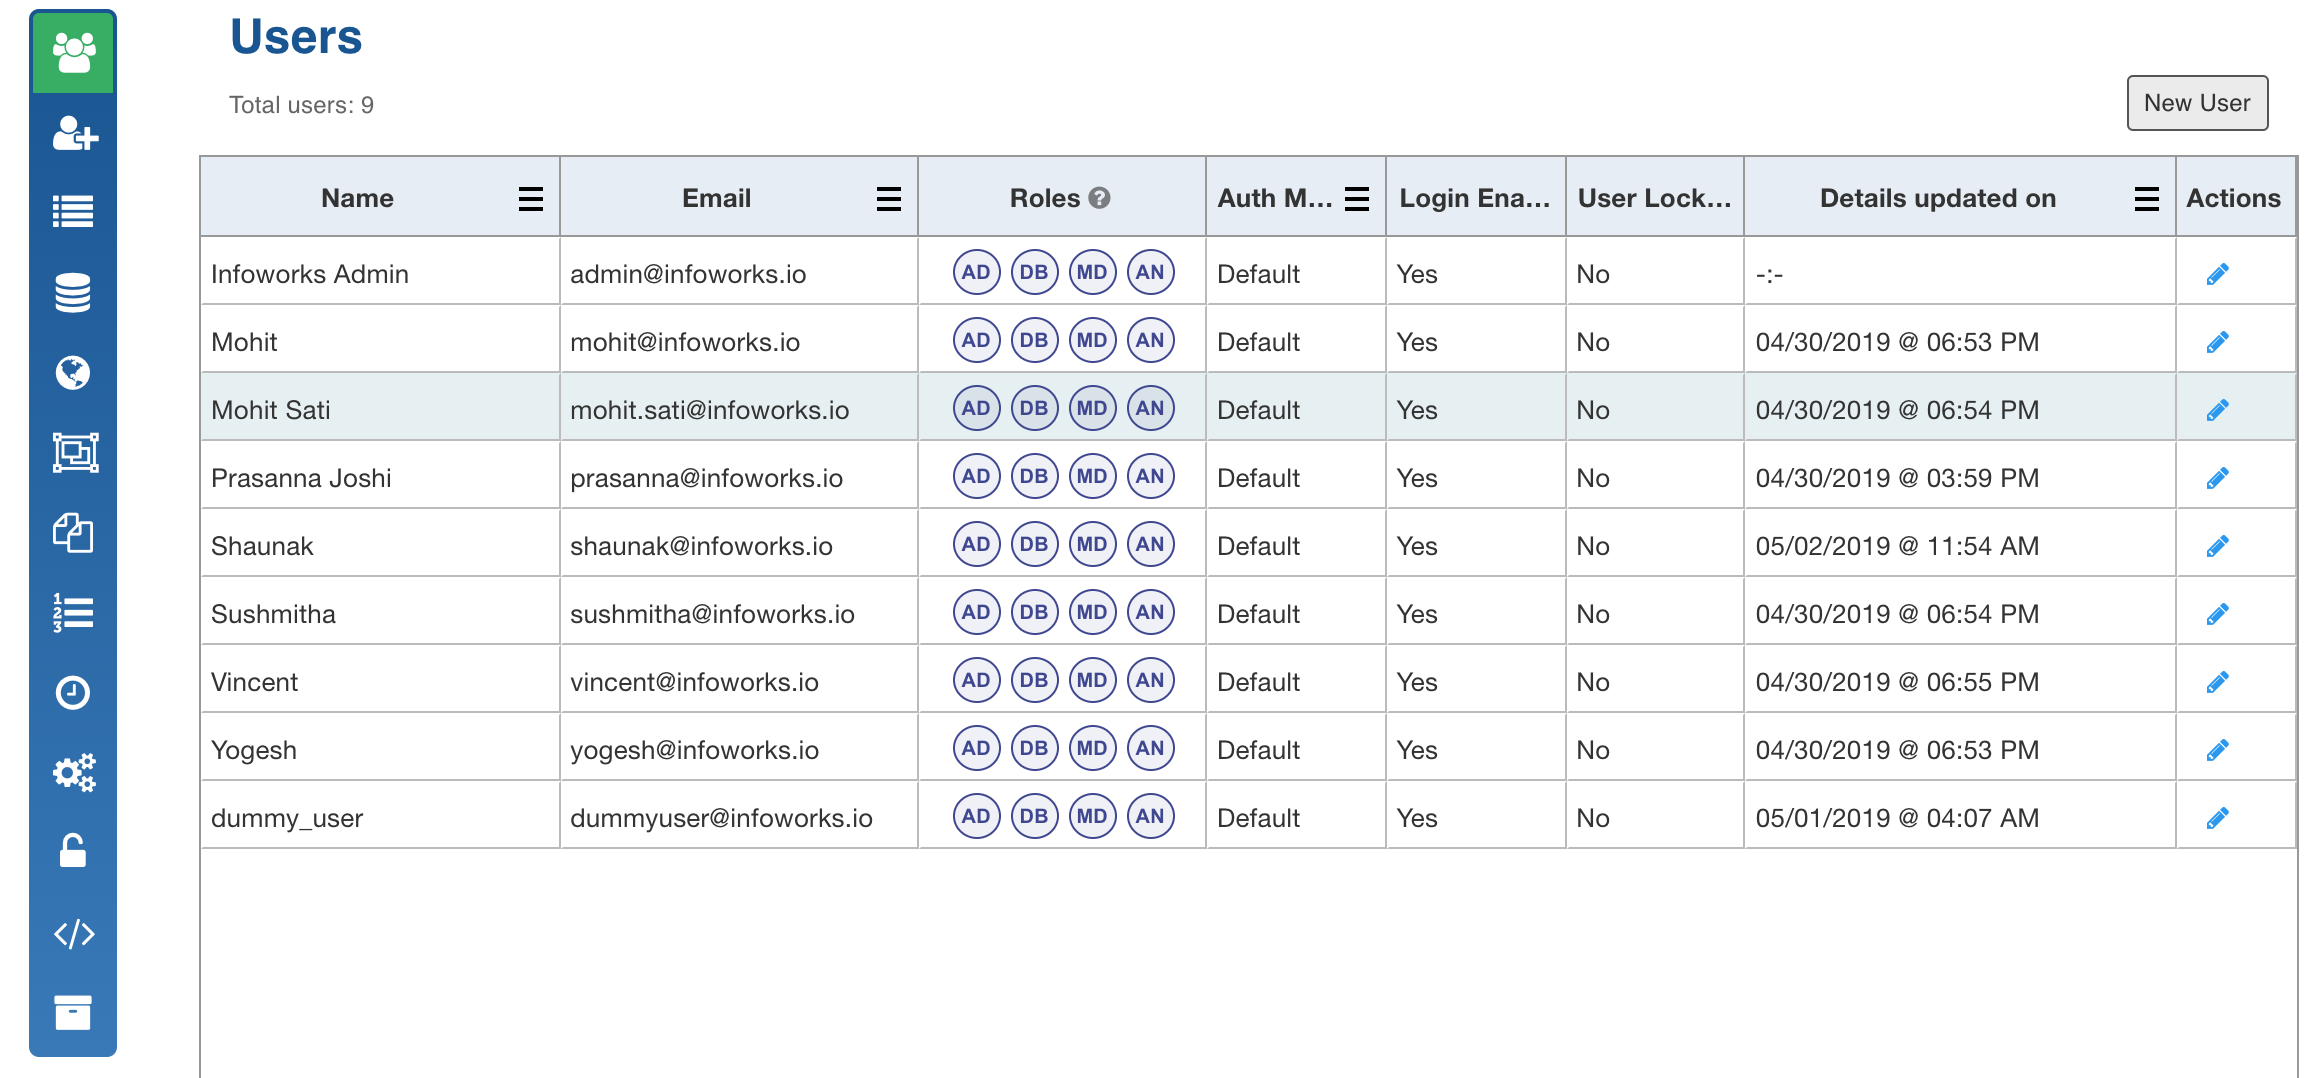
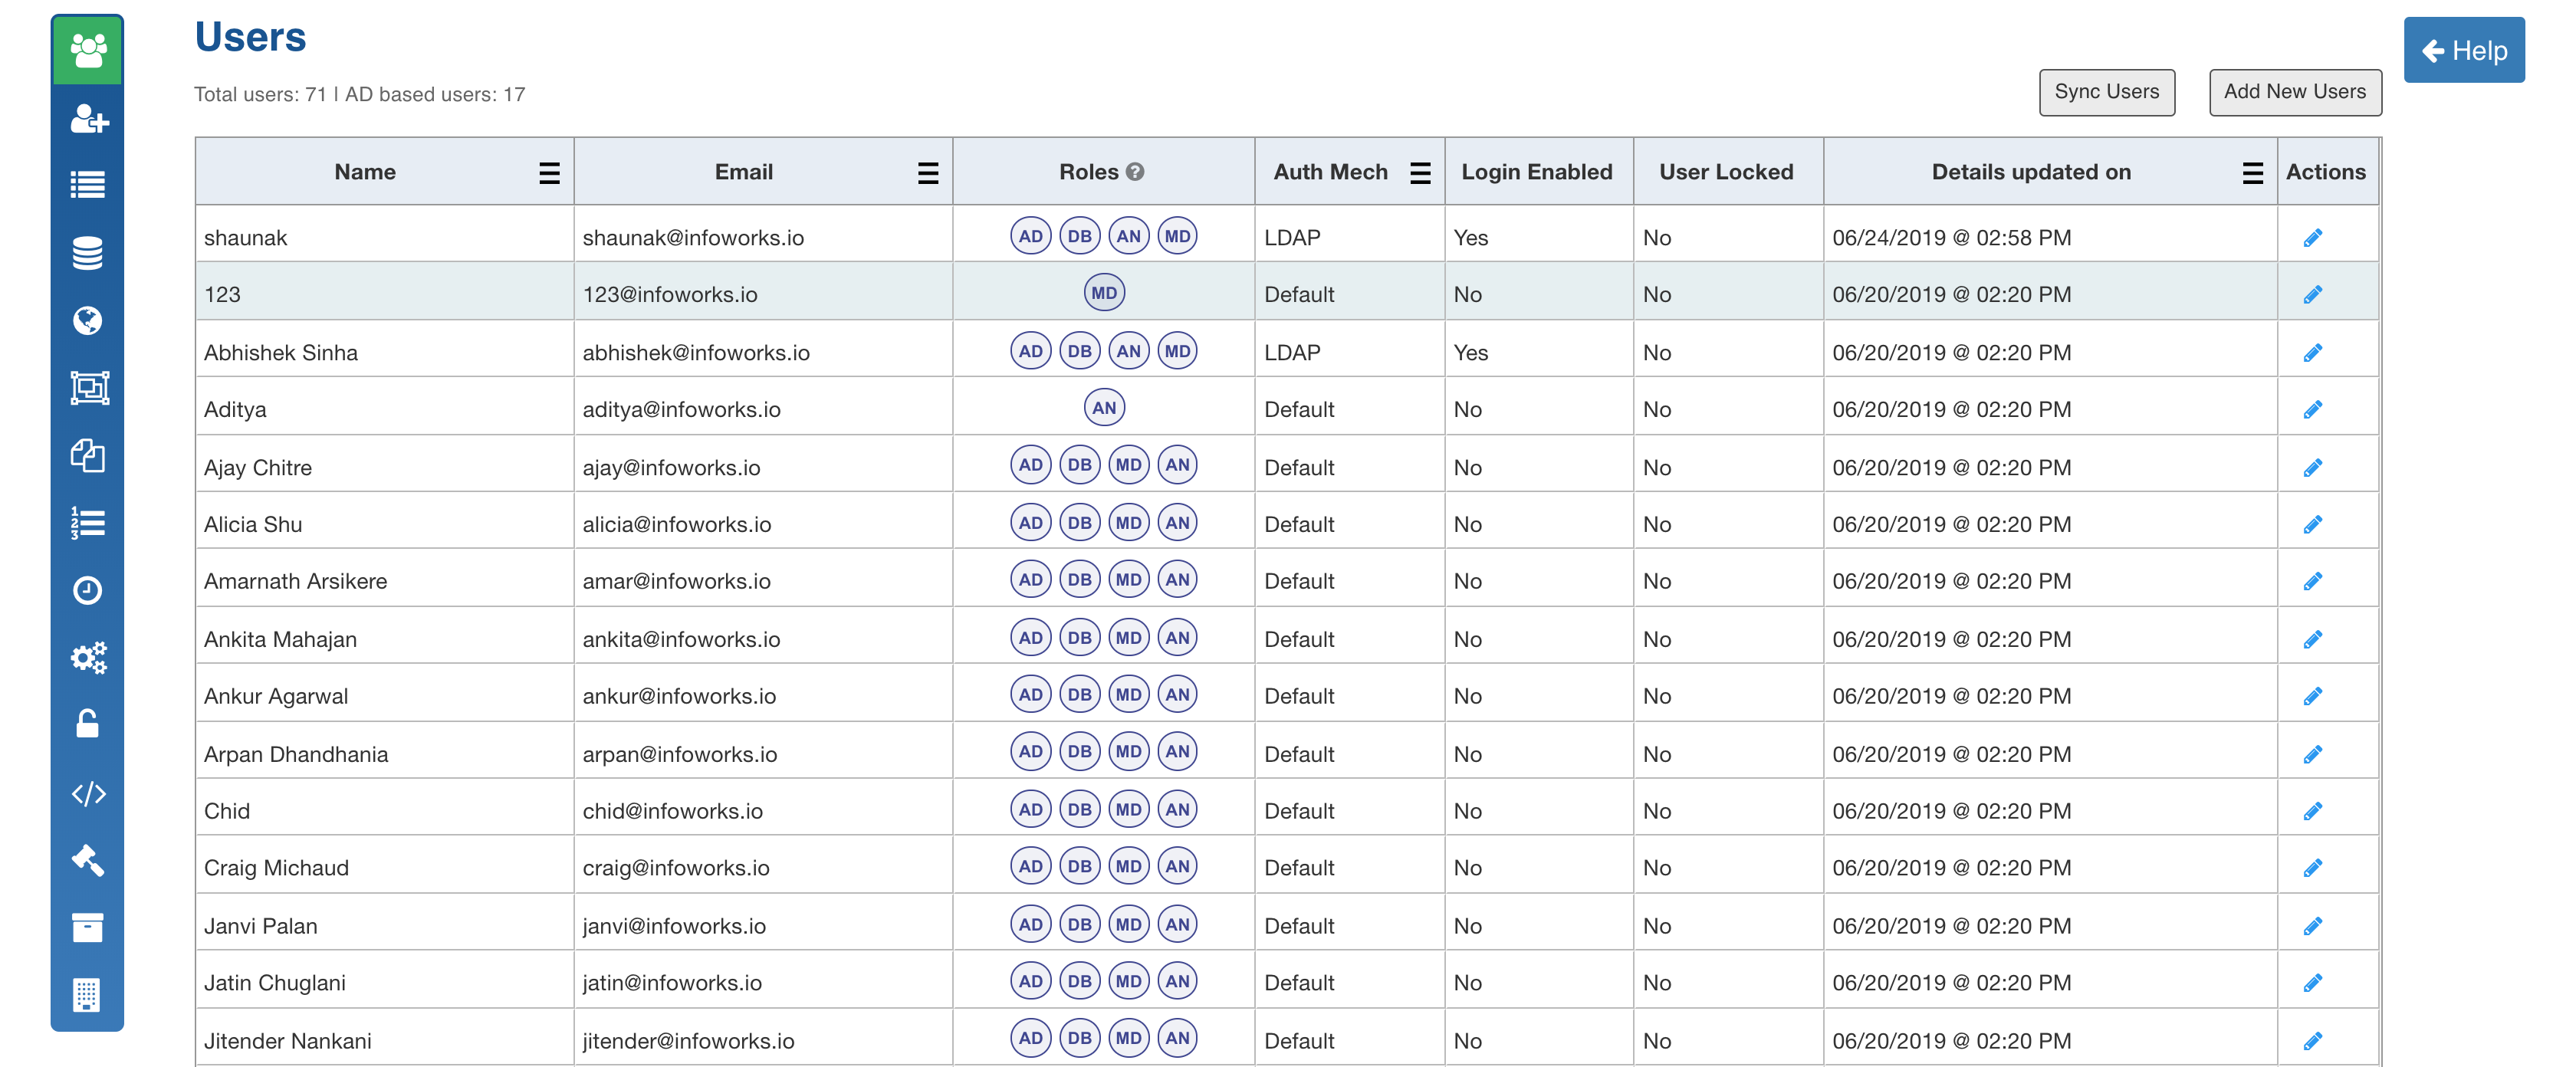
The Auth Mechanism column displays the type of authentication mechanism for the user. It includes default and LDAP.
For LDAP authentication, the following page is displayed:
Adding User
Following are the steps to add a user:
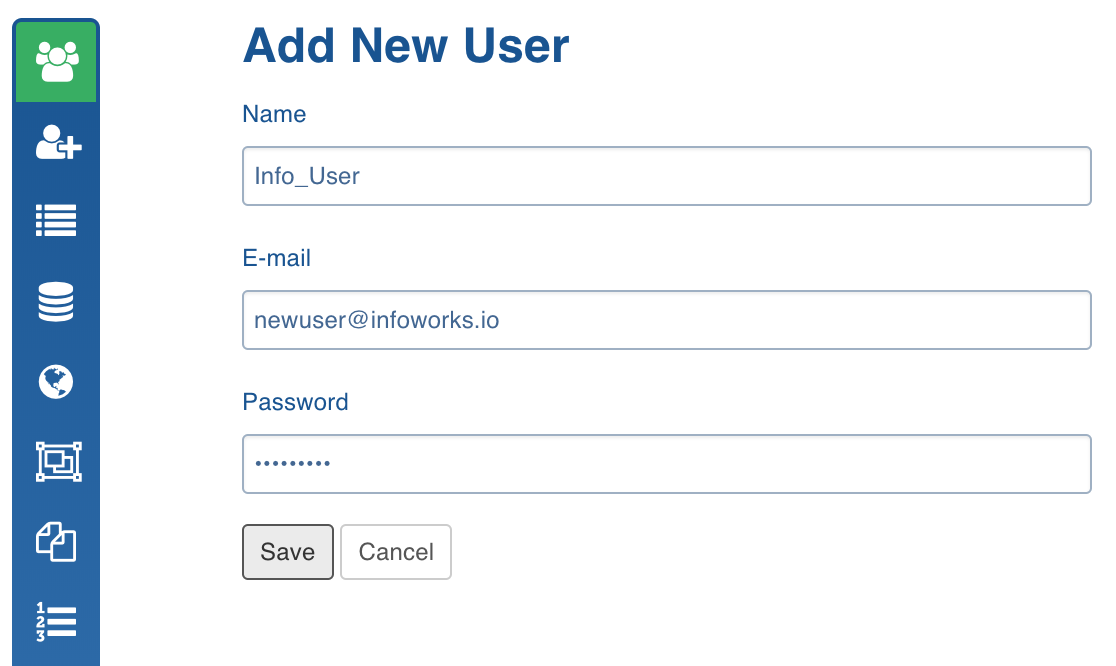
- In the Users page, click New User. The Add New User page is displayed.
- Enter all the Name, Email ID and Password details.
- Click Save.
The default user role assigned to a user is Data Modeller (MD).
For LDAP authentication, perform the following:
- Enter the following details:
Search On: Option to search user in Active Directory (AD) based on the email attribute or login attribute.
Search List: Comma or newline separated list of users to be added from AD.
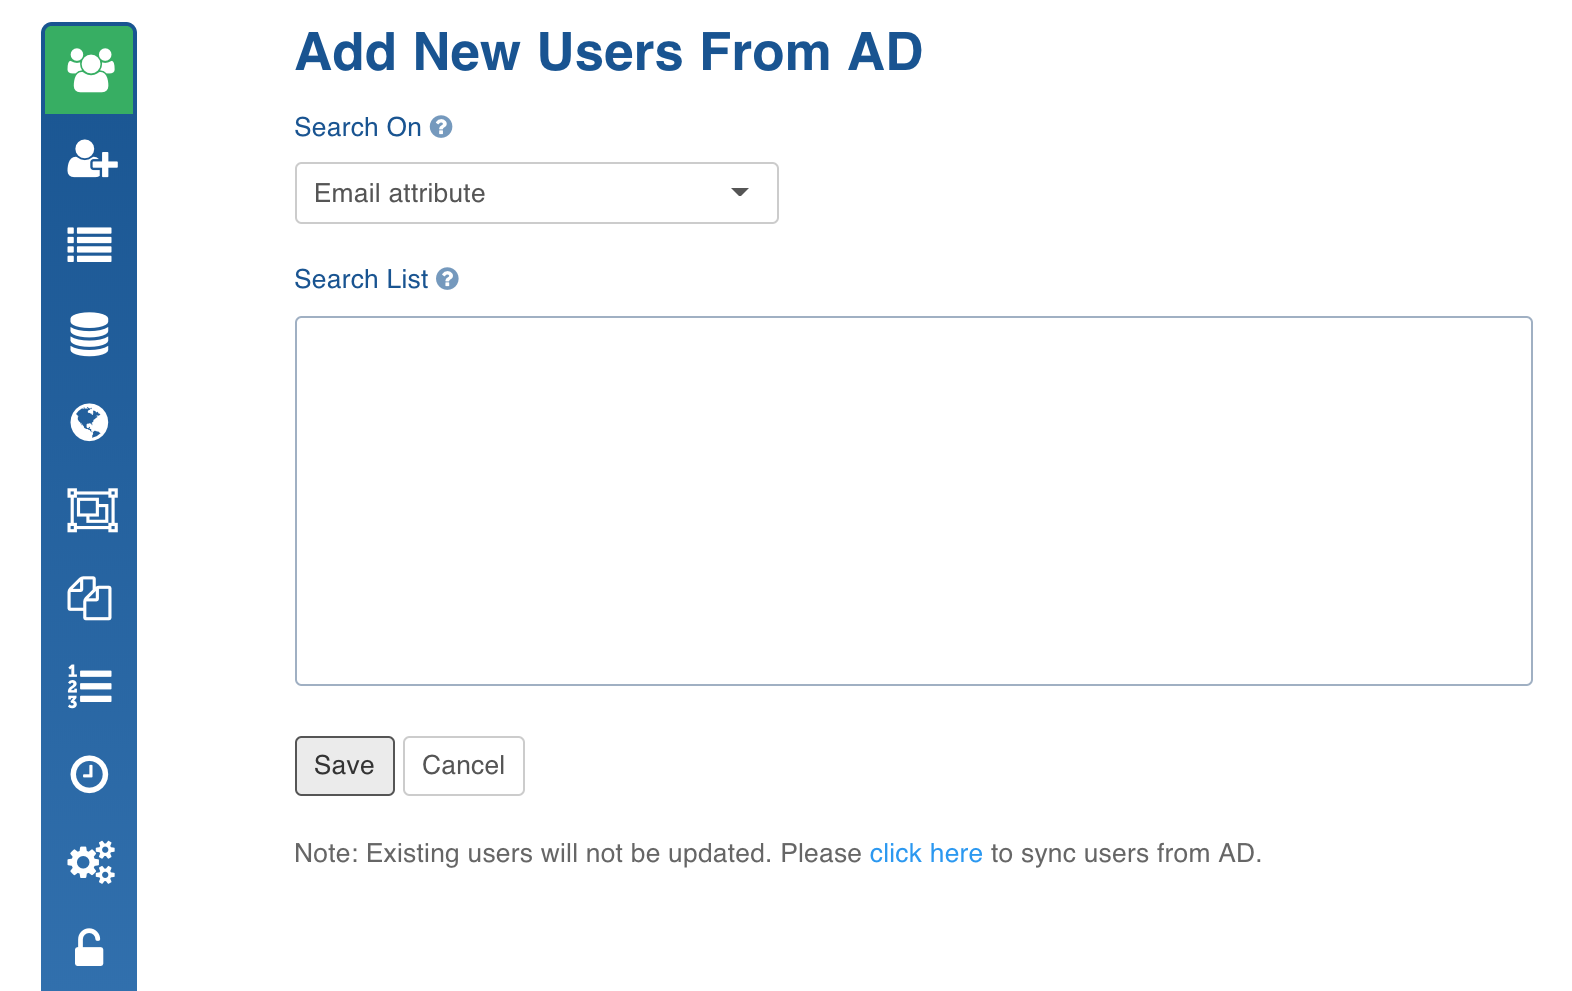
- Click Save. The user details will be searched on AD and added to the user collection. While adding user, the roles will be automatically assigned. If any user is already available in the Infoworks user collection, the user will be ignored.
Editing User
Following are the steps to edit a user:
- In the Users page, click the user record to be edited. The Edit User page is displayed.
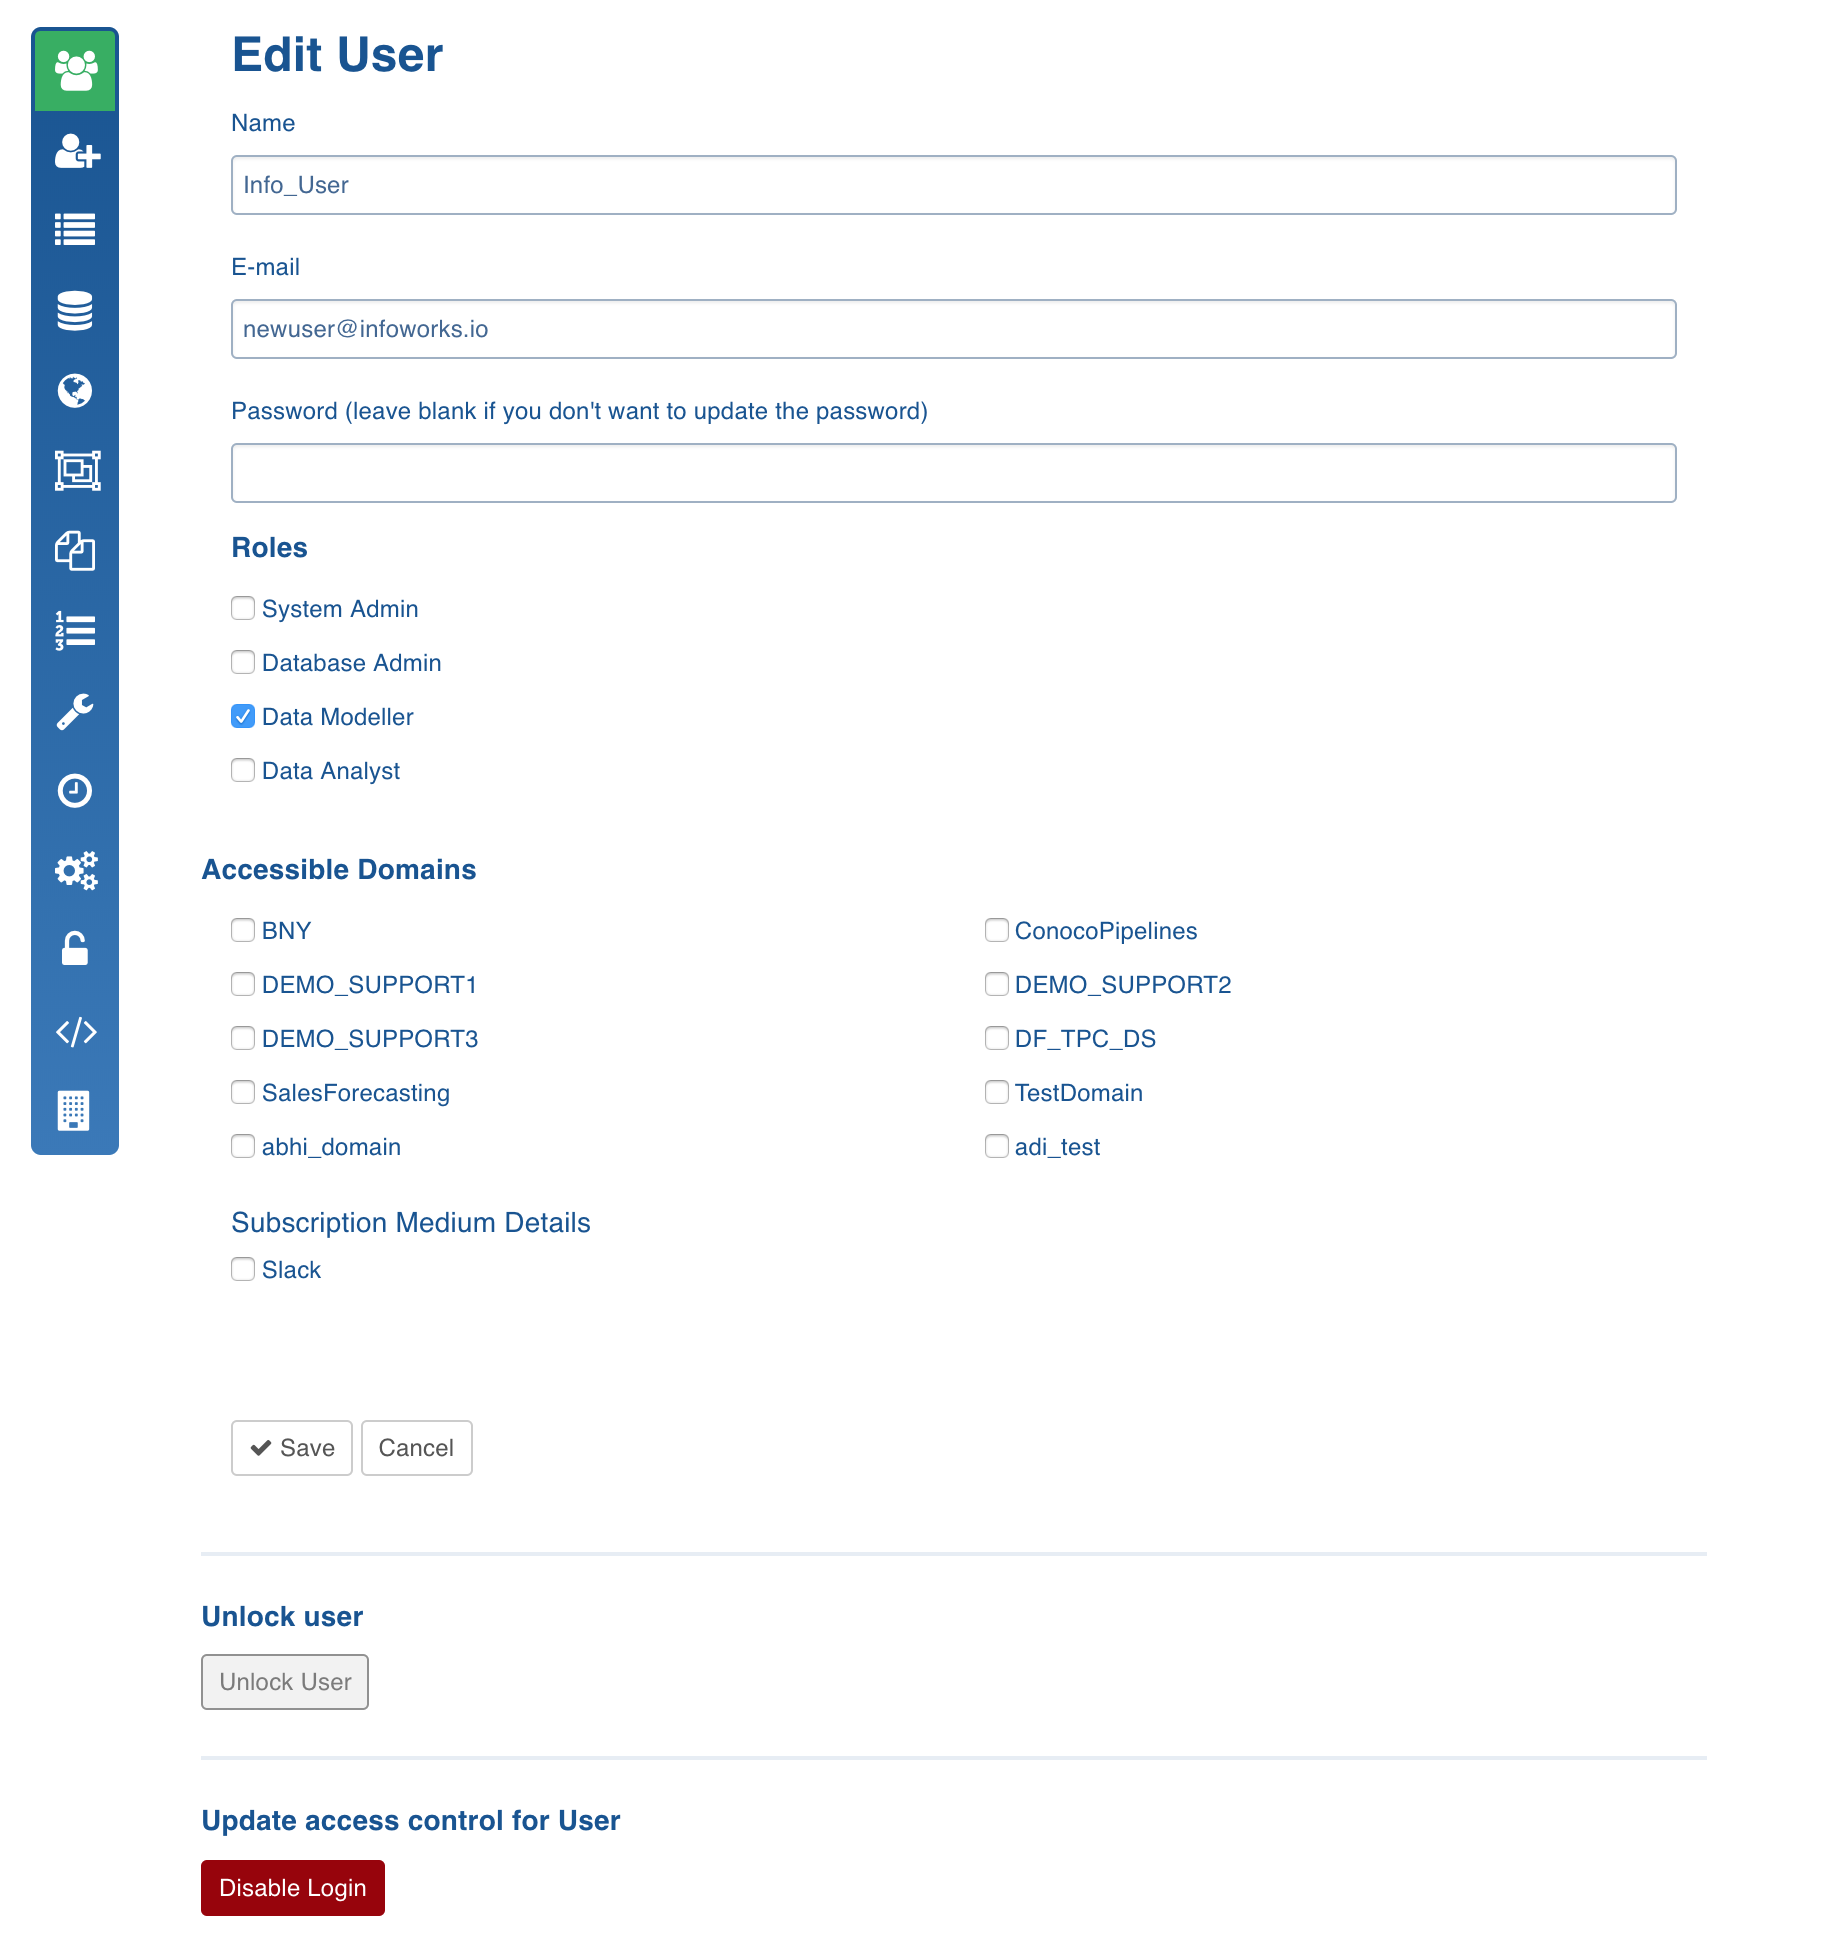
The following table describes the user roles:
| Role | Privilege | Description |
|---|---|---|
| System Admin | Manage users | Add, modify, and delete users from Infoworks DataFoundry. Maintain subscribers list. |
| Manage License | Add and modify license. | |
| Manage platform | Add, modify, and delete sources. Add and modify domains. Add, modify, and delete external scripts. Associate data sources with domains. Associate external scripts (post hook and pipeline extensions). Perform Metadata cleanup activities. | |
| Manage security | Configure authentication and authorisation. | |
| Manage replicator clusters | Add and configure replicator clusters. | |
| Database Admin | Manage data sources | Configure and schedule source ingestion. |
| Schedule data sources | Schedule run for data sources. | |
| Data Modeller/Data Analyst | Design & develop transformation | Design and develop pipelines. Create and configure transformations. |
| Design & develop orchestration | Design and develop workflows. Create and configure tasks. | |
| Design & develop cubes | Design and develop cubes. Create and configure tables associated with cubes | |
| Schedule & execute orchestration | Schedule orchestration run. Execute orchestration, pipeline, and ingestion on demand. | |
| Create and configure exports | Schedule exports run. Execute exports on demand. |
- Modify the required fields and click Save.
NOTE: You can click the Disable Login button to revoke the user. The jobs scheduled by the disabled users get disabled in Infoworks DF.
Synchronizing User
NOTES:
This option is available only for LDAP authentication.
The sync will be performed for all the users added either via AD or Infoworks DF.
- In the Users page, click the Sync Users button. The modified user details will be synchronized and a success message will be displayed.
Disabling Invalid Users
On clicking the Sync Users button, login will be disabled for the user records for which user details or valid roles are not available.
To re-enable the users, perform the following:
- Click the edit icon under the Actions column for the required user.
- Click Enable Login button in the Edit User page that appears.
The jobs scheduled by the disabled users will also be disabled.
User login will be disabled in the following cases:
- user not found in AD,
- any of the required user details not available in AD,
- no valid role found for the user.
Subscriber Management
Infoworks allows you to add subscribers to be notified for specific jobs selected under each component (ingestion, pipeline, and cube).
NOTE: The list of email addresses configured in the Configuration > Notification page will be notified for all jobs.
Adding Subscriber
Following are the steps to add a subscriber:
- Navigate to Admin > Subscribers.
- Click Add New Subscriber.
- Enter all the Name and Email ID.
- You can select Slack and enter the slack details to receive notifications on slack.

- Click Save.
NOTE: Multiple slack channels can be configured in the Channels field by entering them separated by commas. For Example, Channel-1,Channel-2.