This document aims to help in the installation of the Infoworks on the Dataproc cluster in GCP Environment.
Prerequisites
Block all the external network access after the Dataproc cluster creation.
1.Preliminary Steps to Create a Dataproc Cluster
Step 1: Create a GCP storage bucket using the following command to store the initialization scripts: gsutil mb -p <project_id> -c standard -l us -b on gs://< bucket_name >/
For example, the bucket name can be dataproc-init-scripts.
Step 2: Refer Prerequisites.
Step 3: Login to Google Cloud and create a project for deploying the Dataproc cluster.
Step 4: Ensure to enable API of the respective services - Dataproc and Compute Engine.
Go to API & services -> Library.
Cloud Dataproc API
Compute Engine API
Cloud Runtime Config API
Cloud SQL API
Cloud SQL Admin API
Compute.instanceAdmin
Dataproc Editor
Compute Network Admin
Cloud Key Management Service (KMS) API
Google Service Networking API
Step 5: Ensure to have the right quota limit on the vcpus.
Step 6: Create a network for the Dataproc cluster. Create a Virtual network if required.
gcloud compute networks create --bgp-routing-mode regional --subnet-mode=auto
Check if the VPC network is created. Once created, note one of the IP addresses range for the region. For example, 10.xxx.0.0/20 for us-central region. Use this IP range for setting firewall and creating cluster.
gcloud compute firewall-rules create --network --allow tcp,udp,icmp --source-ranges 10.xxx.0.0/20
For the project, go to VPC network -> Firewall and manually check ports from the firewall page.
Select firewall and allow all ports. Change this only if required, else allow selected ports.
Ensure Port 80 is opened to your respective VPN address.
Step 7: Ensure to have permissions to create KMS keys, keyring and GCS buckets.
Create a service account user from IAM.
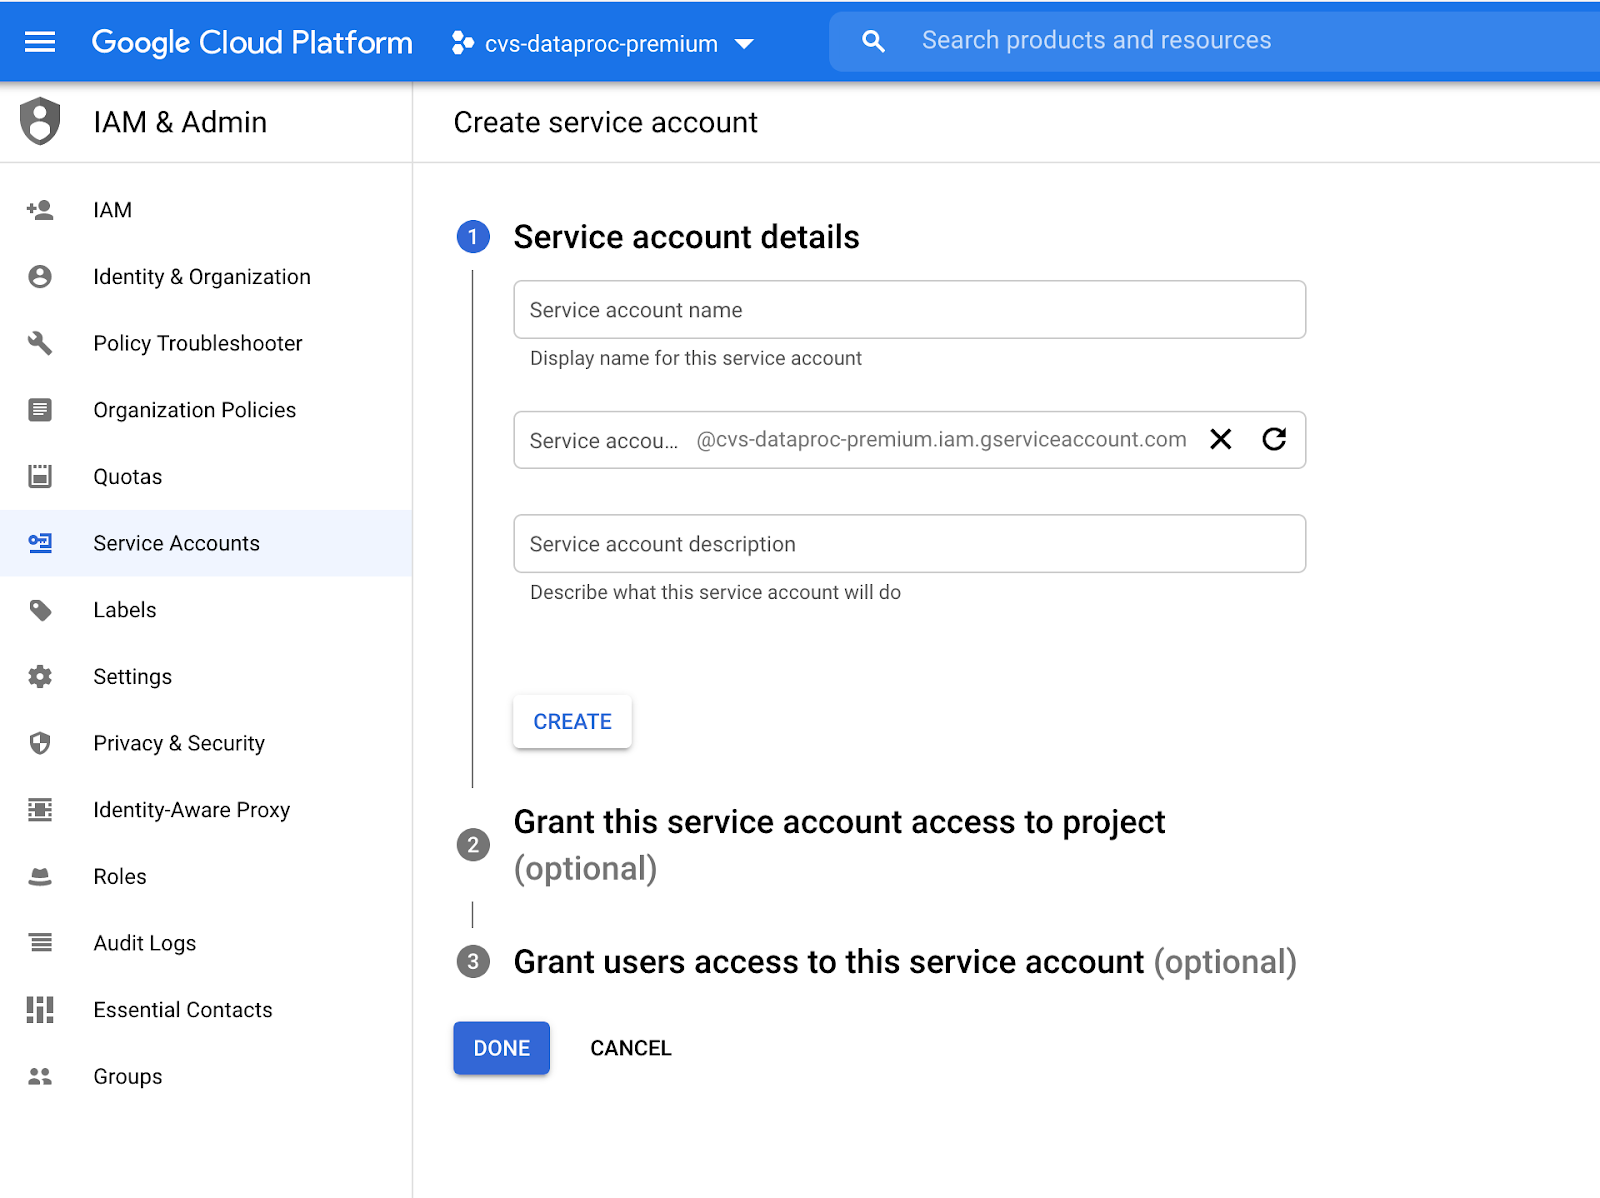
Provide the below permissions to the service account user.
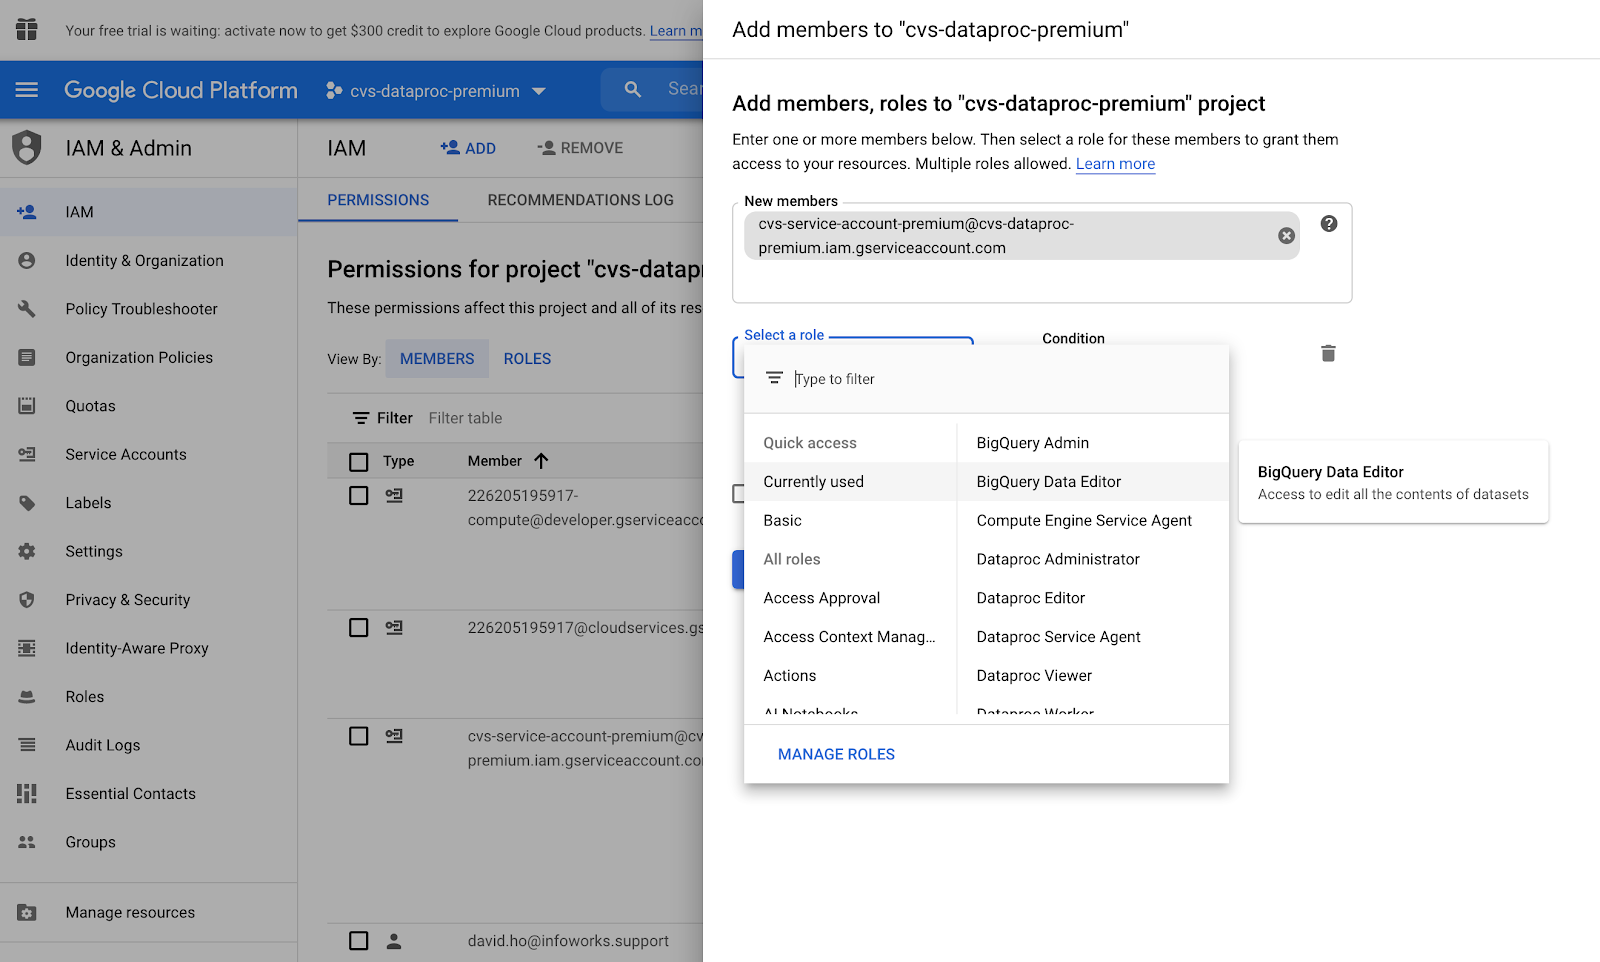
Go to Cloud IAM -> Add Member -> Add the new member name and add the below roles.
BigQuery Admin
BigQuery Data Editor
Dataproc Administrator
Dataproc Editor
Dataproc Viewer
Dataproc Worker
Owner
Storage Object Admin
Step 8:
Add initialization script to create infoworks user.
Init action script will add infoworks user to the Dataproc cluster. It automatically adds users on autoscale nodes and existing nodes before creating the Dataproc cluster.
For example, copy the following script snippet under GCS bucket and call it in initialization actions while creating a Dataproc cluster to add users automatically on all Dataproc nodes.
Add cloud-sql-proxy.sh initialization script for connecting to external Hive metastore.
Copy the script snippet from the following link under GCS bucket and call it in initialization actions while creating a Dataproc cluster: https://github.com/GoogleCloudDataproc/initialization-actions/blob/master/cloud-sql-proxy/cloud-sql-proxy.sh
NOTE Ensure that the keyring created includes two different user permissions. For detailed steps on setting user permissions, see Setting Up Keyring User Permissions.
2. Creating a Dataproc Cluster
To create the cluster from command line, use the following command.
NOTE If the command is used for creating the image for edgenode, keep the disk size to 20GB and remove the parameter for auto scaling.
3. Creating an Image from Worker Node for Edge Node of Dataproc Cluster
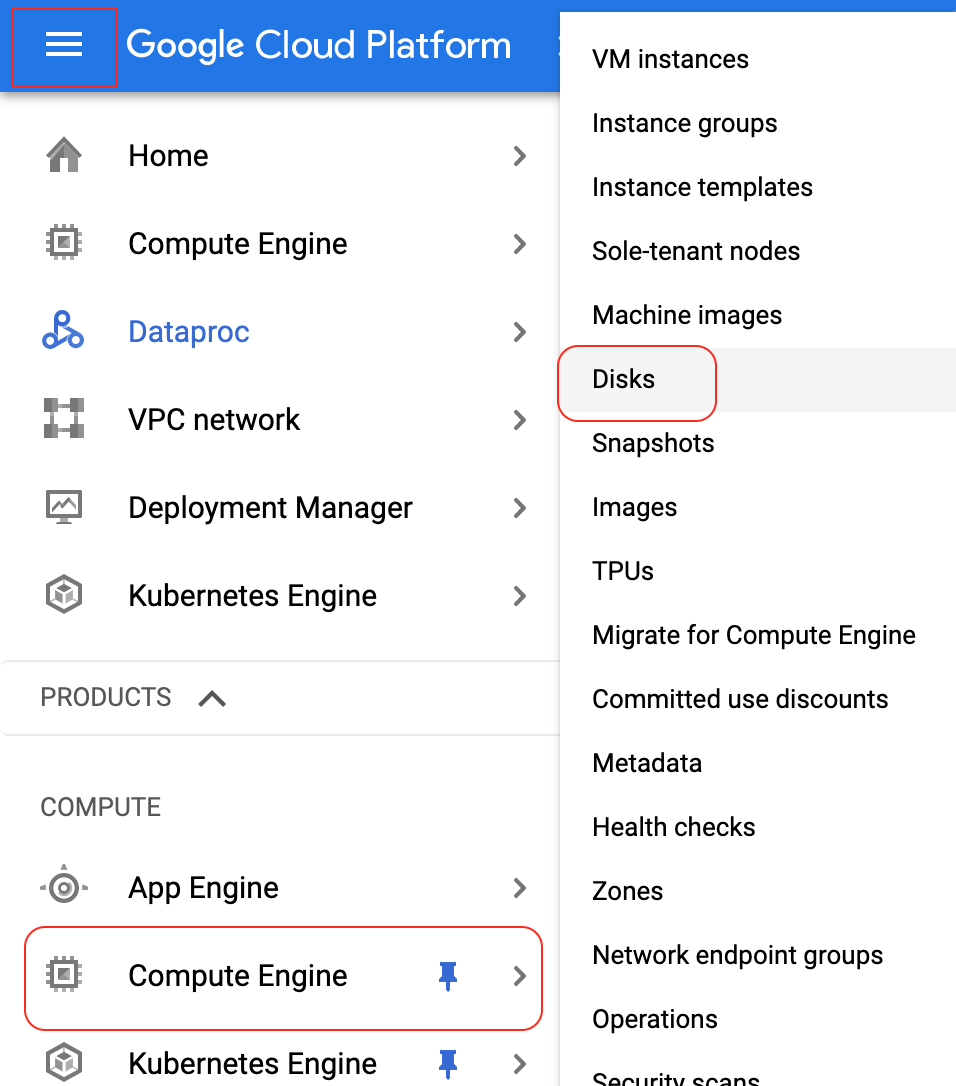
Select Menu -> Compute -> Compute Engine from Google Cloud Console.
Input the Dataproc cluster name in the Filter VM instances section.
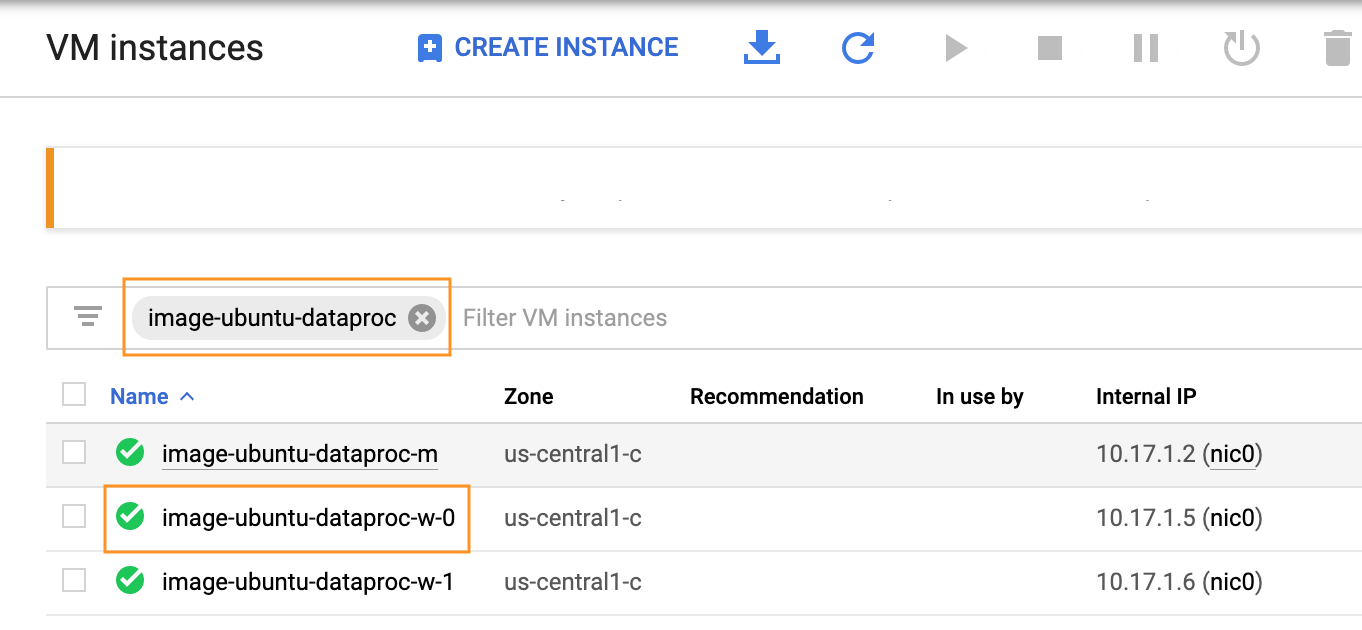
Select any worker node and click EDIT.
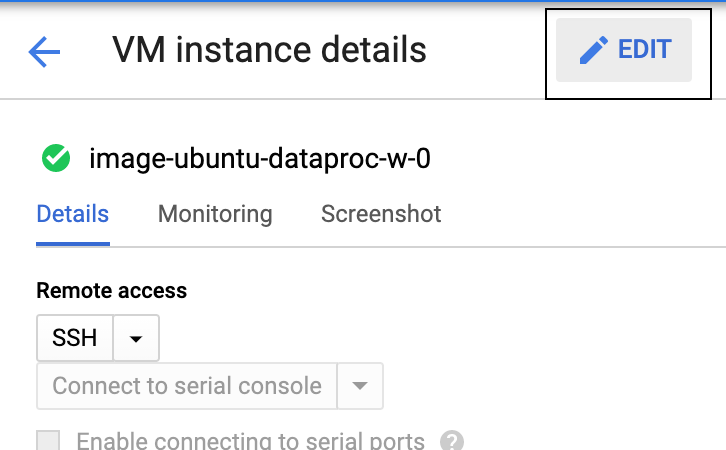
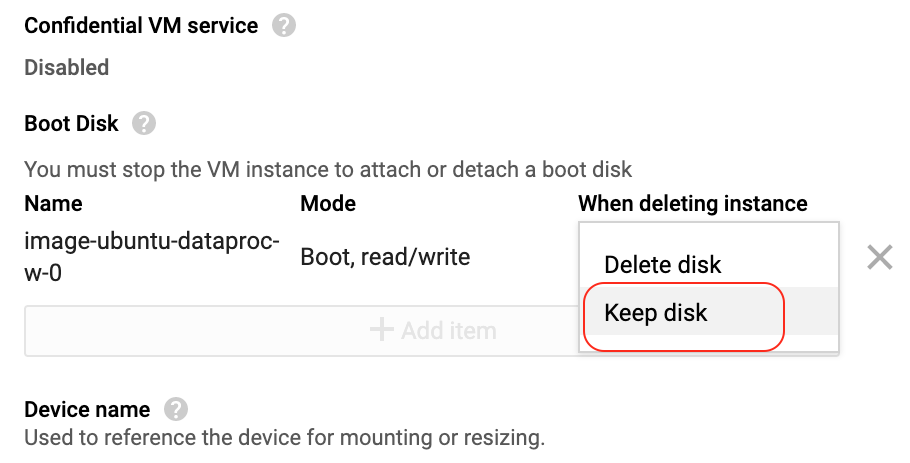
Scroll down to the boot disk section and change Delete disk to Keep disk in the drop-down list. Click Save at the end to apply the setting changes.
Go to Dataproc dashboard, select the cluster, and Delete the cluster to terminate all the VM instances.

Go to Menu section -> Compute -> Compute Engine -> Disks.
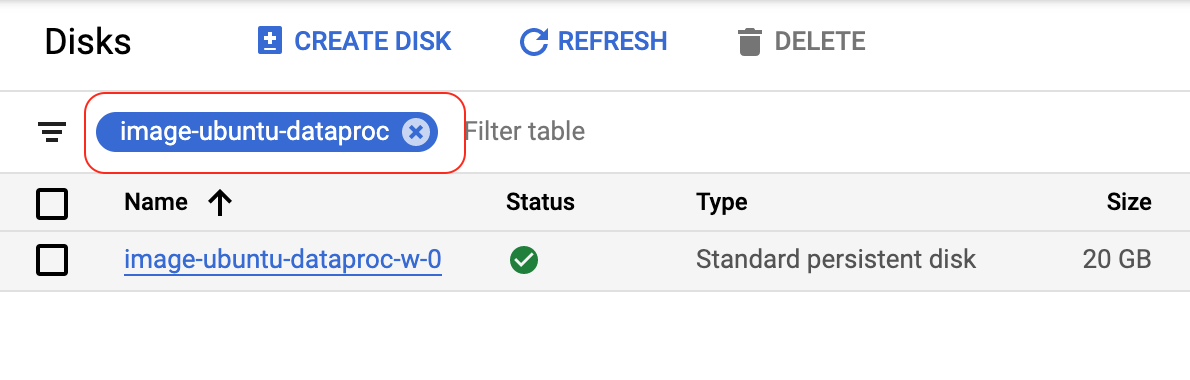
Input the Dataproc cluster name to filter the disks.
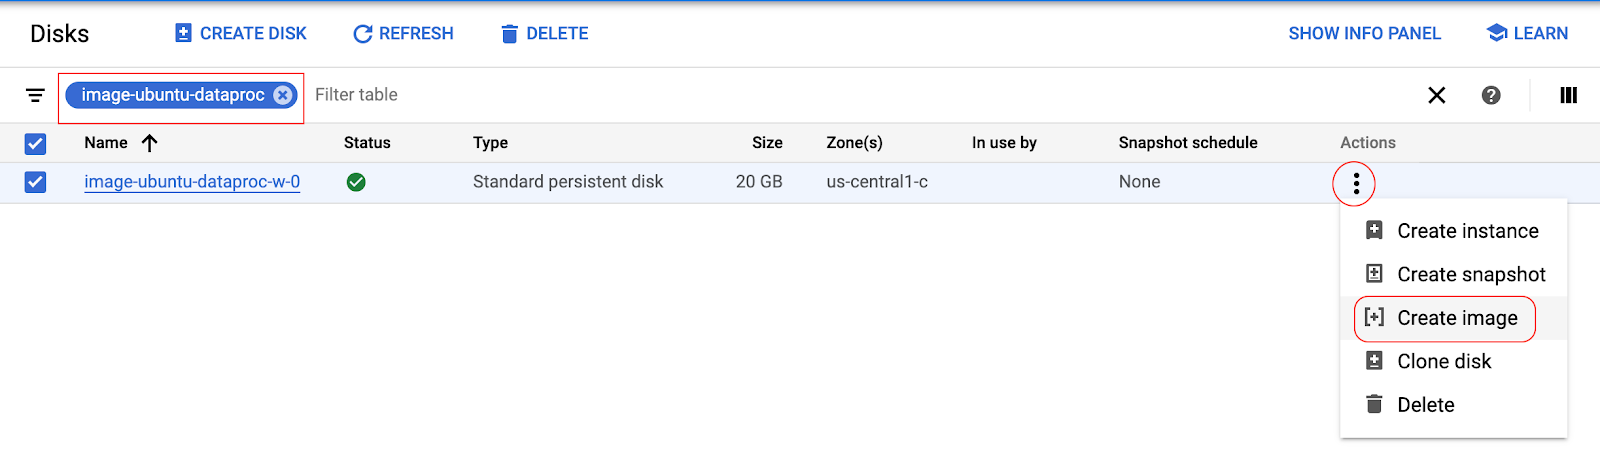
Select the disk and click the icon to get more options. Click the Create Image option to create an image using the disk.
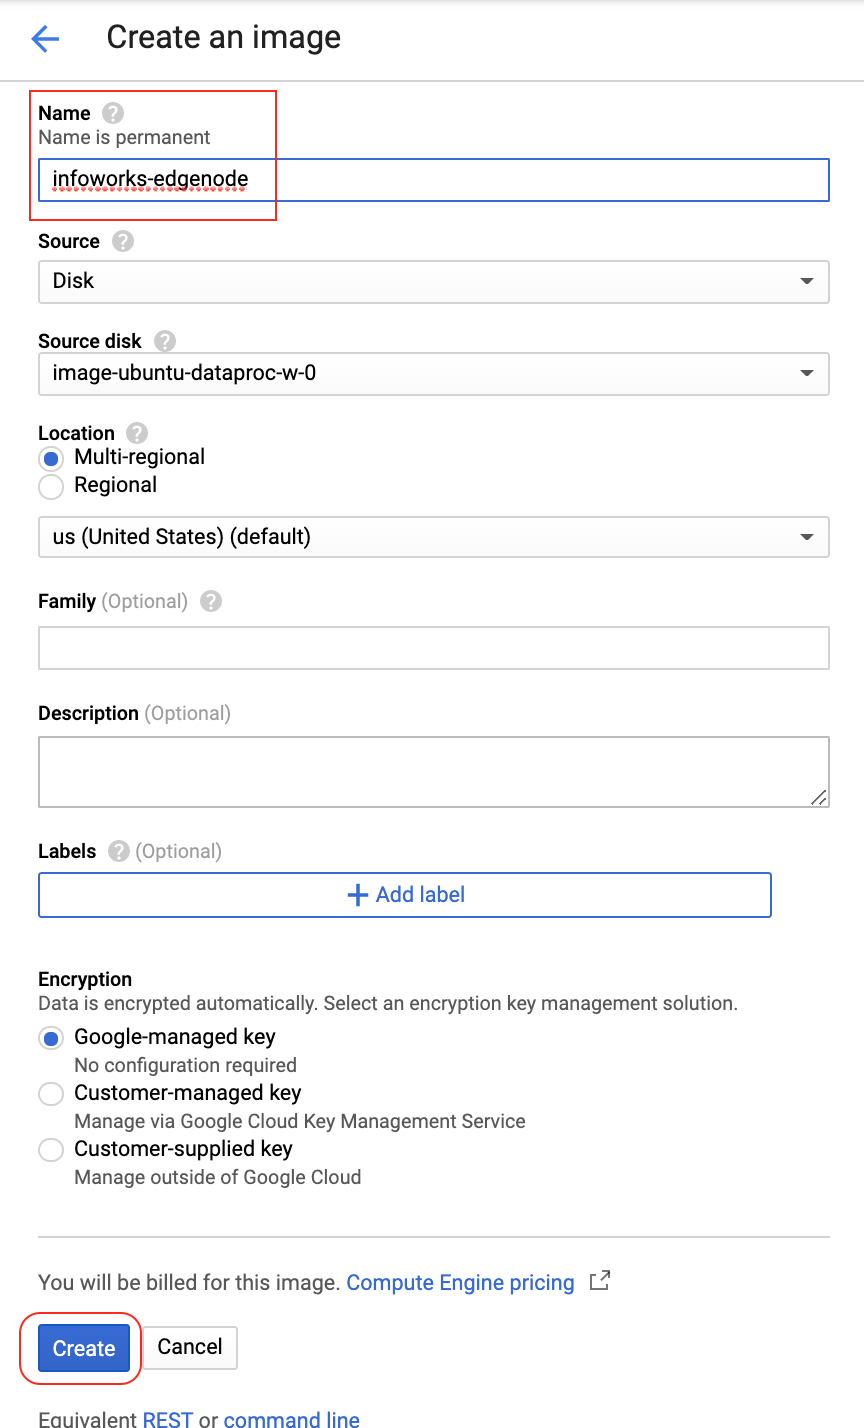
The page will automatically be redirected to the image section. Enter the name of the image and click Create.
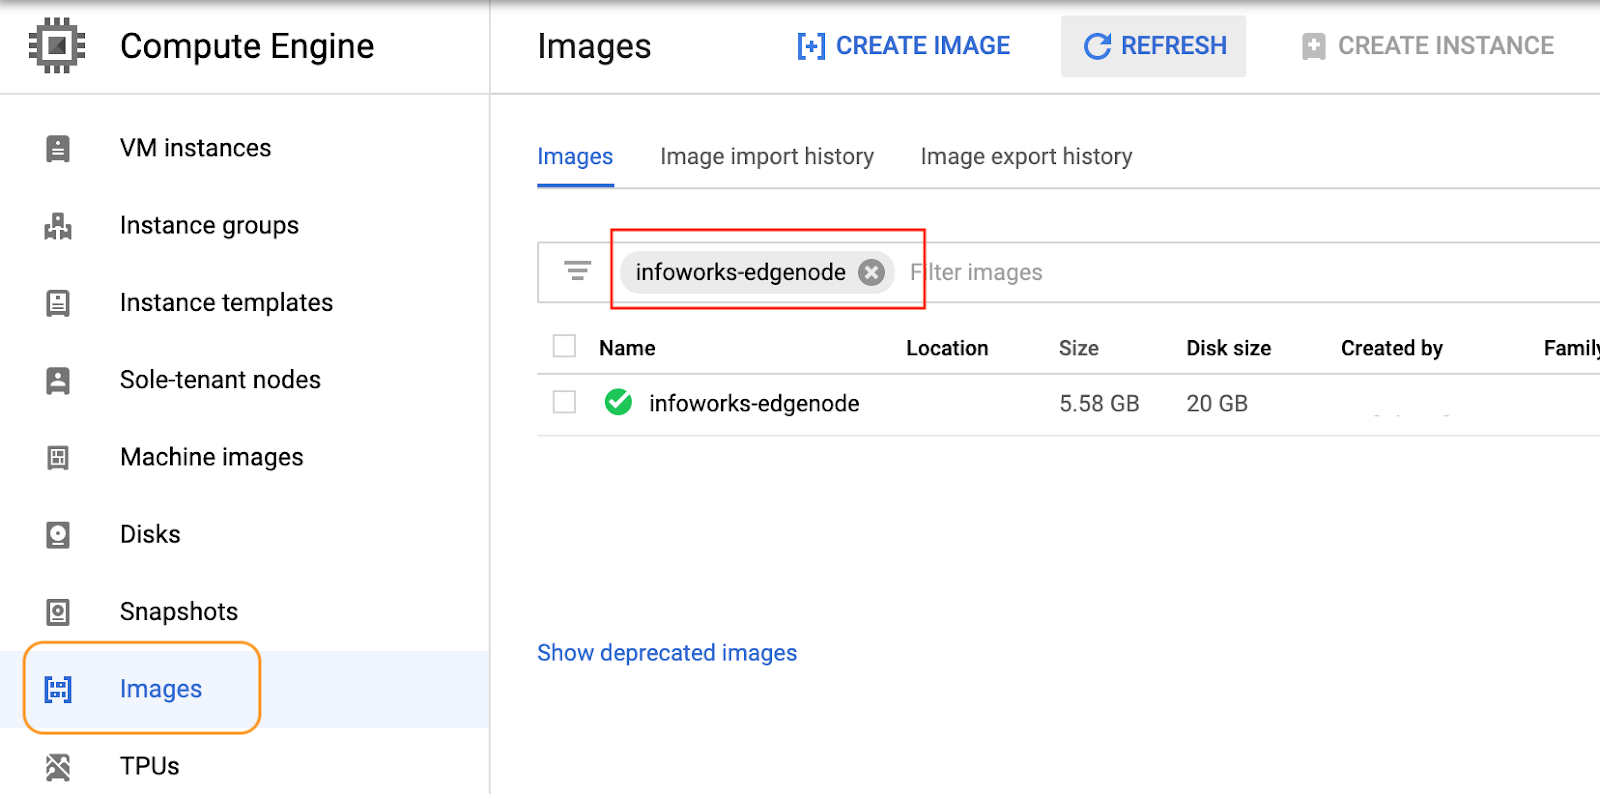
Wait for the image to create, select the image section, and filter the image name created above. The status will be displayed in green indicating that the image has been created.
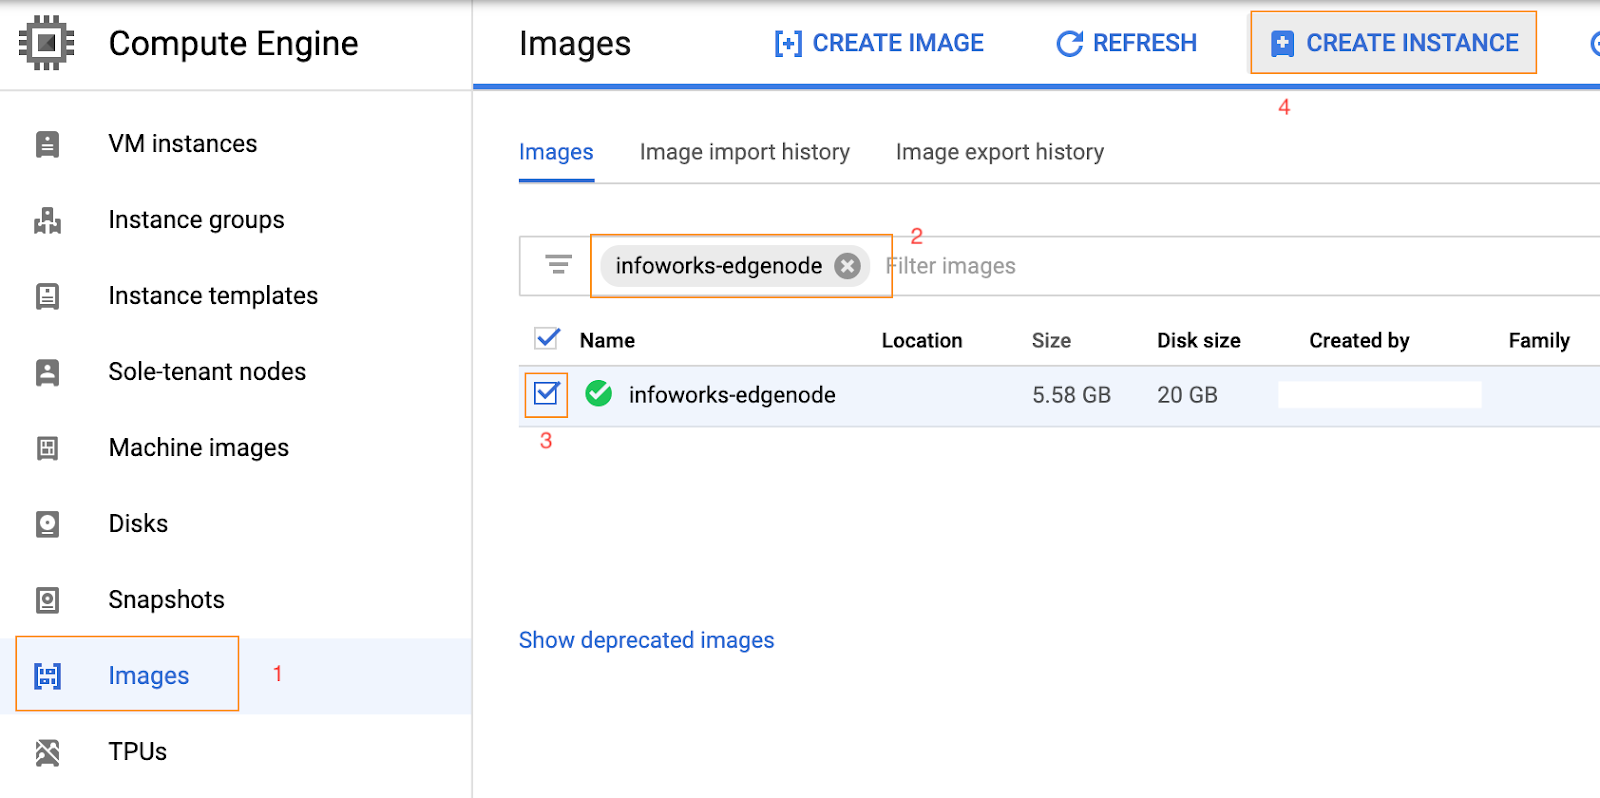
Proceed to launch the infoworks-edge-node from the image created.
4. Recreating Dataproc Cluster
Recreate the Dataproc Cluster as mentioned in Creating a Dataproc Cluster.
NOTE As per the procedure, create the Dataproc cluster twice. First, create a cluster to create an image of the worker node which is later used for creating the edge node. Once the image is created, drop the Dataproc cluster. Second, recreate the cluster and attach the edge node.
5. Attaching Infoworks Edge Node to Existing Cluster
Step 1: Ensure that the Dataproc cluster is up and running in the same region and project as mentioned in the above steps.
For example, assume the Dataproc cluster name as iw-dtp-example.
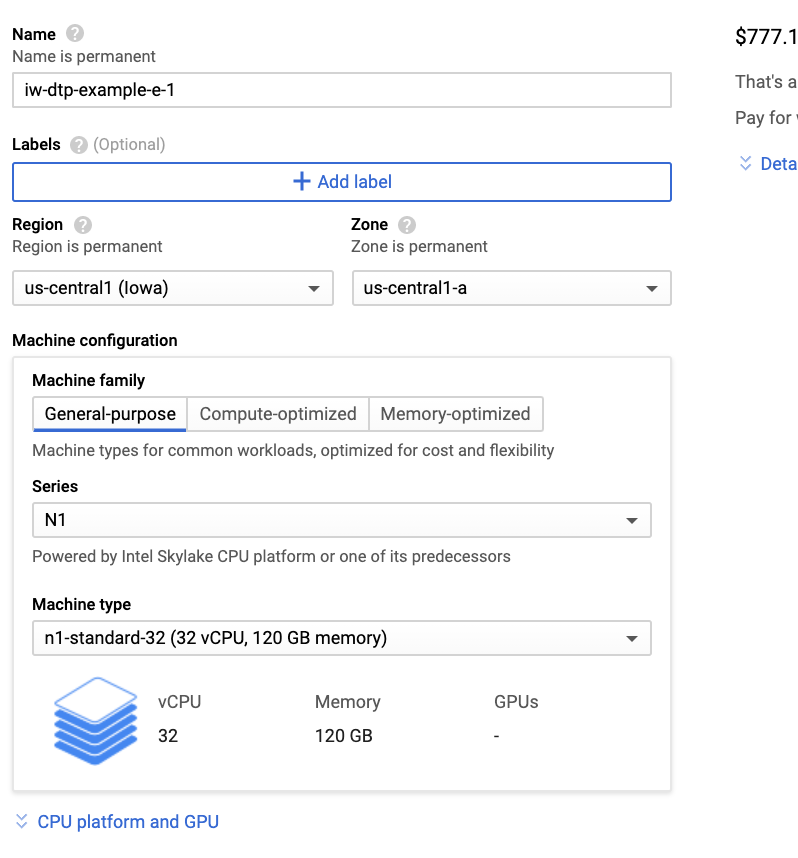
Step 2: Input the VM name with prefix ${dataproc_cluster_name}-e-1 and select the region and zone similar to the Dataproc cluster. Select the required edge node machine configuration.
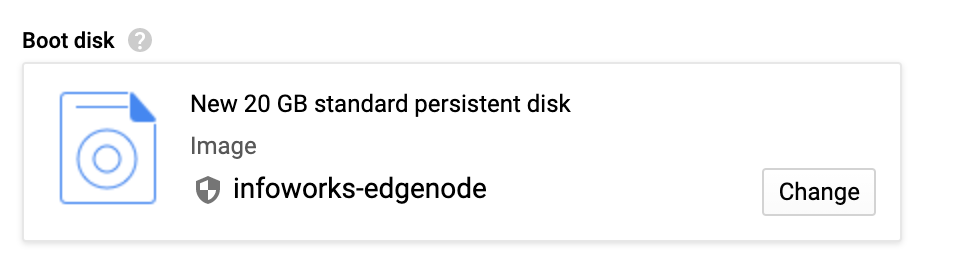
Step 3: Click Change to modify the boot disk size.
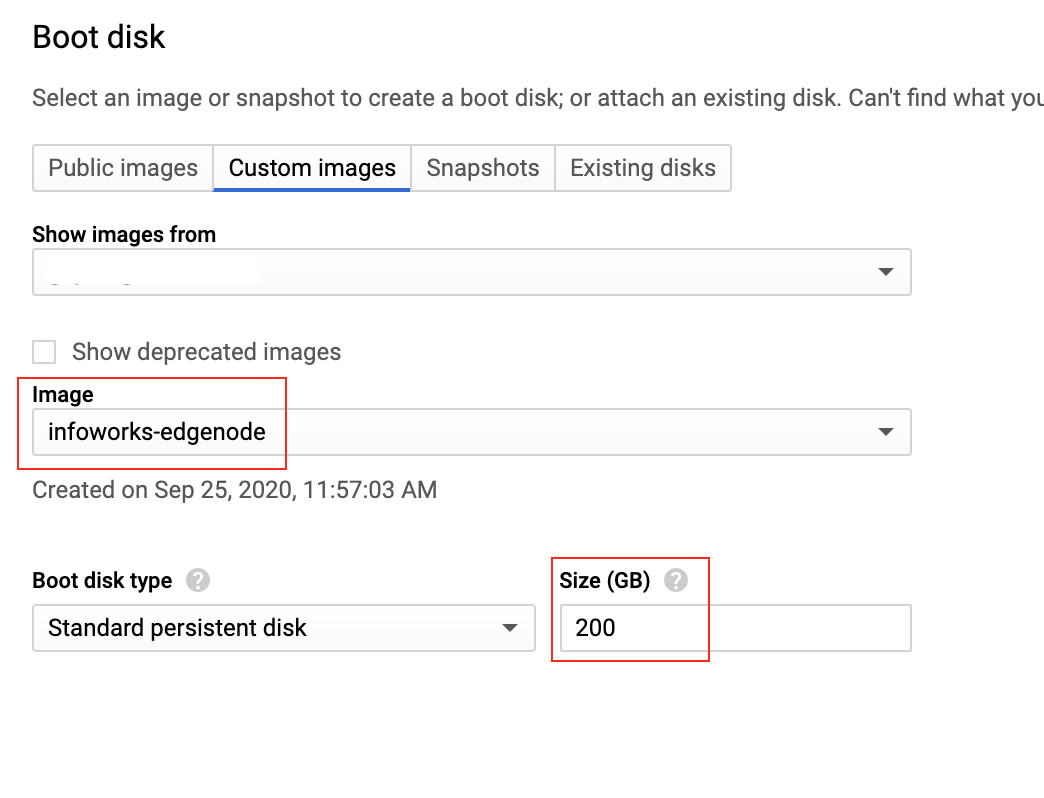
Step 4: Select the required project and image from the drop-down list and modify the size from 20 to 200 or the required disk size.
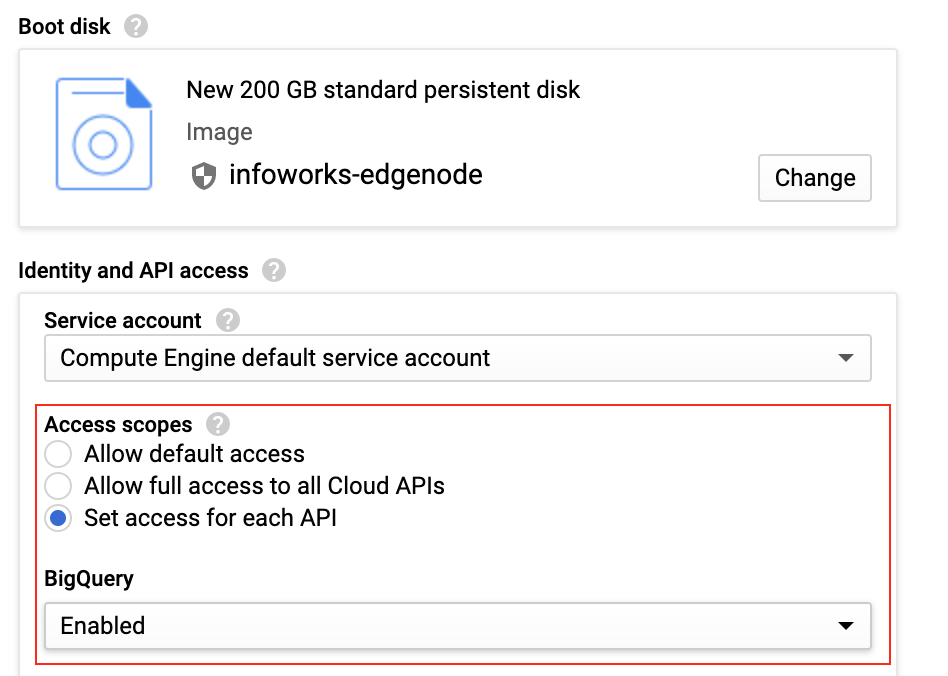
Step 5: Enable the identity and API access to the VM by enabling the services below.
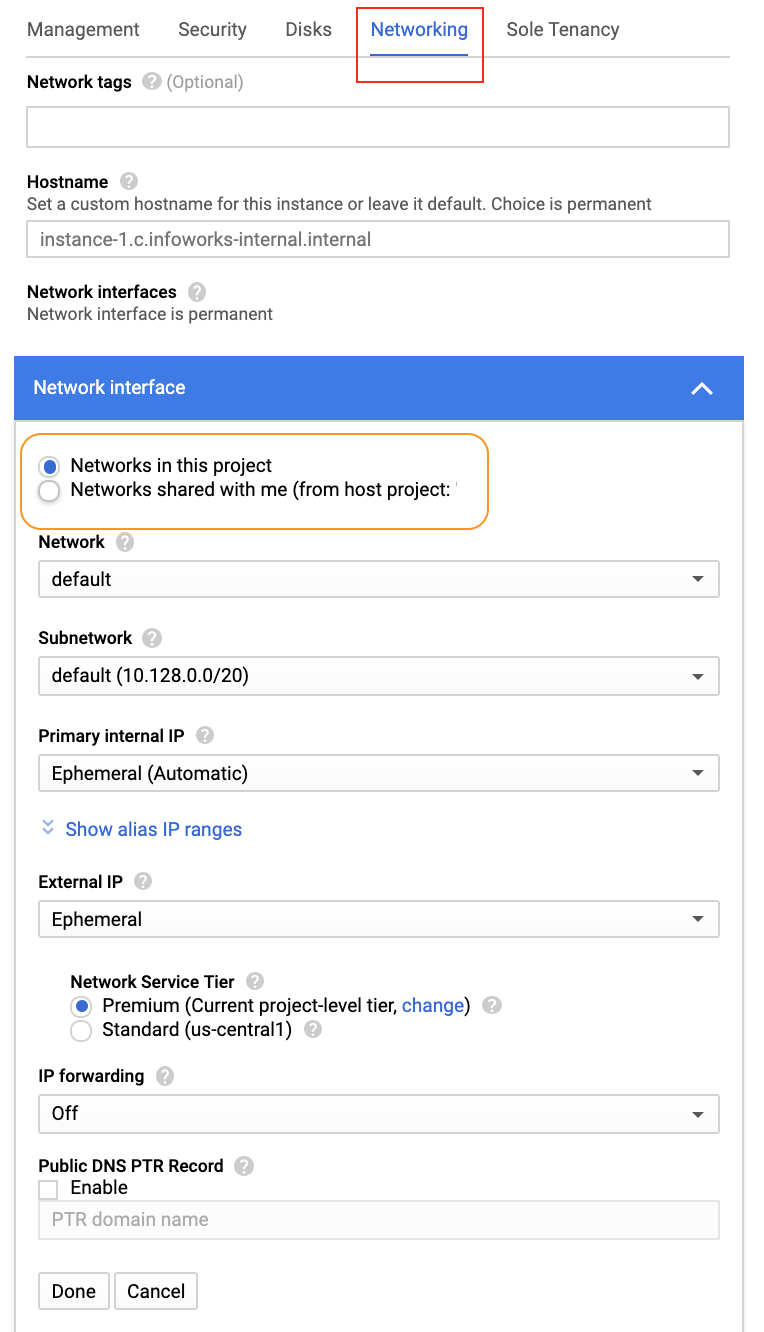
Step 6: Click the selected section below to modify the advanced network section.

Step 7: Select the networking section and select the desired network similar to the existing Dataproc cluster. Click Create to deploy the instance.
Prerequsite: Stop services in the Edge node VM before configure the VM to be part of Dataproc.
6. Configuring Edge Node to Communicate with Dataproc
Step 1: SSH to the VM from the Compute Engine dashboard or using gcloud.

Step 2: Ensure to have sudo access to run the script or switch to root user. Download the script from the URL.
Step 3: wget URL
Step 4: sudo bash dataproc-edgenode-init.sh
Step 5: Enter the Dataproc Cluster name: iw-dtp-example
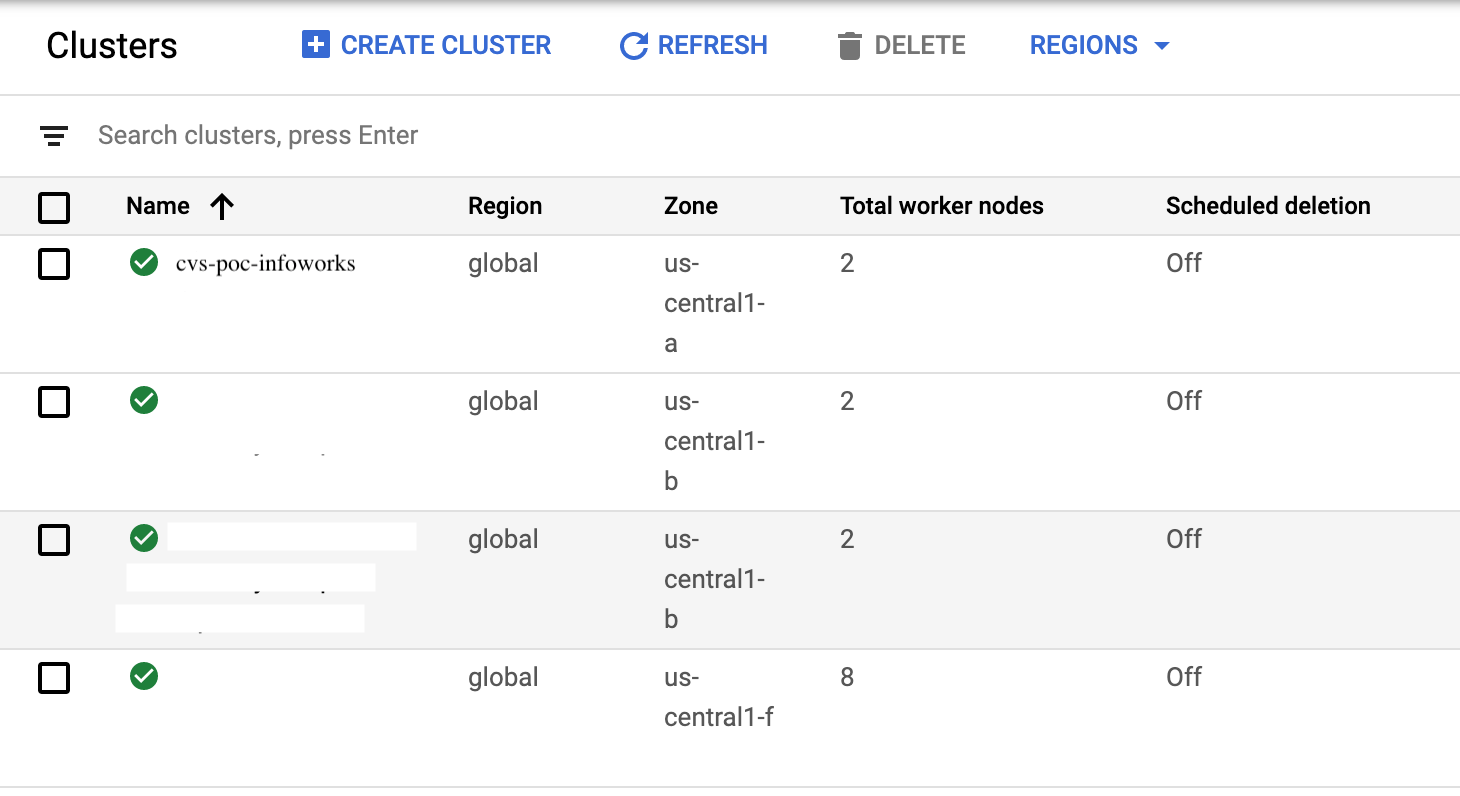
To verify the cluster name, login to Google cloud console and go to Main menu -> BigData -> Dataproc. Get the cluster name from the list of clusters.

7. Installing Infoworks DataFoundry on Edge Node
Step 1: Use a standalone Ubuntu 18.04 VM (N-1 family Standard) for cluster. Sizing for the master node and worker node will be decided after observing the workloads.
Node Type | Machine name | vCPUs | Memory (GB) | Disk |
|---|---|---|---|---|
Edge Node | n1-highmem-32 | 32 vcpu | 208 | 1 TB |
Master Node | TBD | TBD | TBD | TBD |
Worker Node | TBD | TBD | TBD | TBD |
Step 2: Check if the required ports are open (CHECK THE PORTS IN DETAILS).
Ports: Infoworks services use the ports 2999-3009, 5672, 7070, 7071, 7080, 7001, 7005, 7006, 8005, 27017, 3030, 3011, 3012, 23011, 23012 (if platform HA is enabled) on the Infoworks server. For details, see Specifications.
Step 3: Make infoworks user a passwordless sudo user.
Update sudoers file in
sudo vi /etc/sudoersUpdate the user privilege specification:
infoworks ALL=(ALL) NOPASSWD:ALLCheck if infoworks user is part of the admin group grep "admin" /etc/group
Add the user to the admin group
sudo adduser infoworks admin
Step 4: Create a directory for Infoworks installation in the /opt/infoworks folder and provide permissions to the infoworks folder.
chown -R infoworks:infoworks /opt/infoworks/chmod 775 /opt/infoworks/
Step 5: Login to the edge node and fetch the files from the GCS bucket that were copied from the Master node.
Copy SSL to /etc/hadoop/conf/ssl/* and keytab to /opt/infoworks.keytab
gsutil cp gs://bucket-dataproc-bucket/infoworks.keytabChange the ownership of the file.
chown infoworks:infoworks infoworks.keytabkinit -kt infoworks.keytab infoworks@<<principal>>
Step 6: SCP deploy_$version.tar.gz and infoworks_$version.tar.gz and install Infoworks.
Deploy file download link: https://infoworks-setup.s3.amazonaws.com/3.3/deploy_3.3.2.tar.gz.
Infoworks download link: https://infoworks-setup.s3.amazonaws.com/3.3/infoworks-3.3.2-gcp.tar.gz.
Scp the deploy and infoworks tar files.
tar -xf deploy_3.3.2.tar.gz -C /opttar -xf infoworks-3.3.2-gcp.tar.gz -C /optchown -R infoworks:infoworks /opt/iw-installerchown -R infoworks:infoworks /opt/infoworkscd iw-installer
Run ./configure_install.sh and enter the following parameters for installation.
Is hdp installed under /usr/hdp? y or n
Ans - y
Enter the user name for the user with sudo privilege. Press enter to use current user. For example, infoworks (automatically recognises the user).
Using current user: infoworks
Enter the group name to use for current user. Press enter to use current group. For example, infoworks (automatically recognises the user).
Using current group: infoworks
Enter the path of directory where Infoworks must be installed. For example, /opt/infoworks.
Enter the path of directory for the home folder for Infoworks artifacts: (Infoworks HDFS home). For example, /user/infoworks.
Enter the Hive schema to store the Infoworks sample data: For example,
iw_df_workspaceEnter the host name/IP which will be used when accessing the Infoworks UI via the browser (when in doubt, use the fqdn of the Infoworks host). For example,
iw-dtp-example-e-1.c.iw-gcp-eng-dev.internalEnter the HiveServer2 thrift server hostname. This hostname must have a DNS/hosts file entry for resolution. hive.server2.transport.mode must be set to binary mode on this server and the HiveServer2 thrift must be listening on port 10000. For example, hive2://iw-dtp-example-m-0.c.iw-gcp-eng-dev.internal:10000
Enter the username which will be used by Infoworks for accessing Hive. This username must belong to a group present in hadoop.proxyuser.hive.groups. For example, infoworks
Enter the password for the username infoworks for accessing hive: ### (Do not type the password simply hit enter.)
Does /opt/infoworks already have infoworks directories extracted? (Y/N)
If N, infoworks package will be downloaded and extracted to /opt/infoworks
If Y, this step will be skipped
Enter Y, since the infoworks package is already extracted.
./install.sh -v 3.3.2-gcp
Step 7: Hive Principals
The Kerberos Hive principal will be used to update the /opt/infoworks/conf/conf.properties file. The hive principal is obtained from the hive-site.xml file.
#iw_security_kerberos_hiveserver_principal=hive/HIVEHOST@DOMAIN.COM
Step 8: Hive JDBC URL
Add the Hive JDBC URL in the /opt/infoworks/conf/conf.properties file.
Step 9: Add the security settings in the /opt/infoworks/conf/conf.properties file.
Step 10: Modify the following in the /opt/infoworks/conf/conf.properties file:
Modify the
iw_security_kerberos_*properties with the respective values.Add
SUPPORT_RESERVED_KEYWORDS=falseAdd
modified_time_as_cksum=trueAdd
SKIP_DIST_CACHE_SQOOP=true
Assumptions/Call Outs
The latest Interactive guides do not work without internet connectivity.
Block Egress traffic through Firewall rule for the subnet.
Dataproc requires an internet connection for the cluster to be deployed. It fails in-case of traffic blocks.
Infoworks jobs fail while uploading data to GCS bucket.