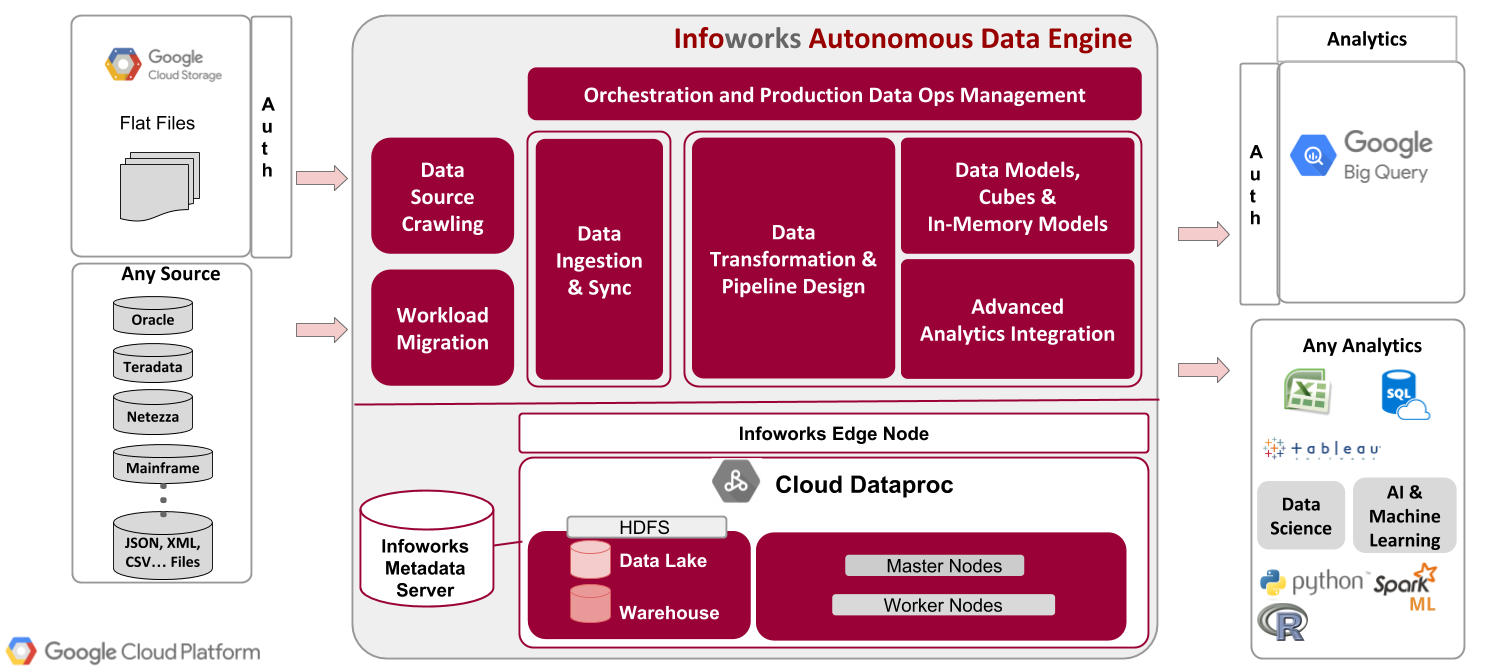
Following are the prerequisites to support GCP Dataproc 1.3 secured ephemeral environment to work with the Google Cloud Marketplace solution for Infoworks DataFoundry:
Steps |
|---|
Step 1: A Google account is required to work with GCP. Sign up for a Google account, if you do not have one. |
Step 2: Log on to the Google Cloud Platform Console, and create a new project. |
Step 3: Enable your billing account. |
Step 4: Ensure that the Quota limit for CPU cores is greater than 72 for the region that Infoworks is spinning up. |
Step 5: Enable API for the DataProc, Compute Engine, Deployment Manager and Runtime Configuration services. |
**NOTE :**Infoworks DataFoundry supports both dedicated and shared VPC networks.You must create a firewall rule to allow all ingress traffic within the VPC network.
All parameters marked as bold must be replaced with the required value by the user.
Step 6: Install Google Cloud SDK for your environment to deploy Infoworks ephemeral Dataproc from Google Marketplace. For more details on environment specific instructions to install Google Cloud SDK , see Installing Google Cloud SDK. |
Step 7: Run the following commands to create a Key and Keyring in Key Management Service (KMS) for GCP. gcloud kms keyrings create keyring_name --location global gcloud kms keys create <key_name> --location global --keyring <keyring_name> --purpose encryption This is a one-time setup to create keys for encryption of passwords. NOTE: Ensure that the keyring created must have two different user permissions. For detailed steps on setting up user permissions, see Setting Up Keyring User Permissions. |
Step 8: Run the following command to list the keyring, and save the output to use later: gcloud kms keys list --location global --keyring < keyring_name> |
Step 9: Copy the output which is displayed in the following format, and save the output to use later. projects/<project_id>/locations/global/keyRings/<keyring_name>/cryptoKeys/<key_name> |
Step 10: Encrypt passwords using the KMS Key Ring using the following steps:
echo "[MetastoreRoot_Password]"| gcloud kms encrypt --location global --keyring [keyring_name] --key [key_name] --plaintext-file - --ciphertext-file [MetastoreROOT.encrypted] echo "[MetastoreHive_Password]"| gcloud kms encrypt --location global --keyring [keyring_name] --key [key_name] --plaintext-file - --ciphertext-file [MetastoreHive.encrypted] Run the following command, only if you want the deployment to be secure: echo "[KRBROOT_Password]"| gcloud kms encrypt --location global --keyring [keyring_name] --key [key_name] --plaintext-file ---ciphertext-file [KRBROOT.encrypted] NOTE: The passwords used in the KRBROOT.encrypted, MetastoreROOT.encrypted,and MetastoreHive.encrypted files, placed into the GCS bucket must be the exact same password used by the root user of the MySQL metadata environment. |
Step 11: Create a GCP storage bucket using the following command: gsutil mb -p <project_id> -c standard -l us -b on gs://< bucket_name >/ |
Step 12: Copy the encrypted password to the newly created GCP storage bucket using the following commands: Step 12.a: gsutil cp **KRBROOT.**encrypted gs://<bucket-name>/KRBROOT.encrypted (NOTE: Perform this step only if you want the deployment to be secure). Step 12.b: gsutil cp **MetastoreROOT.**encrypted gs://<bucket-name>/MetastoreROOT.encrypted Step 12.c: gsutil cp MetastoreHive.encrypted gs://<bucket-name>/MetastoreHive.encrypted |
NOTE: Kerberos root and KDC passwords must be same.
Step 13. Create a Cloud SQL Server: The prerequisites are as follows:
Step 13.1: Enable the Cloud SQL Admin API and Cloud SQL.
Step 13.2: Navigate to Cloud SQL.
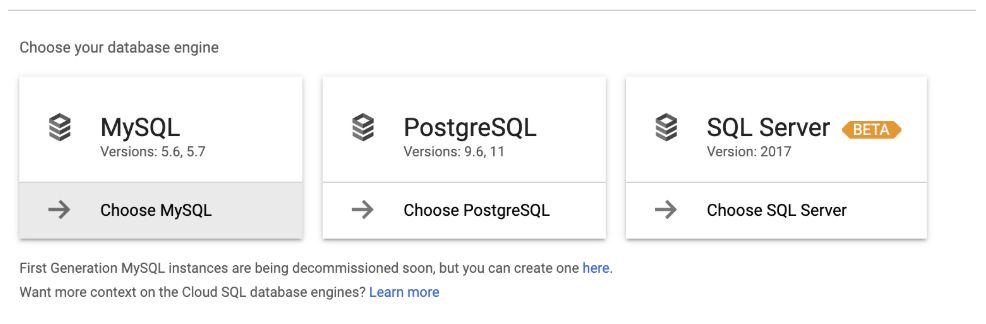
Step 13.3: Select Create Instance > Choose MySQL.
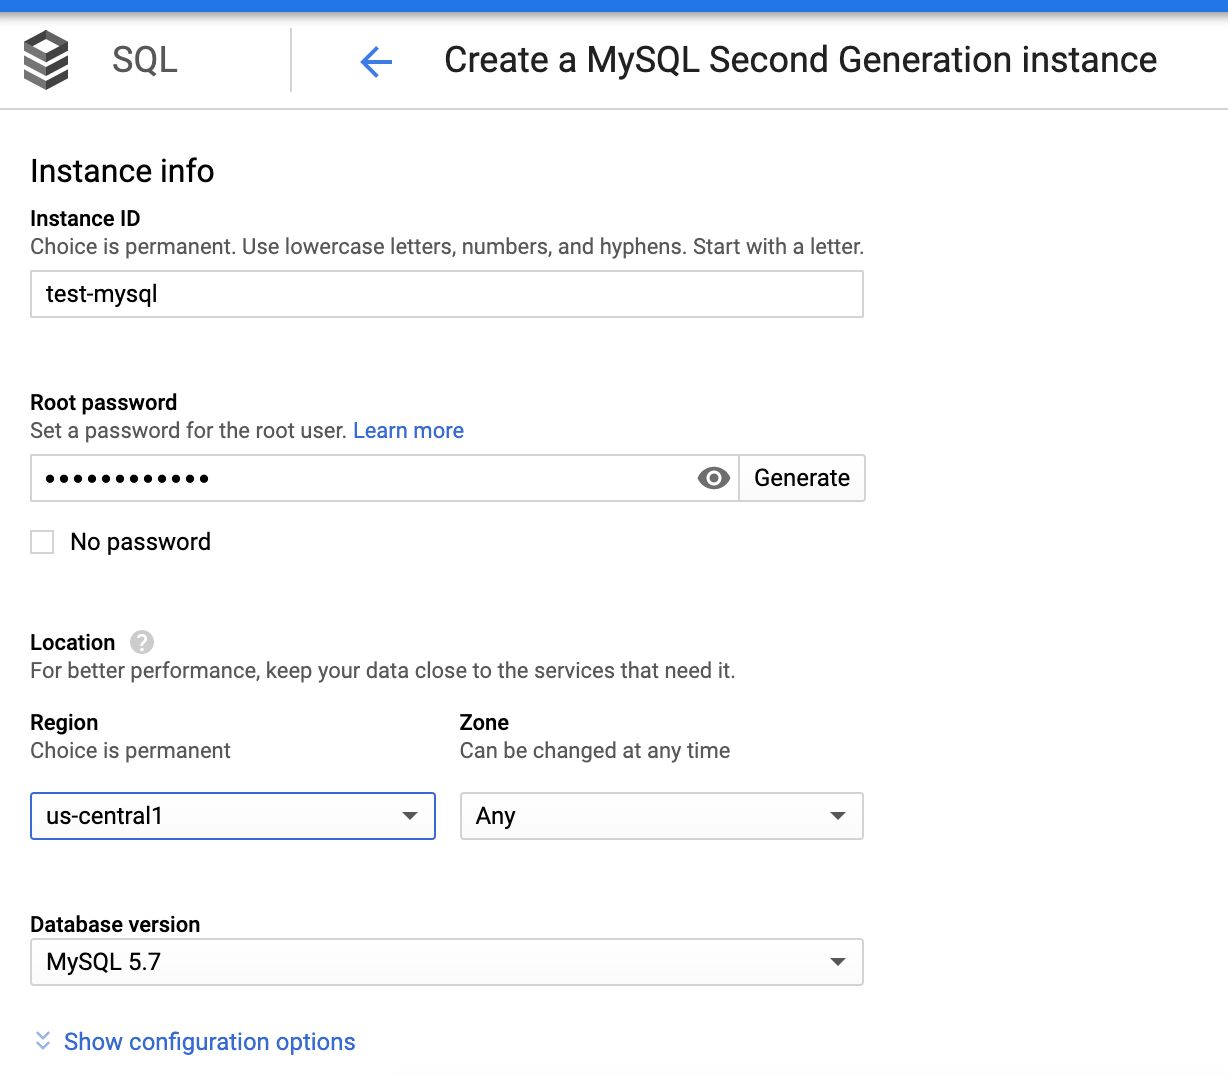
Step 13.4: Enter the following data: Instance ID, password (generated in the first section), required region, zone with respect to the Dataproc cluster, and so on. This creates the MySQL instance.
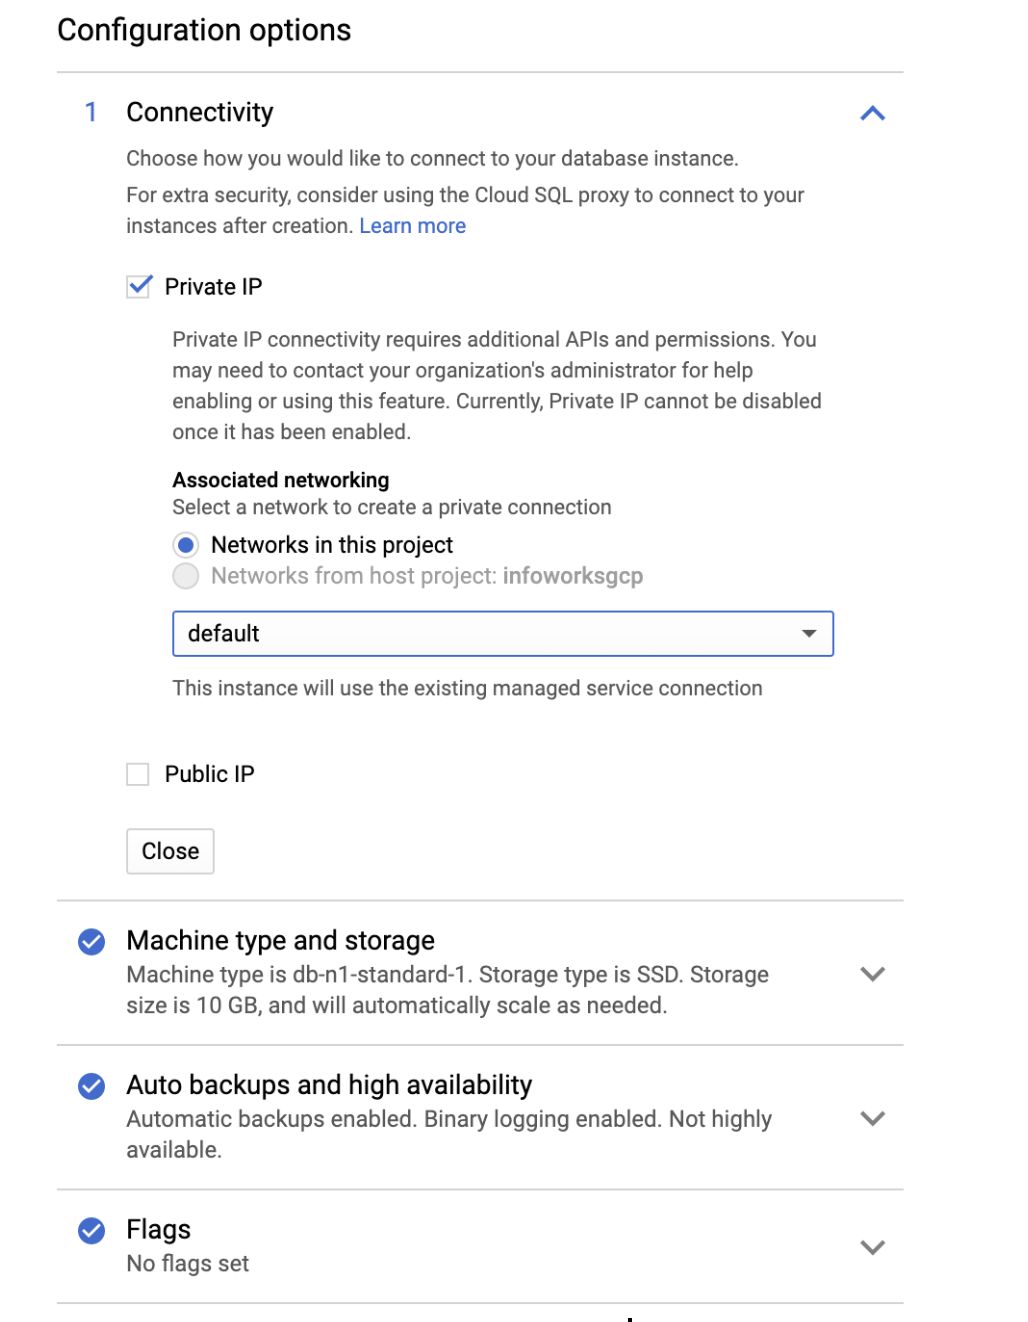
Step 13.5: In the Configuration options tab, check Private IP to connect privately.
The following table describes the parameters and their descriptions
Field | Description |
|---|---|
Instance ID | Name of the Metastore instance. This is a one-time choice. Syntax: Start with n alphabet. Use lowercase alphabet, numbers, and hyphens. |
Root password | Allows you to generate a user defined password for the root user. |
Region | Same Region as that of the Dataproc Cluster |
Zone | Same zone as that of the Dataproc Cluster |
Database version | MySQL 5.7 |
CONFIGURATION OPTIONS | |
Connectivity | Allows you to choose how you want connect to your database instance. |
Private IP | Allows you to connect using Private access. This requires Cloud SQL Admin API enabled. Currently, Private IP cannot be disabled, if it is once enabled. This is the recommended setup. |
Public IP | Allows you to connect SQL using Public IP. This authorizes external networks to connect to your Cloud SQL instance. |
Machine type and storage | Allows you to select your machine type and storage. For better performance, choose a machine type with sufficient memory to support the largest database table in your system. |
Auto backups and high availability | Supports scheduling automatic backup of your database, and enabling high availability. For development environments, high availability is optional. For production environments, schedule the auto backup span and enable high availability. |
Flags | Database Flags. This is an optional field. |
Maintenance | Supports maintenance. Maintenance typically takes place only once every few months. This requires the SQL instance to be restarted while updates are made, and thus disrupts service for a short time. This is an optional field. |
Labels | Labels/Tags for the Cloud SQL. This is an optional field. |
Setting Up Keyring User Permissions
Follow the steps below to set up user permissions:
Step 1: In the Google Cloud Console, select your required project.
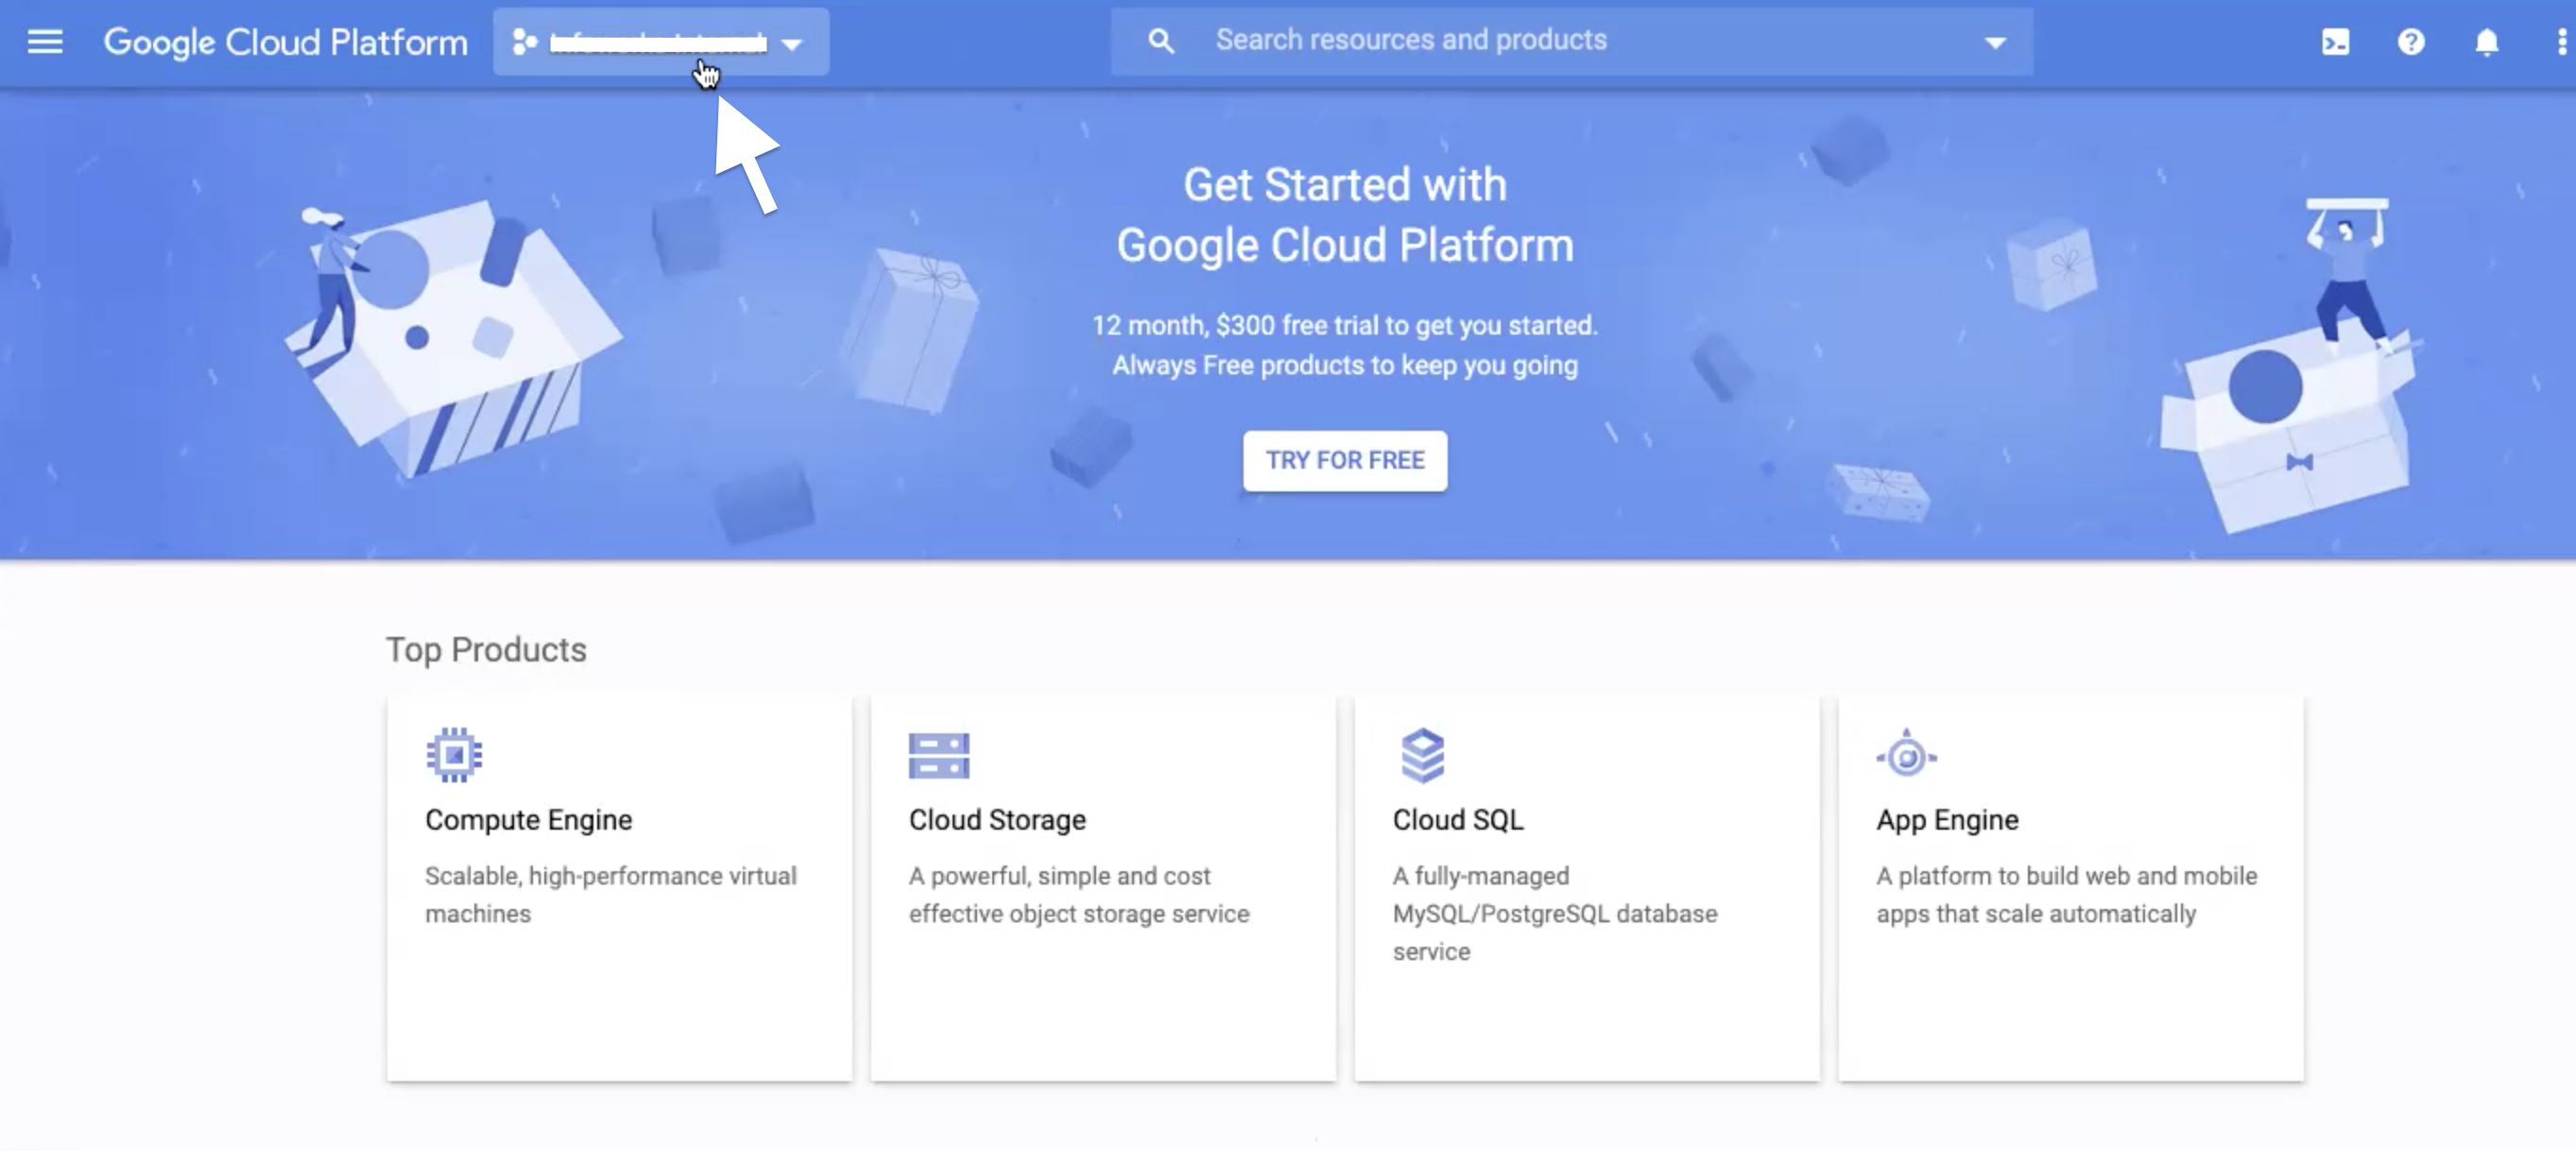
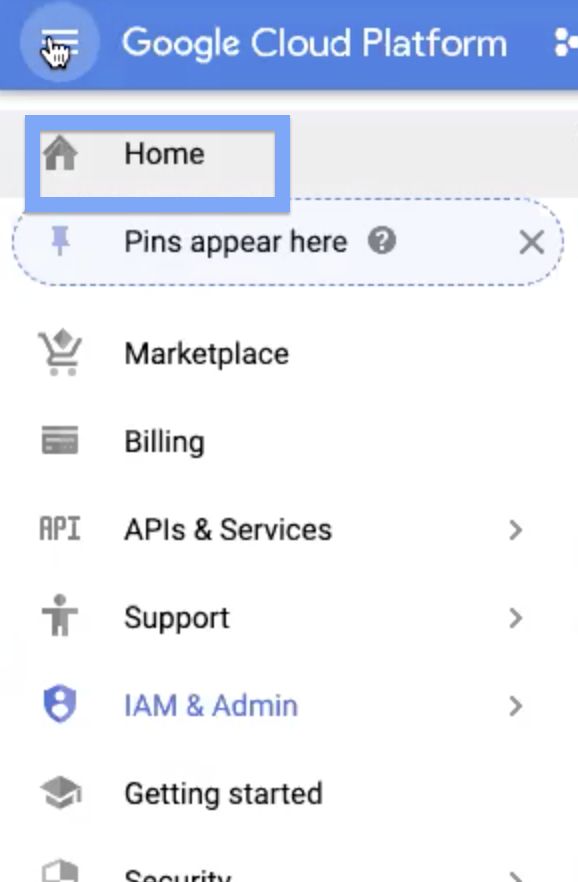
Step 2: Click the Navigation menu on the top left corner, and click Home.
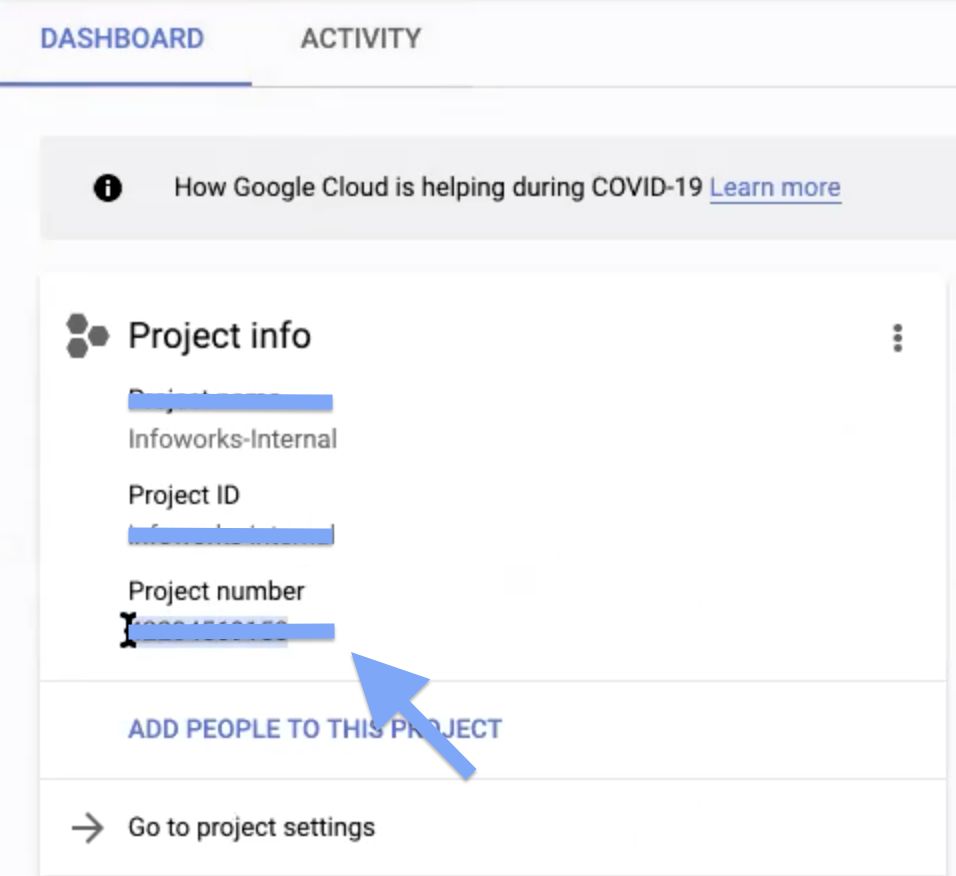
Step 3: In the Dashboard Tab, copy the Project number, and save it for later.
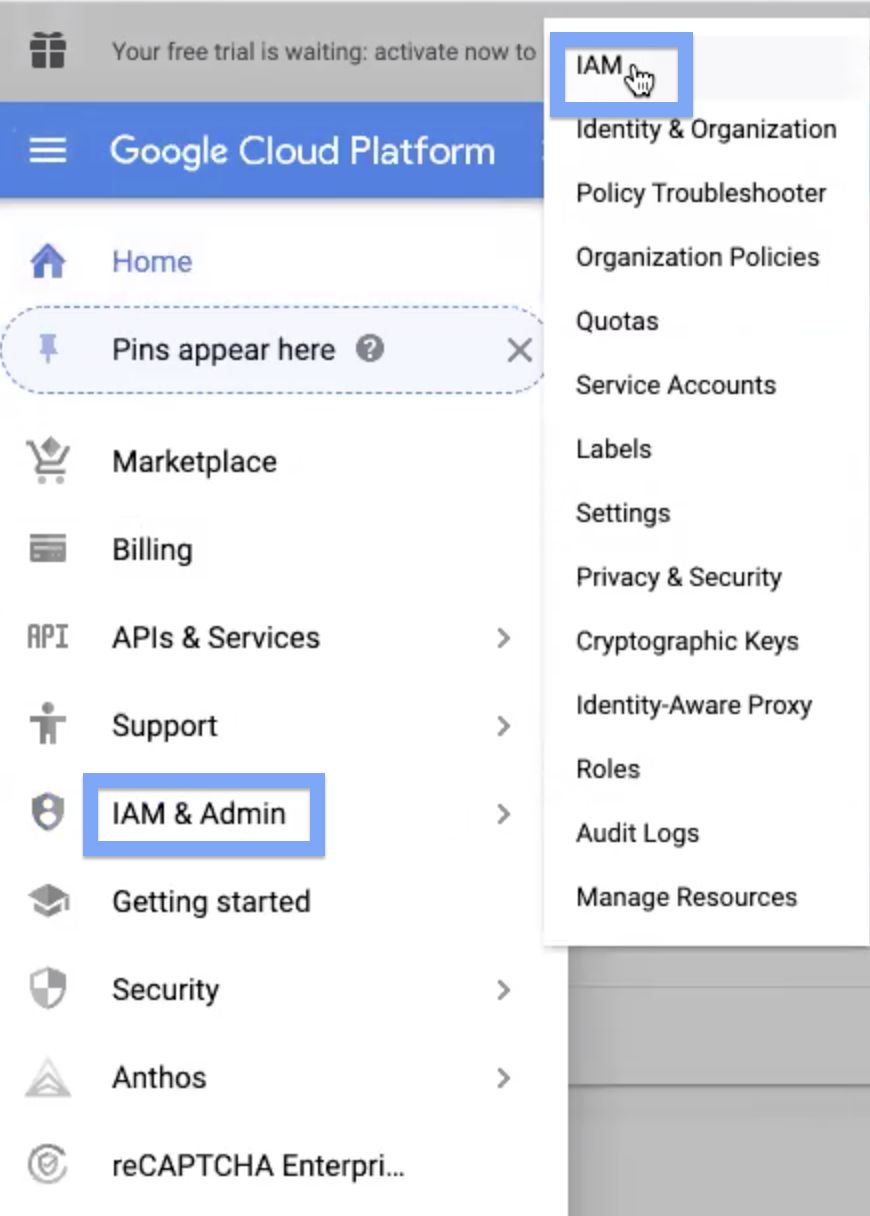
Step 4: Navigate to Navigation menu > IAM & Admin > IAM.
List of service account names are displayed. Copy the two names which are in the following syntaxes, and save it for later use:
compute@developer.gserviceaccount.com and @cloudservices.gserviceaccount.com.
NOTE: is the value copied in Step 3 of the Setting Up Keyring User Permissions section.
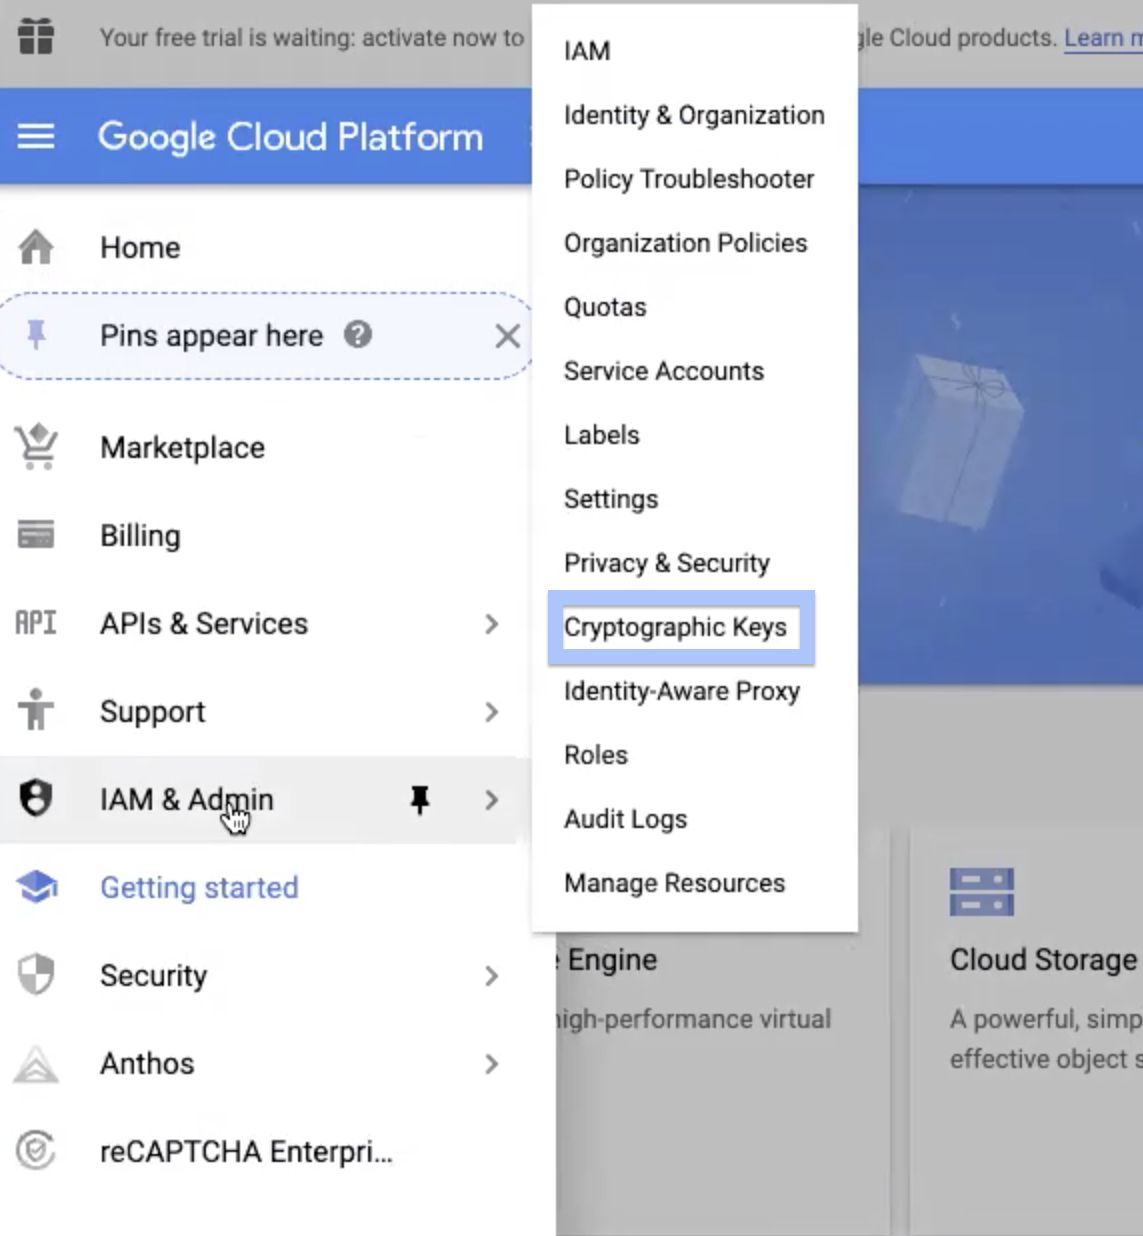
Step 6: Navigate to Navigation menu > IAM & Admin > Cryptographic Keys.
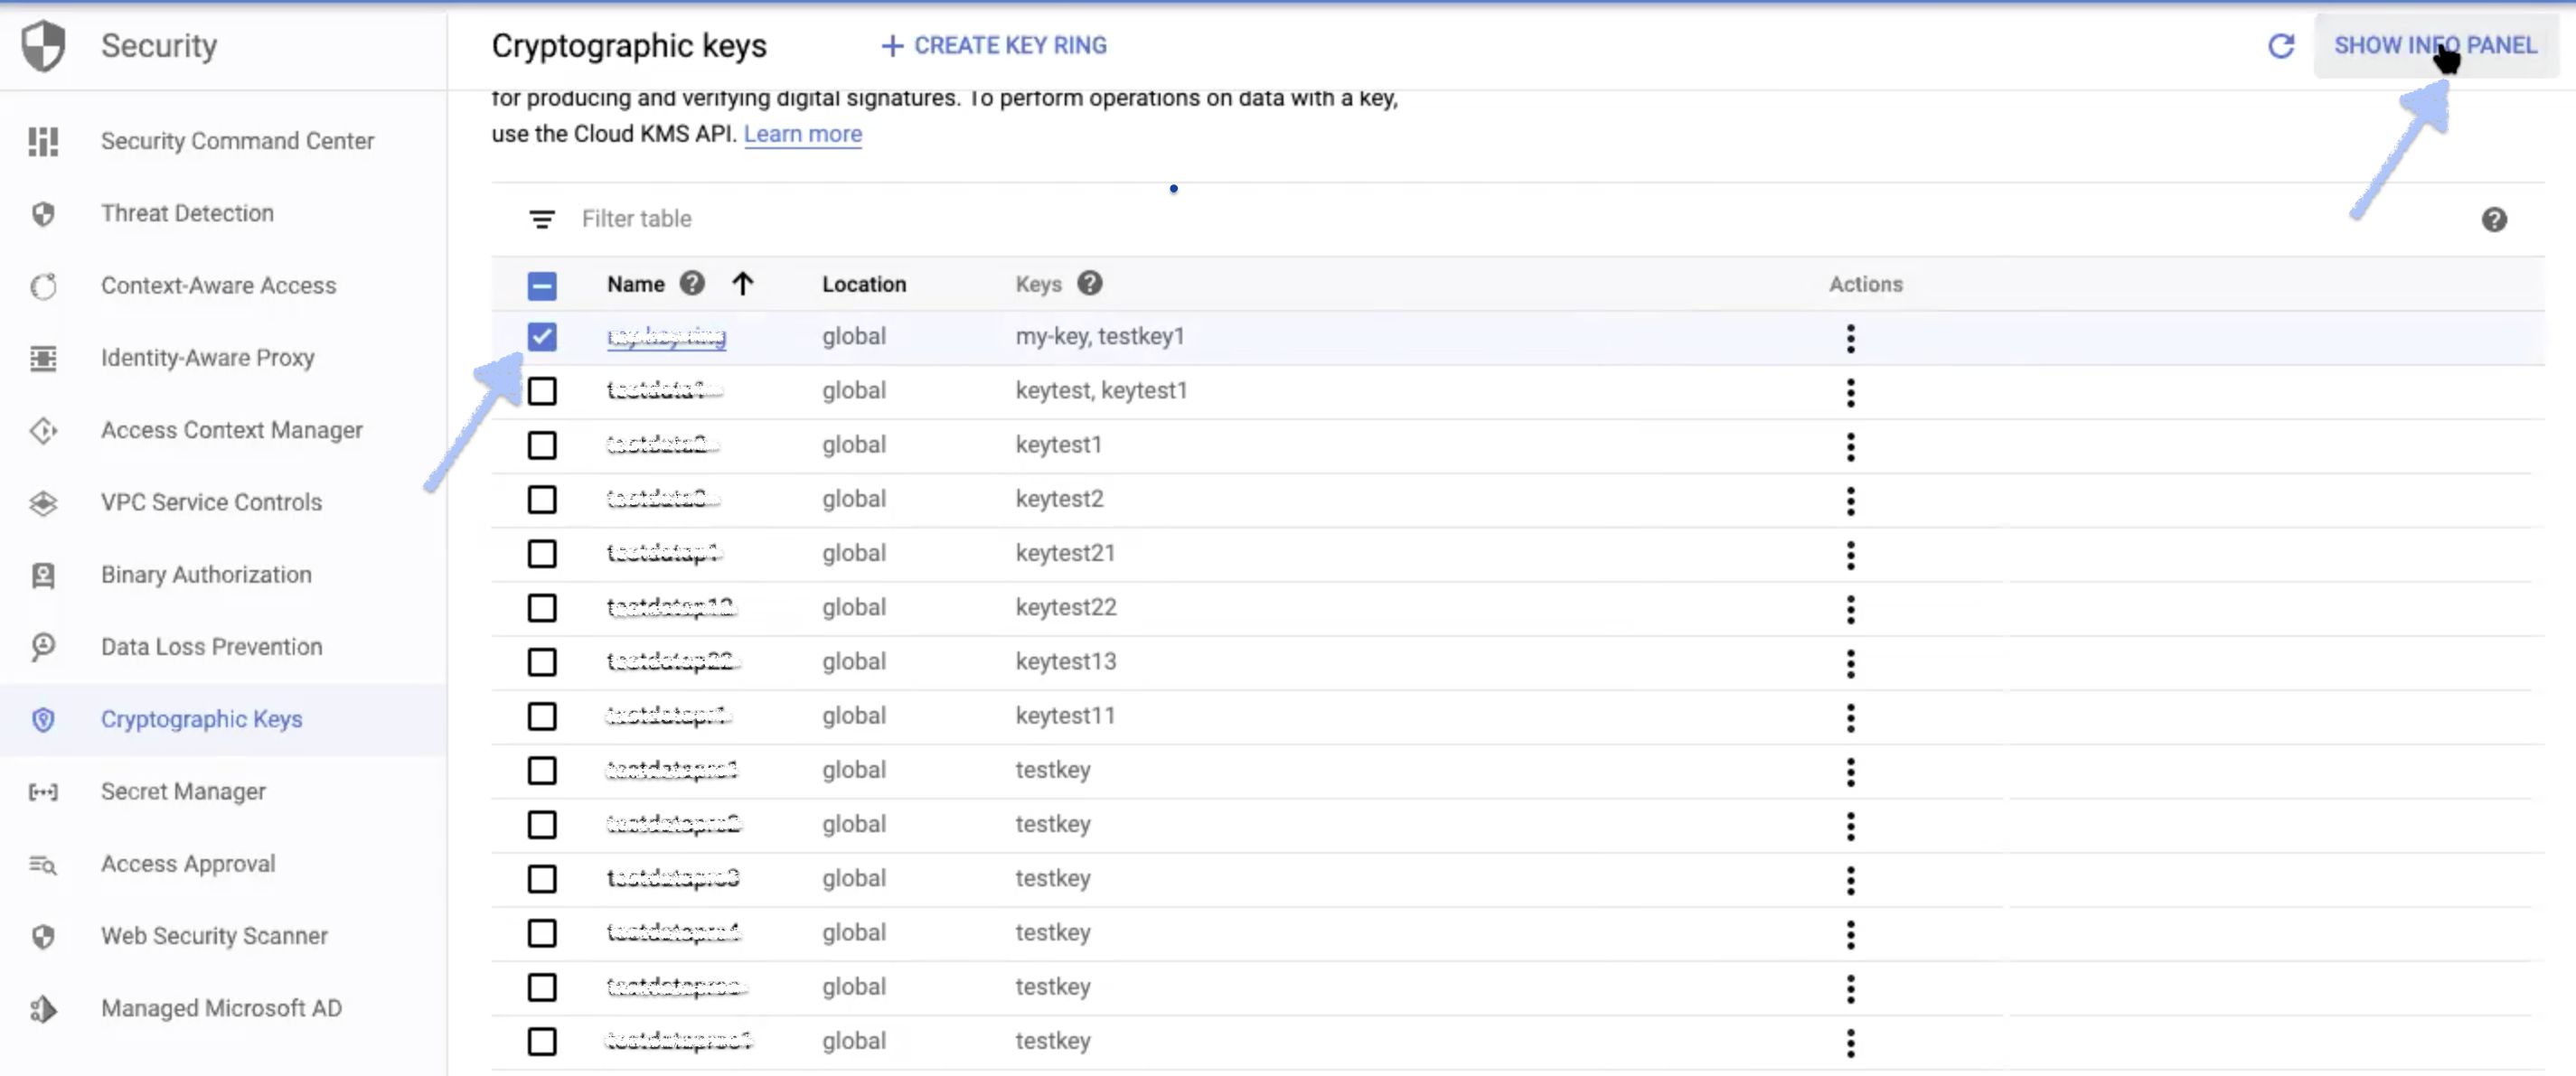
Step 7: In the list of keyring names, select the check box corresponding to the keyring you created. If the information panel is hidden, click SHOW INFO PANEL button. This displays the information panel of the corresponding keyring you selected.
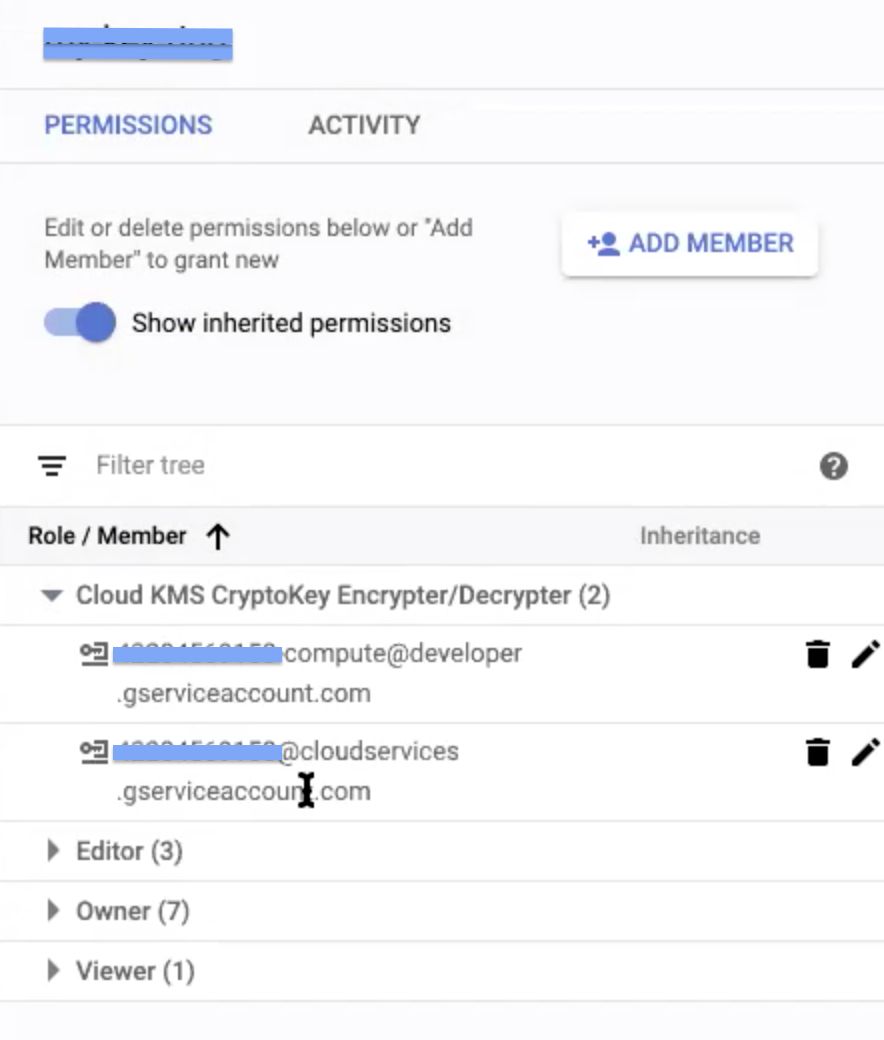
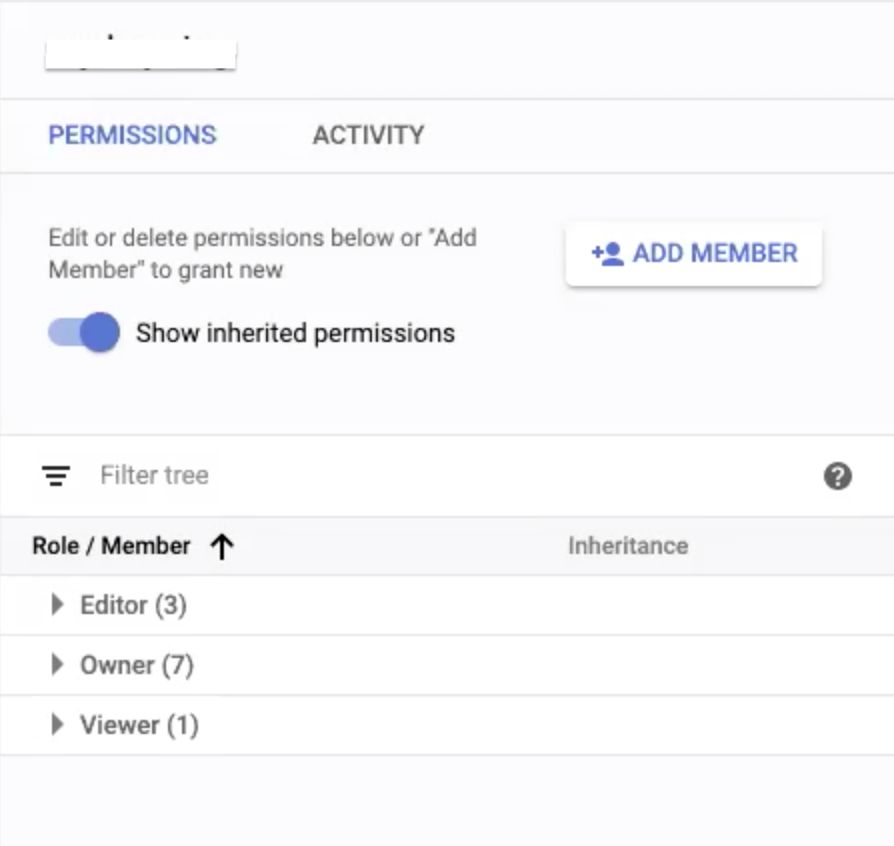
Step 8: The following Information panel is displayed. Click ADD MEMBER button.
Step 9: In the New members field of the tab that displays, paste the service account names copied in Step 5 of the Setting Up Keyring User Permissions section. Ensure that, when you paste these names, select the items from the drop-down that appears to avoid errors.
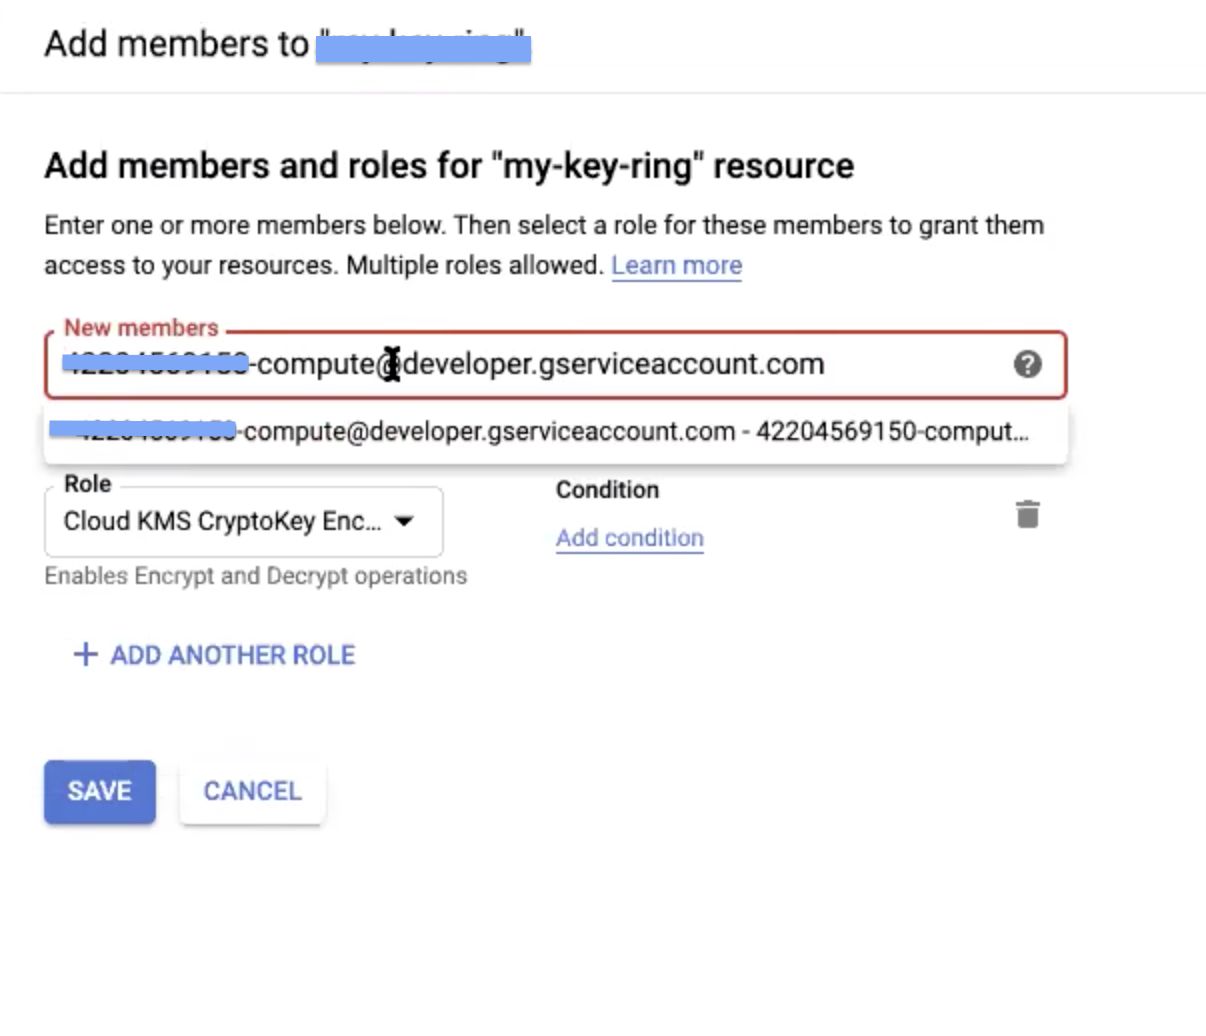
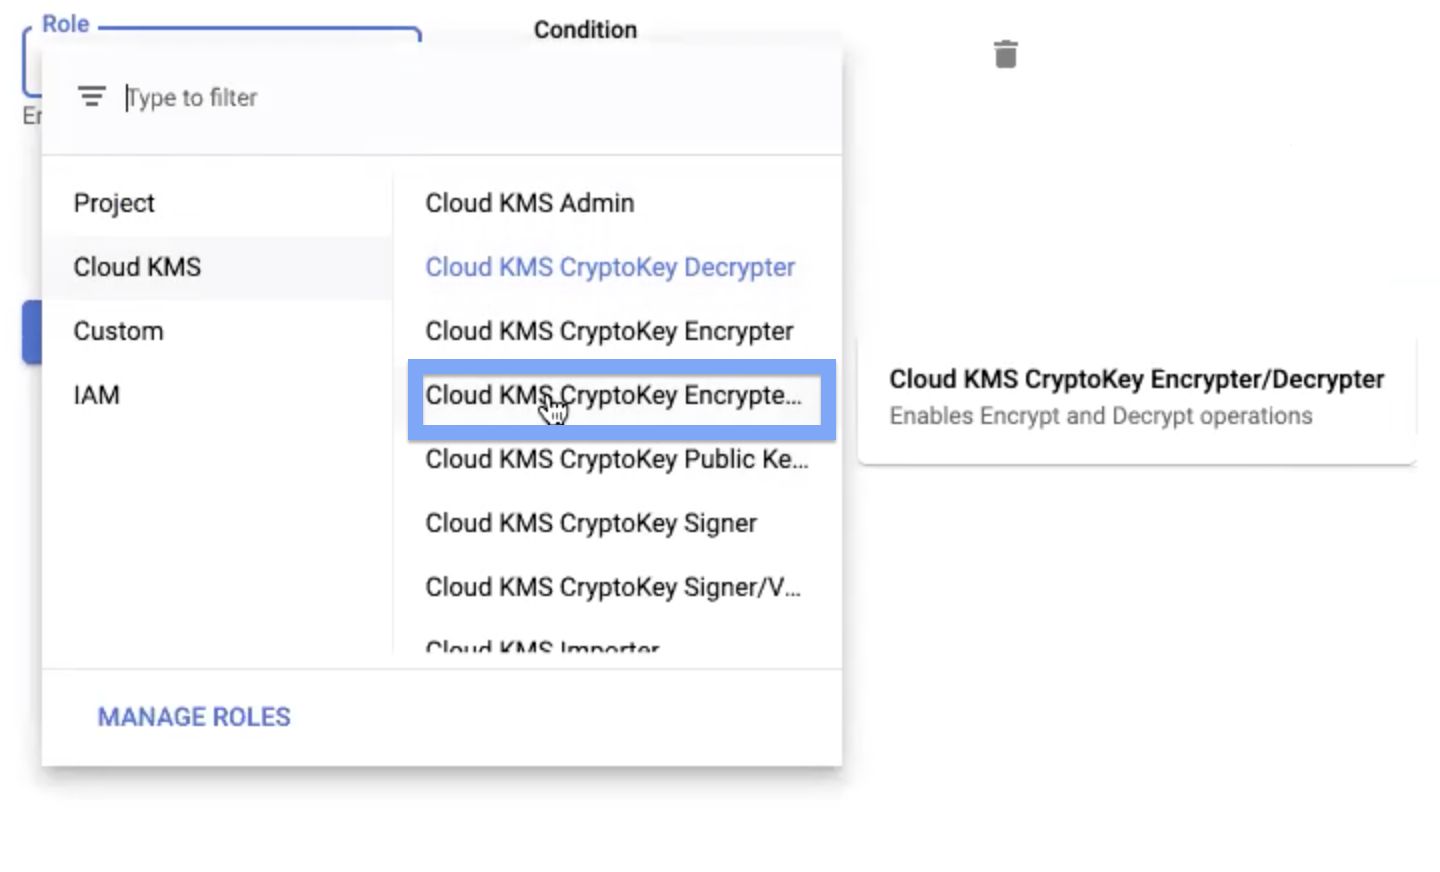
After you place both the service account names in the New Members field, select the Cloud KMS CryptoKey Encrypter/Decrypter option in the Role field.
Step 10: Click Save, to save your changes.
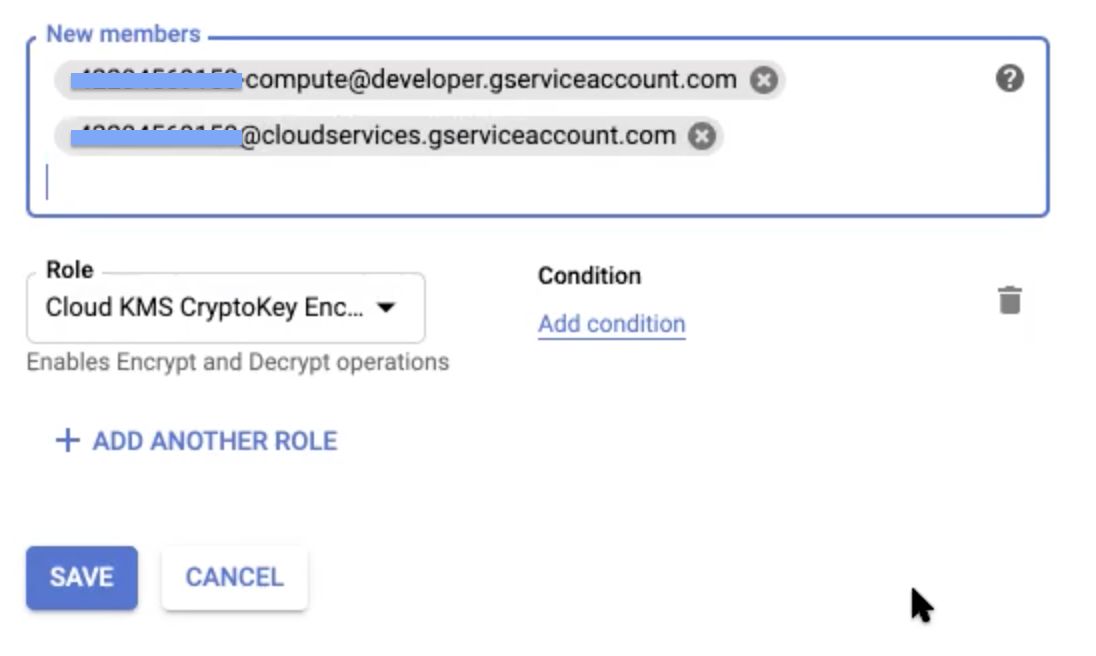
This displays the two new service account names added in the information panel.