Importing SQL
NOTE: This feature will be available based on your license.
The SQL Import feature is used to automatically build reliable, scalable and efficient pipelines. The feature is designed to make it easier to build large scale, real-time data pipelines by standardizing how you modify and align the ingested sources and tables.
You can create complex pipelines with just a few clicks by periodically executing an SQL query and creating an output record for each table/row in the result set.
Following are the steps to build an ETL pipeline:
- Click the Domains menu.
- Click the required domain in which you want to create an ETL pipeline.
- Click the Pipelines icon in the side bar.
- Click New Pipeline, enter the required values and click Save.
- Click the newly created pipeline to open the blank Design.
- Click the Settings icon.
- On the Settings page, scroll down to the SQL Import section.

- Select the following:
- SQL Dialect: The SQL compatibility mode based on query type. For example, select Oracle to import Oracle SQL queries.
- Quoted Identifier: the syntax for quoting identifiers in SQL statements.
- Click Choose A File and select the required SQL file. Following is an example of SQL file content with the Filter criteria, without any schema specified.
SELECT shipvia FROM ORDERS WHERE 2 AND orderid is not nullFollowing shows the sample SQL file content with the schema name (SALES_DB2).
SELECT DISTINCT count(shipvia) as count_shipvia, shipvia + 10 FROM SALES_DB2.ORDERS- In the Table in Data Lake drop-down list, select the table that has the same columns as the ones in the uploaded file.
- At this point, if you want to import a different SQL file, click Return to Pipeline Settings. To proceed with the same SQL file, click Next: Import Workload.
- After the successful import of the SQL file, return to pipeline editor page, edit the target configuration, and build the pipeline.
Limitation
- Usage of the keyword QUALIFY is not supported.
- SQL queries that can not be parsed using Calcite parser are not supported.
- Following queries are supported by Calcite but not by SQL Import:
| Query type | Example |
|---|---|
| Nested Select in column list. | Select a, (select b from table1) from table2 |
| SQL query which includes with operator. | with T1 as (select * from table1), T2 as (select * from table2) Select * from T1 inner join T2 on T1.a = T2.a |
| Combination of multiple EXISTS/NOT EXISTS or combination of exists/not exists with other filter conditions (like, a >10) in where clause. | Select * from table1 where a > 10 and exists (select * from table2 t2 where t1.a = t2.a) |
| Combination of multiple IN/NOT IN or combination of exists/not exists with other filter conditions (like a >10) in where clause. | Select * from table1 where a > 10 and b IN (select * from table2 t2 where t1.a = t2.a) |
| Subqueries in having clause | Select a,sum(b) from table1 group by a Having sum(b) > (select count(*) from table2) |
Pipeline Configuration Migration
For a successful pipeline configuration migration, the sources and tables in the exported file must exactly match the names in the environment where the pipeline configuration is being imported.
This feature allows you to perform the following:
- map table to any source table or pipeline target.
- map a source table to pipeline target and vice versa.
- add to new columns during configuration Import.
- manually configure critical Target Node properties, like HDFS path, in the imported pipeline.
Downloading Pipeline Configuration
Following are the steps to export a pipeline configuration:
- Click Domains menu and click the domain where the required pipeline is created.
- On the Summary page of the domain, click the pipeline for which configuration must be migrated.
- Click the Settings icon and locate the Download Configuration section as follows:

- Select a version from the drop-down list. By default, the active version will be selected.
- Enable Pretty print configuration to download the configuration file with JSON syntax.
- Click Download. The version configuration is downloaded.
Uploading Pipeline Configuration
Following are the steps to import pipeline configuration:
- Click Domains menu and click the domain where the required pipeline is created.
- On the Summary page of the domain, click the pipeline for which configuration must be migrated.
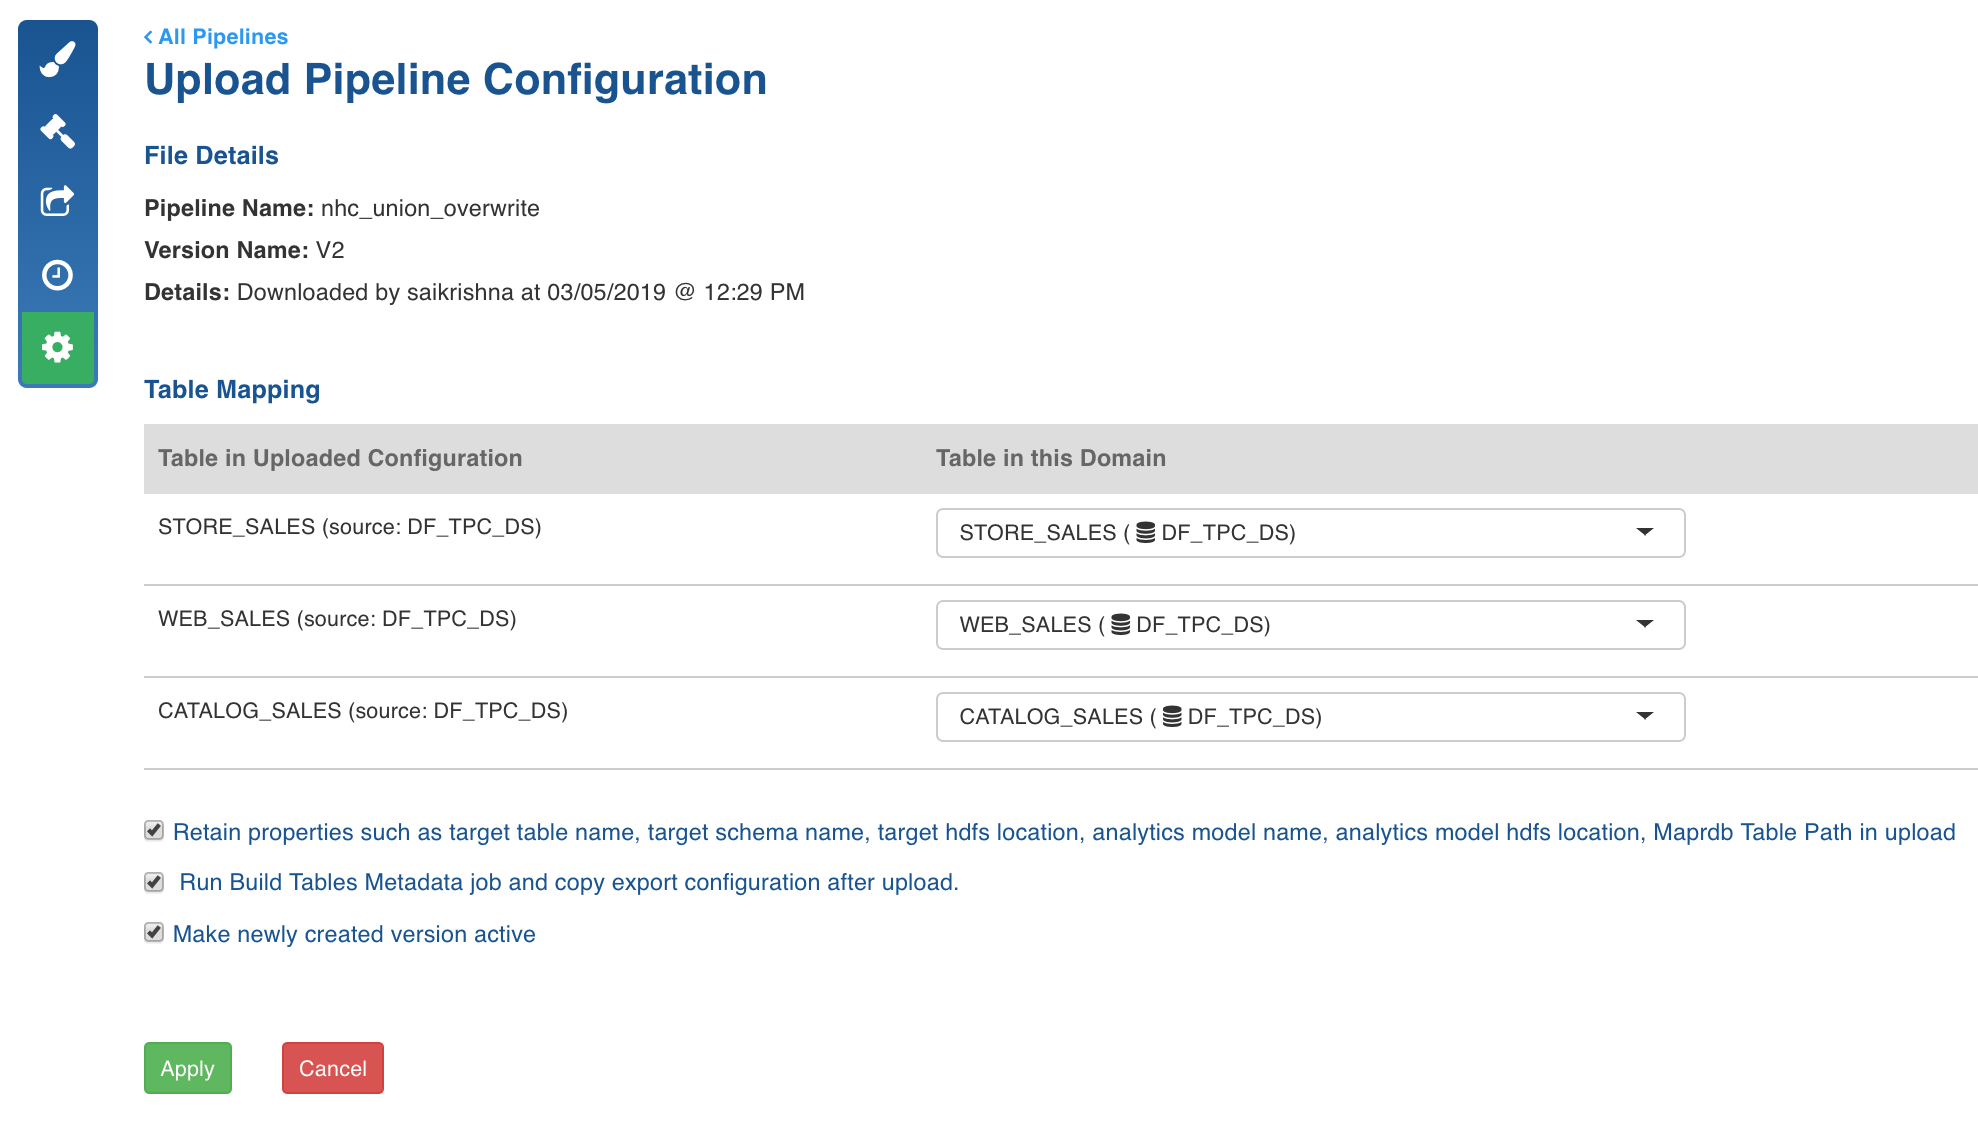
- Click the Settings icon and locate the Upload Configuration section as follows:

- Click Choose A File and select the required pipeline version configuration file.
- The Import Configuration for Pipeline page is displayed with the table mapping between the imported file and the tables in the domain.
If a table mapping is not available, an error is displayed next to the table.
Perform the following:
- Select the required table from Table in this Domain to map it with the table in the uploaded configuration.
- Retain properties such as target table name, target schema name, target hdfs location, analytics model name, analytics model hdfs location in import: Enable or disable this option to retain or skip target configurations respectively during the pipeline configuration import.
- Run Build Tables Metadata job and copy export configuration after upload: Enable or disable this option as required.
- Make newly created version active: Enable this option to set the newly created version as Active.
- Click Import Configurations. The configurations are imported and a success message is displayed.

Pipeline Advanced Configurations
Following are the steps to set advanced configurations for pipeline:
- Navigate to the pipeline Design page.
- Click Settings icon on the left menu.
- On the pipeline Settings page, scroll down to locate Advanced Configurations section as follows:

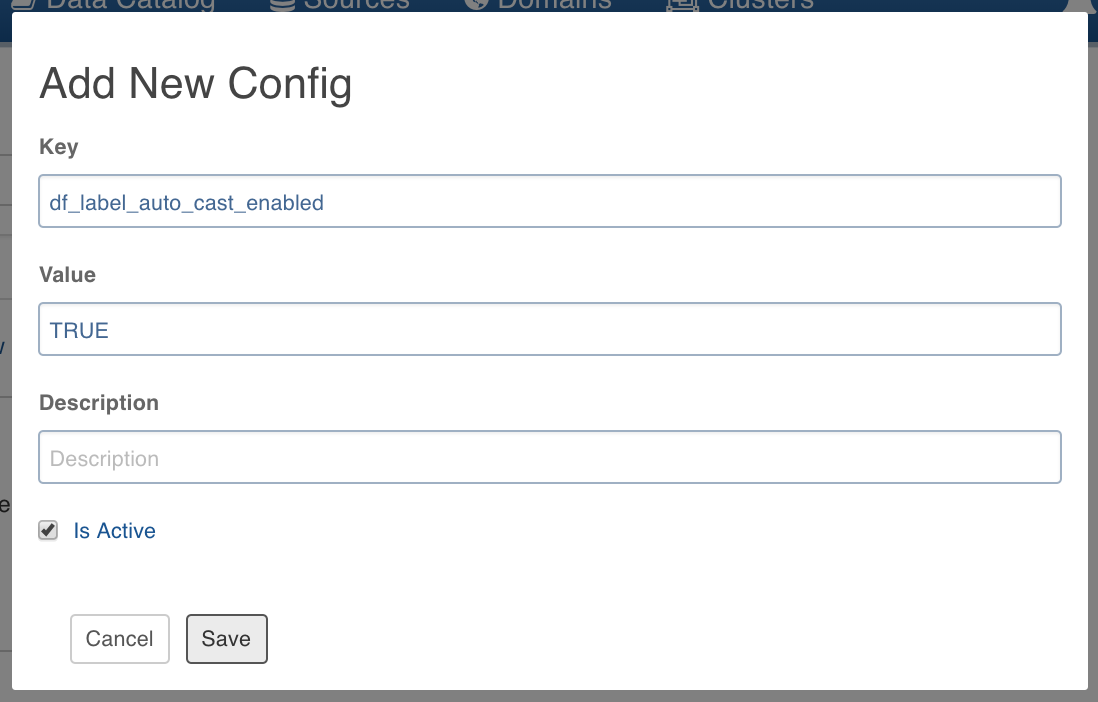
- Click Add Configuration.
- Enter the Key and Value.

NOTE: This setting overwrites the admin and domain configurations.
Following are the steps to add/edit configuration on the domain level:
NOTE: These configurations will be applicable to pipelines in that domain.
- Click Domains and click the required domain to modify configuration.
- Click Settings icon and click Add Configuration.

- Enter the required Key and Value and click Save.
Configuring Data Validation in Node Properties
After you set the node properties and click Preview Data, there are certain instances where you do not see the required data being fetched, or it takes an unusually long time to fetch the data. This is mainly due to resource availability issues in the Hadoop cluster.
- To configure manual or automatic validation in the node properties, set the pipeline_interactivity_mode configuration to manual or auto respectively from Admin or Pipeline level configurations.
Configurations to Disable Sample Job
- To disable Sample Job after pipeline build, set the df_disable_sample_job configuration to true from Admin or Pipeline level configurations.
Configurations to Disable Cache Job
- To disable Cache Job after pipeline build, set the df_disable_cache_job configuration to true from Admin or Pipeline level configurations.
Notification Services
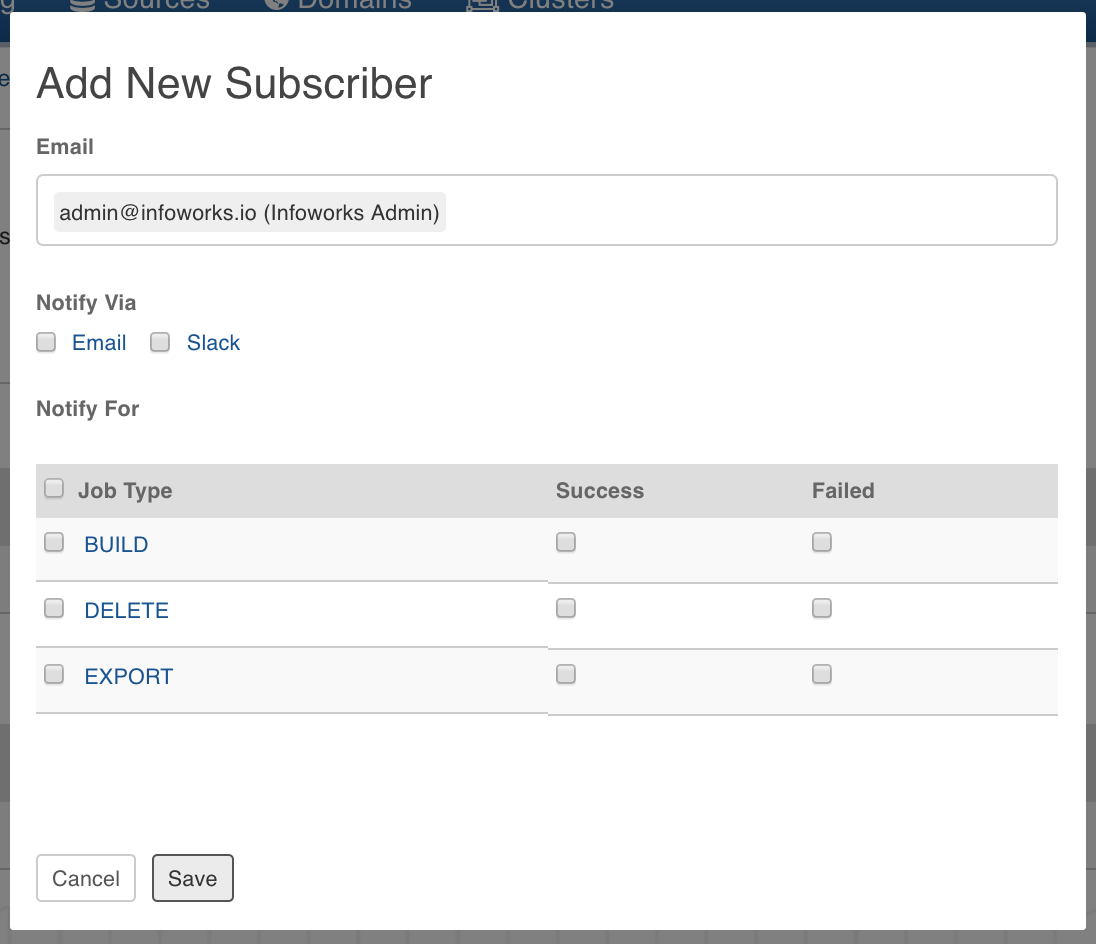
- In the Pipeline Settings page, click Add New Subscriber button.

- Enter the email ID of the subscriber.
- Select the Notify Via options which include email and slack.
- Select the jobs for which the subscriber must be notified. The jobs include build, deletion and export of pipeline.

- Click Save. The subscriber will be notified for the selected jobs.