Title
Create new category
Edit page index title
Edit category
Edit link
Designing Workflow
Following are the steps to design a workflow:
- Click the new workflow created. The blank Preview page is displayed.
- Click Open Workflow Editor.
- Drag and drop the required tasks in the editor.
Other than running regular tasks like Ingestion, Building of pipelines and cubes, you can execute Bash commands, execute Hive queries, send notifications and also use a Decision Branch to add flow control.
The following sections describe various options available on the Workflow Editor page.
View Options
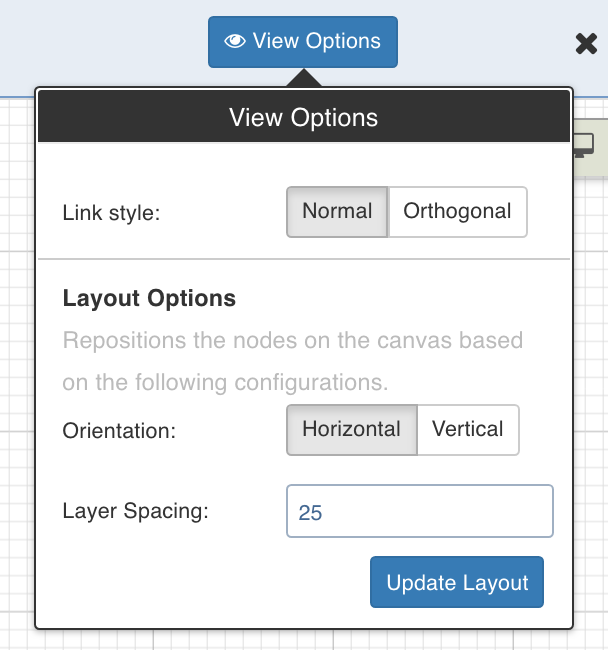
Click View Options, make the required changes and click Update Layout to select the way you want the workflow to display on the workflow editor page.
- Link Style: Normal - displays straight arrows connecting the nodes. Orthogonal - displays right-angular arrows connecting the nodes.
- Layout Options: Repositions the nodes on the canvas horizontally, vertically, or as per the layer spacing number provided.
Overview
The Overview option comes in handy if you are working on a complex workflow with many artifacts and tasks, and if the workflow exceeds the normal page view.
Click the Overview option to open a pop-up window on the bottom right corner of the workflow editor page. Drag the cursor through the pop-up window to view a specific task/artifact or part of the workflow.
Tasks
This section includes a list of all the tasks that can be added to the workflow. To view the properties of a task, drag and drop it to the editor and double-click it.
Ingest Source
This option ingests the required source.
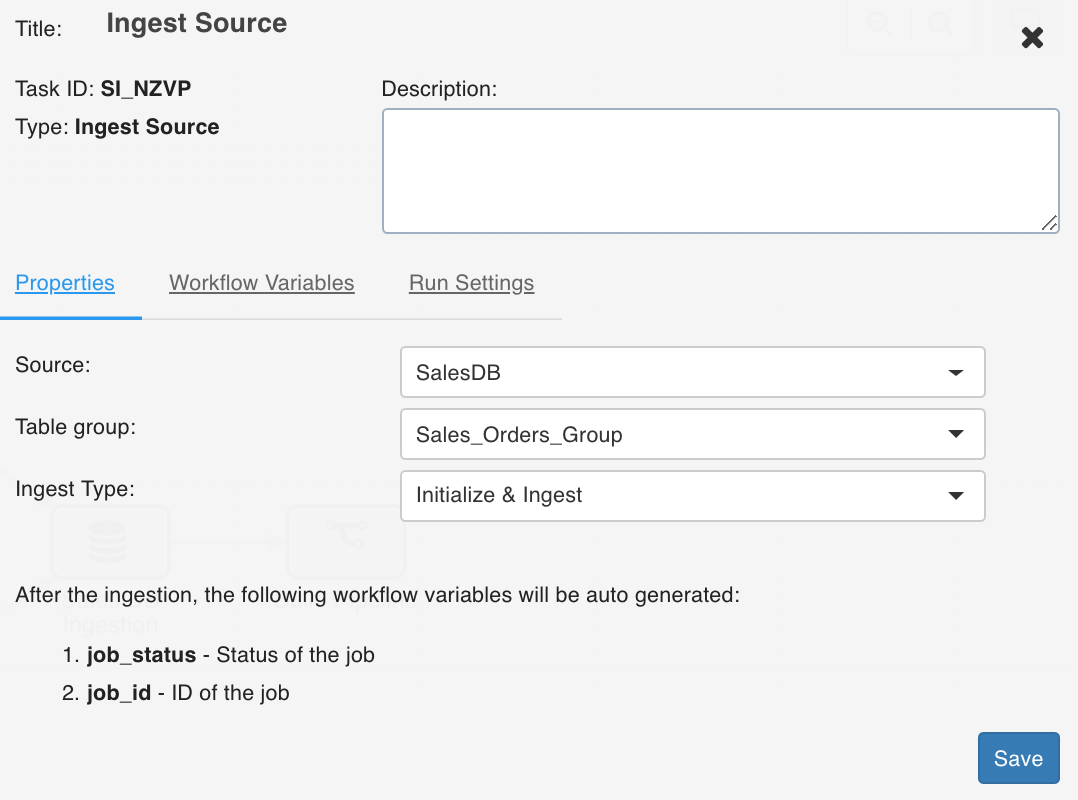
Double-click the Ingest Source Table task and enter the following properties:
- Title: Double-click the default title Ingest Source Task to change the title.
- Description: Enter the required task description.
- Properties: Select the required Source name, Table group name, and Ingest Type.
Workflow Variables
Workflow variables are the static variables you can set to use in the downstream nodes. Following are the types of workflow variables:
- Auto-generated workflow variables: These are the auto-generated workflow variables that you can see in the Properties section of a task.
- User-defined workflow variables: These are the variables that you can set in the Workflow Variables section of a task.
On the Workflow Variables section, click Add a Variable and enter the variable name and value. You can add as many variables as required. These variables will be applied to the downstream nodes and they will override any variable values that are set in the admin or domain configuration settings.
Run Settings
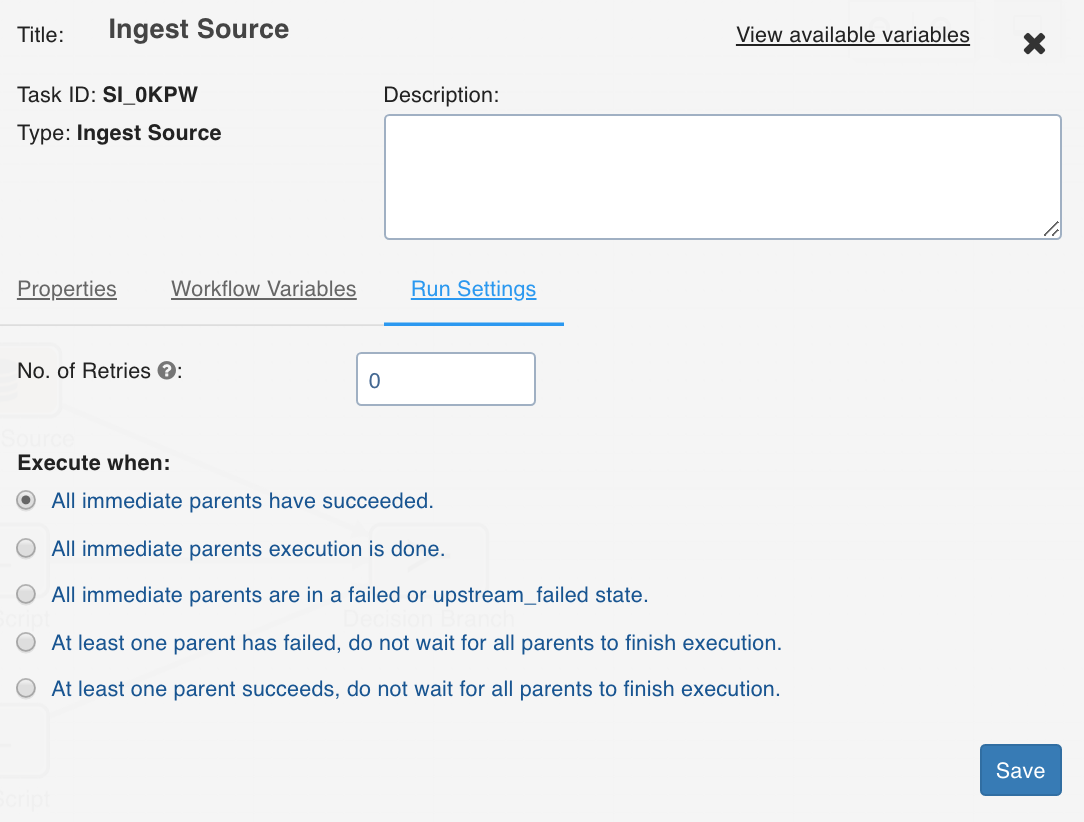
Run settings are the task level settings that control runtimebehaviour of the tasks in a workflow. Following are the options:
- No. of Retries: The number of times a task can be retried before stopping execution and failing. The default value is 0. When this value is set, the following options are enabled:
- Delay Between Retries: The delay between two retries. The default value is 300 seconds.
- Enable Exponential Backoff: Enabling this option backs off task exponentially after every failed attempt of execution. The retry delay is multiplied by 2 for every failed execution. This option is disabled by default.
- Maximum Delay for Retries: This option is displayed when the Enable Exponential Backoff option is selected. Indicates the maximum delay time. The task does not exceed this time while retrying. The default value is 1000 seconds.
- Execute when: The set of rules which define the scenario in which the task should be triggered.
Build Pipeline
The Build Pipeline task, as the name suggests, builds a selected pipeline.
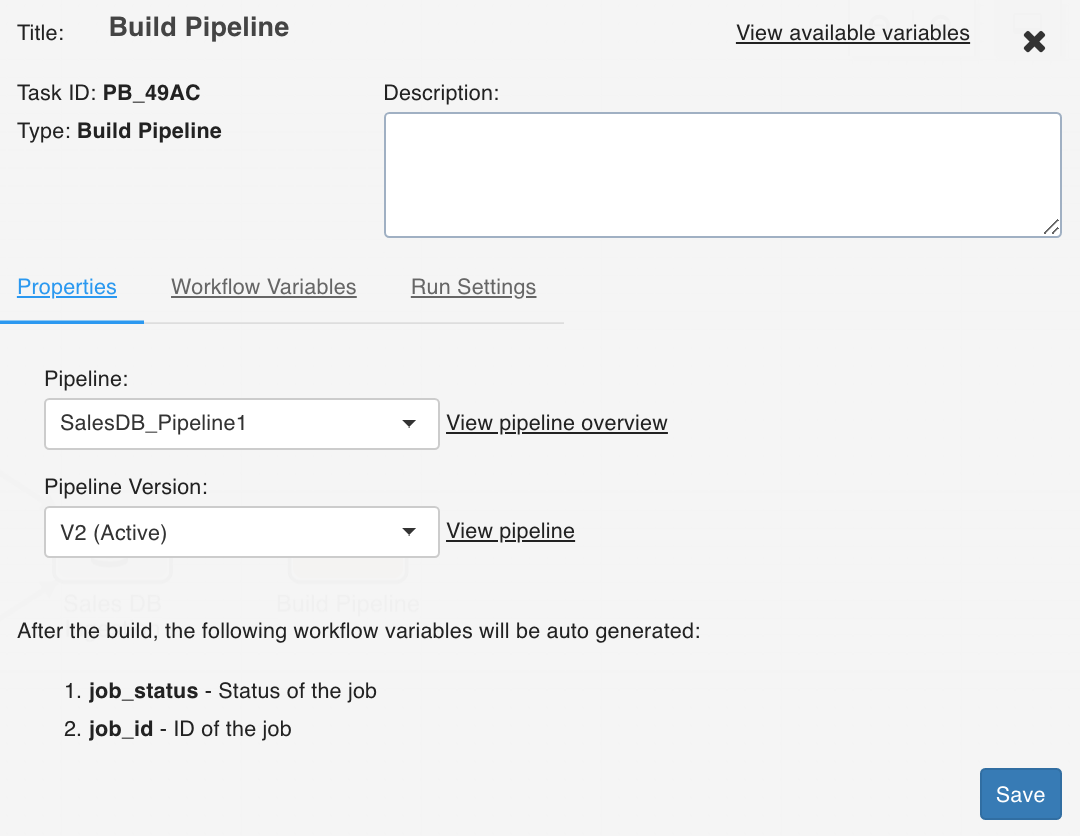
Double-click the Build Pipeline task and enter the following properties:
- Title: Double-click the default title Build Pipeline Task to change the title.
- Description: Enter the required task description.
- Pipeline: From the drop-down, select the required pipeline that you want to build.
- View Pipeline: This option displays after you select the required pipeline. You can click this option to directly navigate to the selected pipeline.
- View available variables: This option displays if a task has another preceding task connected to it.
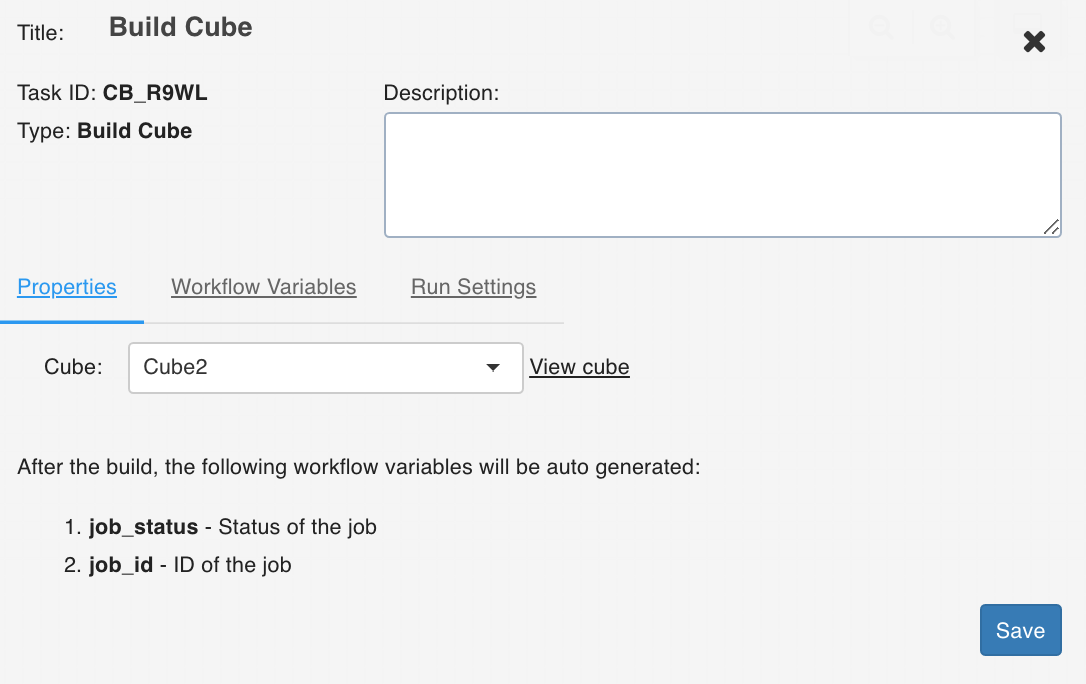
Build Cube
The Build Cube task builds the selected cube.
Double-click the Build Cube task and enter the following properties:
- Title: Double-click the default title Build Cube Task to change the title.
- Description: Enter the required task description.
- Cube: From the drop-down, select the required cube that you want to build.
- View Cube: This option displays after you select the required cube. You can click this option to directly navigate to the selected cube.
- View available variables: This option displays if a task has another preceding task connected to it.
Run Workflow
This node allows you to trigger any workflow within a workflow.
NOTE: The number of entities impacted by each workflow is displayed in the Impact field in the Summary and Workflow pages.
Ensure the following:
- You have access to the workflow.
- The workflow does not cause a cyclic dependency, which means the workflow being triggered in the node is not an ancestor of the current workflow being edited.
Properties
Following are the Run Workflow properties:
- Title: Double-click the default title, Run Workflow, to change the title.
- Description: Enter the required task description.
- Properties
- Select a Workflow: From the drop-down, select the required workflow to run. The lineage of the workflow will be displayed.
- View Workflow: You can click this option to directly navigate to the selected workflow.
- View available variables: This option displays if a task has another preceding task connected to it. When you click this option, the available variables in the task are displayed based on the upstream nodes.
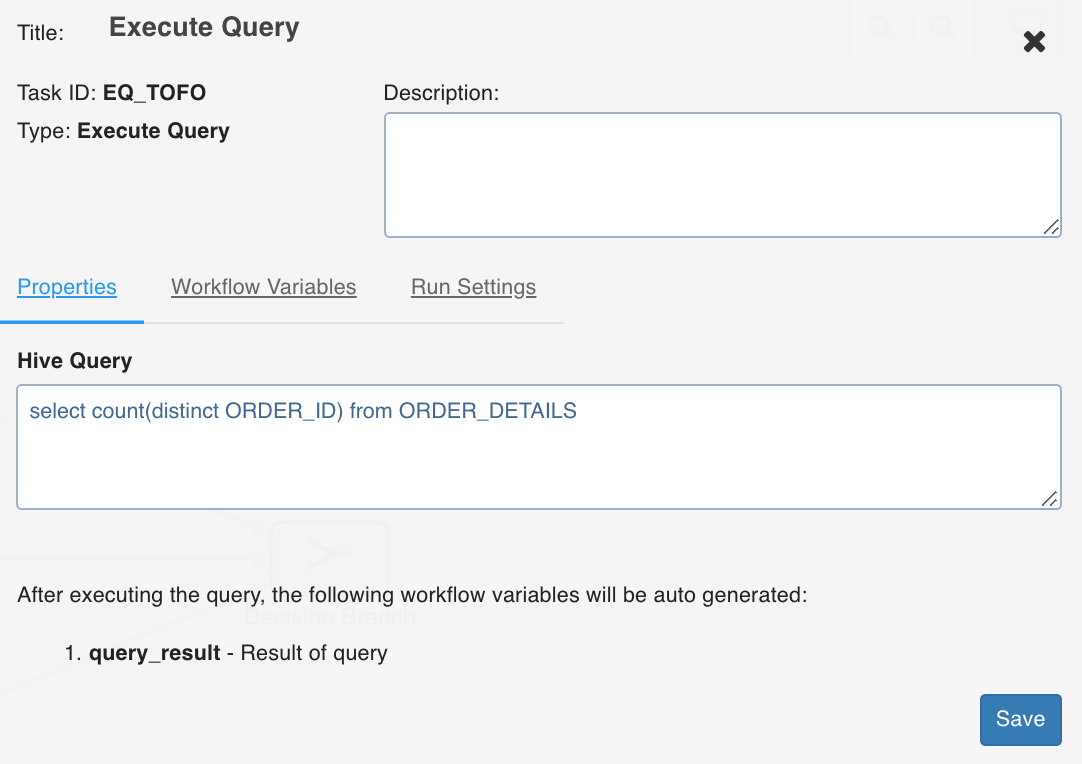
Execute Query
This task allows you to execute Hive queries.
Following are the examples of queries that can be executed:
- select count(*) from ORDER_DETAILS where ORDER_ID=111
- select count(distinct ORDER_ID) from ORDER_DETAILS
- update ORDER_DETAILS set ORDER_ID = 111 where ORDER_ID = 222
- The result of a select query must be a scalar value.
- The update query can be executed only when ACID functionality is available with Hive.
- Only select and update queries are supported currently.
Double-click the Execute Query task and enter the following properties:
- Title: Double-click the default title Execute Query Task to change the title.
- Description: Enter the required task description.
- Hive Query: Enter the required hive query that you want to execute.
- View available variables: This option displays if a task has another preceding task connected to it. When you click the option, a page with all the available variables from the upstream tasks displays.
Send Notification
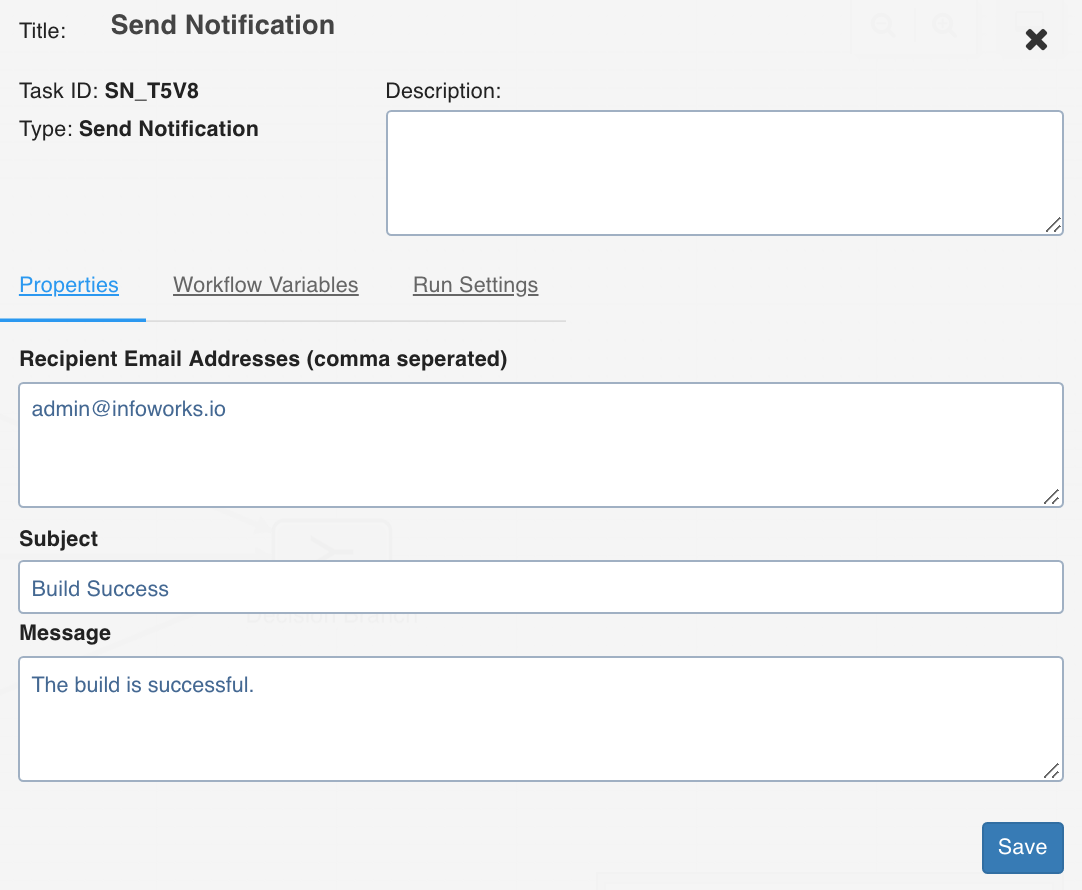
This task sends notification emails to the list of email IDs specified in the task Properties window.
Double-click the Send Notification task and enter the following properties:
- Recipient Email Addresses: The recipients to be notified.
- Subject: The subject of the mail.
- Message: The notification message.
Decision Branch
This task allows you to add workflow control. The conditional logic defined in this task yields in two or more branches and switch paths to take based on the output values of the condition.
Double-click the Decision Branch task and enter the following properties:
- Title: Double-click the default title Decision Branch Task to change the title.
- Description: Enter the required task description.
- Go to node based on value: Enter the required query that you want to execute. Depending on the value fetched from this query, select the node that the workflow should flow to.
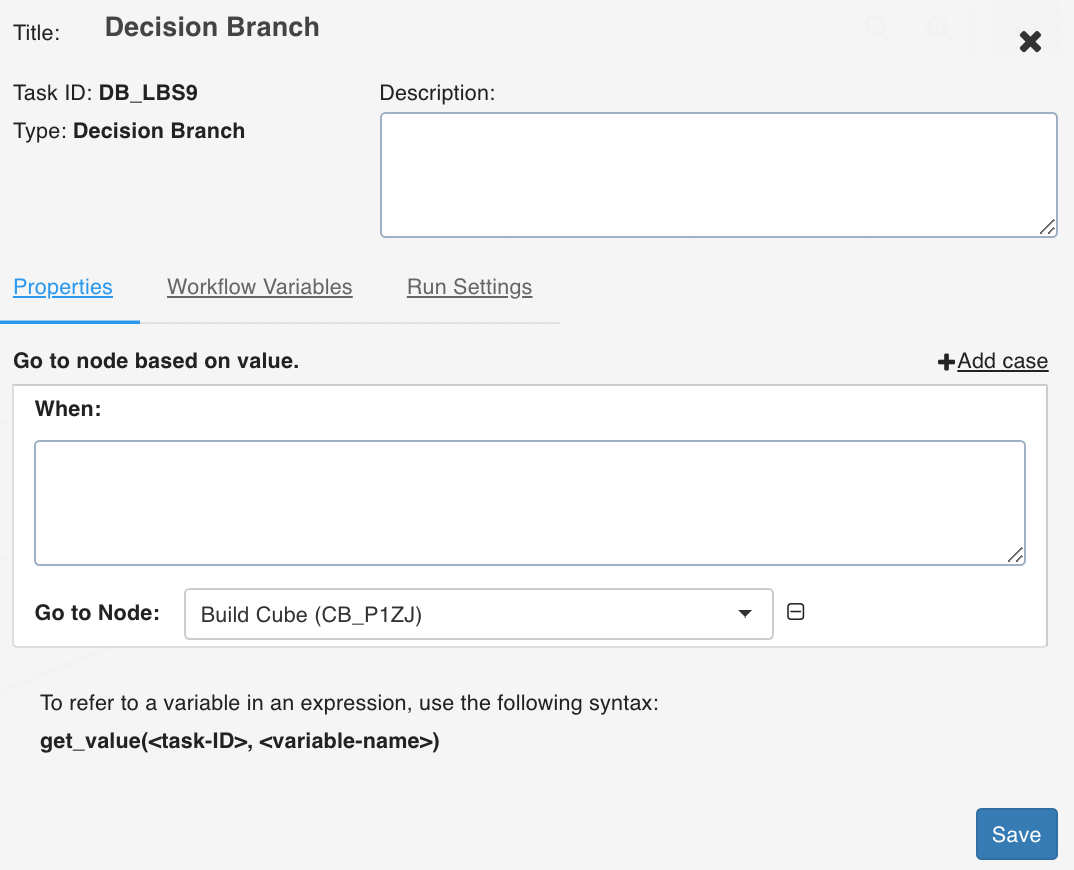
- Add case: You can click Add case option to add multiple cases.
- View available variables: This option displays if a task has another preceding task connected to it. When you click the option, a page with all the available variables from the upstream tasks displays.
Bash Script
Bash script task can be used to run multiple bash statements. You can enter the bash statements in the text area and they will be executed sequentially.
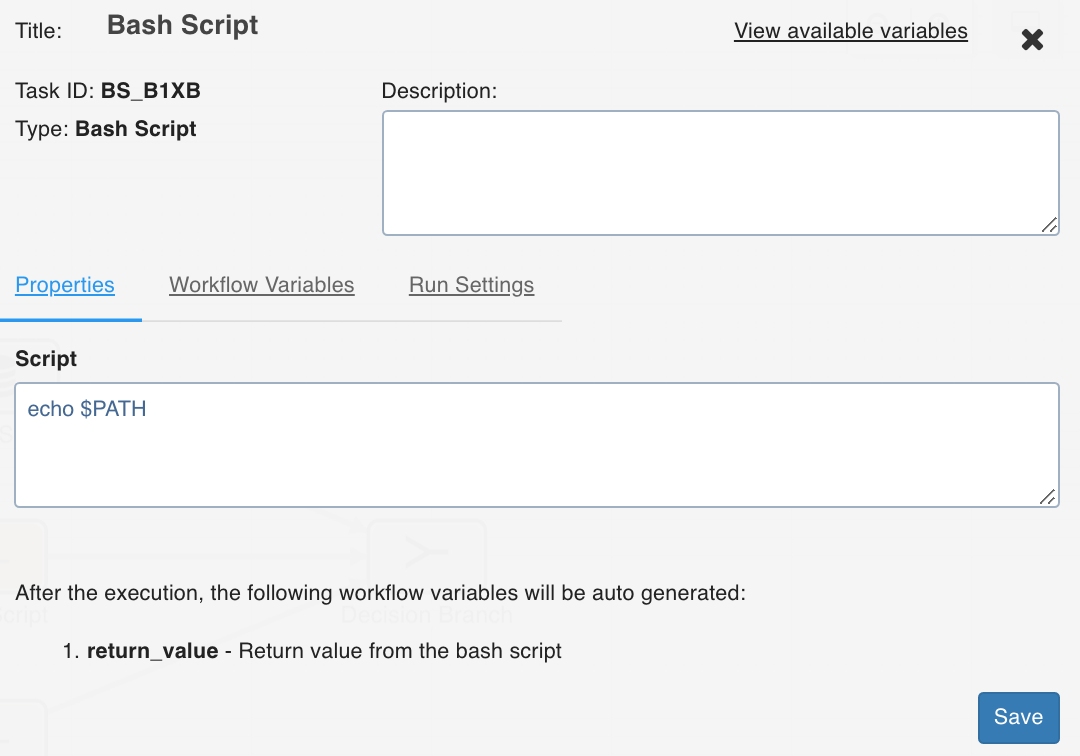
The last thing that will be echoed to the standard system output from the bash commands will be stored as a workflow variable with the name return_value.
Example: ls; pwd;
This will store the current directory in the workflow variable as it is the last value echoed to the standard output.
You can also alternatively run your script files directly using this task by specifying the exact location of your file.
Example: sh /Users/ec2-user/bash-sample.sh python /Users/ec2-user/python-sample.py
Following are the environment variables that can be accessed within the Bash Node script:
- $IW_WF_DAG_ID: Identifier for the current workflow under execution
- $IW_WF_RUN_ID: Identifier for the current workflow run under execution
- $IW_WF_TASK_ID: Identifier for the current task under execution
- $IW_WF_DOMAIN_ID: Identifier for the domain under which the workflow is being executed
Dummy
The Dummy task, as the name suggests, acts as a dummy interface between multiple tasks, each of which must be connected to each other. Adding a dummy task between such tasks will avoid confusions and also makes the workflow look organized.
EMR Scale Node
EMR Scale Node allows users to scale up or scale down the number of instances existing in node groups of EMR clusters.
In general, EMR cluster includes the following three types of nodes:
- Master Node includes server components installed like Name Node, Hive Server, etc.
- Core Node is Data Node that includes HDFS Data Node and YARN Node Managers installed.
- Task Node includes only Node Managers installed to supplement processing and not storage.
Nodes in EMR clusters are grouped by type into Node Groups (also referred to as collections). Following are the two types of Node Groups:
- Instance Group is a legacy collection type that is simple to create and extend.
- Instance Fleet is a new collection type that offer complex operations like mixing of on demand and spot instances, cost control, etc.
This implementation of EMR Scale Node can only scale an existing collection (inside an existing cluster) and not create or delete new collections or clusters.
EMR Scale Node requires the following inputs:
- AWS Auth Credentials
System Default: The credentials stored in the default location of the system are used and does not rely on user inputs. This is ideal for systems like EMR which use system roles or includes credentials stored on the system.
AWS Key: AWS Access Key ID and AWS Secret Key provided by the user with an optional Session Token is used. For more details, see AWS Documentation.
- EMR Cluster ID: The ID string of the EMR cluster to be modified.
- EMR Collection Type: One of the Instance Group or Instance Fleet, depending on the type of collection to be modified.
- EMR Collection ID: The string of the EMR collection to be modified.
- Target Counts: The number of Instances to be scaled for the collection. The target count input varies depending on the collection type. For Instance Group, the target count is a single input since they support only a single type of instance. The target count for Instance Group always represents the number of instances. Instance Fleets can include a combination of Spot and On Demand instance types, and hence accepts two inputs as the target count. One or both of these inputs can be used; an empty input means no change. If both inputs are empty, an error occurs.
NOTE: The target counts for Instance Fleet is represented in Capacity Units defined when creating the cluster or instance fleet. For example, if each instance is counted as 8 units when creating the cluster, then in the scale node, a target count of 8 units will represent 1 instance.
For more details, see Instance Fleet Options.
- Wait for operation to complete: If the checkbox selected, the node will be blocked (in running status) till the scale operation completes. Else, the scale operation request is submitted and operation will be marked as completed.
Advanced Configurations
Following are the Key Value pairs with default values for fine grained control:
- MAX_INSTANCES_IG = 64
- MAX_INSTANCES_IF_ONDEMAND = 64
- MAX_INSTANCES_IF_SPOT = 64
- EMR_SCALE_WAIT_POLL_INTVL = 60
- EMR_SCALE_WAIT_INITIAL_INTVL = 60
- AWS_REGION = 'us-east-1'
For more details, refer to our Knowledge Base and Best Practices!
For help, contact our support team!
(C) 2015-2022 Infoworks.io, Inc. and Confidential